How does a gas stove work?
The design of gas stoves varies depending on the type of equipment. But all such devices include:
Some types of gas stoves are complemented by an electronic control unit for the burner and other components. In particular, equipment is often equipped with a sensor, which, if the fire goes out, shuts off the supply of “blue” fuel.
The stoves also include hoses through which gas flows and taps. A number of models are supplemented with fans, heating elements, a thermometer and other components.
Burners
The burners consist of the following components:
- gas supply nozzle;
- swirler;
- throttle;
- guides;
- lid;
- divider
The latter divides the general flow of flame into several uniform tongues extending outward. Older stoves use diffusion and kinetic burners. The first ones are installed in ovens. Diffusion burners are distinguished by the fact that gas is mixed with air (due to this process the fuel ignites) in a natural way. Modern stoves use combined burners.
Gas flow control
In the center of the stove burner there is a thermocouple that regulates the gas supply. When heated, this element generates a current that is supplied to an electromagnet. The latter holds the damper open, so that gas flows to the burner continuously. If the fire on the burner goes out, the thermocouple begins to cool. Because of this, the magnet is discharged, as a result of which the damper automatically closes, interrupting the gas supply.
This configuration significantly increases the safety level of the slabs. However, due to the thermocouple, you have to hold the regulator knob down for several seconds.
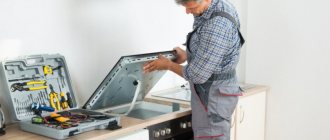
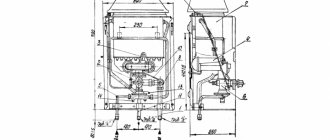
Internal structure of the stove
Before doing any repairs, you need to understand what a gas stove is, what parts are present in it, and what kind of DIY gas stove repair may be required in a given case.
There are many companies producing gas stoves: Gorenje, Ardo, Ariston, etc. But all tiles, even if they differ in price, have a similar type of internal structure.
The structure of the burners
The most noticeable part of any stove is the burners. Each burner is attached to the stove table using bolts. The burner also consists of several parts: they have a lid, a divider and an injector.
Each burner is connected to a steel and copper tube with a fastening similar to the American one. Due to this device, the burner receives gas.
Gas burner device
To work with the burners, you don't need any special tools: you will need a wrench, most likely a size 13, to disassemble the burner parts if it needs repairs or cleaning.
After completing the repair and assembly, you need to assemble the structure and check how tight it is to prevent gas leakage.
Each burner has two candles around its perimeter.
One helps create ignition by working with piezoelectric elements or an electronic circuit, and the second serves as a thermocouple connected to a circuit that controls combustion.
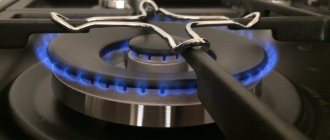
Gas burner (grill removed): 1— nozzle, 2— spark plug, 3— flame sensor (thermocouple hot junction)
The candles differ from each other even in appearance, so it will be difficult to confuse them.
A candle for electric ignition has a ceramic caftan; it is needed to prevent the spark from breaking below the required level.
That is why it is important to properly ground the stoves where electric ignition is built-in. Also, electric ignition does not tolerate the use of water pipes and metal threads.
It is important to separate the slab from the riser using special gaskets during installation and repair, otherwise there is a real risk of explosion.
The thermocouple candle has a bronze caftan, which is a powerful heat conductor
The reliability and speed of switching on the protection that shuts off the gas after you have finished using the stove depends on how quickly the semiconductors cool after the flame goes out.
Gas flow control
Under the stove table you can see the collector. It looks like a thick tube from which leads to the burners diverge.
The gas flow is controlled by solenoid valves, the number of which is equal to the number of burners on the stove.
This is necessary so that if the flame of one burner goes out, the others can still function.
Solenoid valves are equipped with an inductor coil. When the thermocouple is heated, an EMF is generated, which fixes the device open.
Solenoid valve with induction coil
DIY repair
You can only repair the burners and oven door yourself. In case of more serious breakdowns, you will need to involve a third-party technician who has appropriate access to work with such equipment.
For self-repair you will need:
- Phillips and straight screwdrivers;
- pliers;
- adjustable wrench 15-20 millimeters;
- gas lubrication;
- FUM tape for gas equipment.
Depending on the cause of the problem, a cleaning agent and a soft brush may be required.
What to do if the electric ignition fails
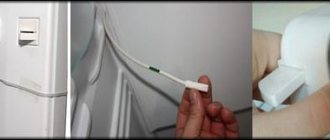
Problems with electric ignition mainly arise due to a short circuit caused by leaking water. To eliminate this malfunction, you will need to clean and dry the wires laid from the generator unit (located at the end of the stove, under the hob) to the burners. Next, these parts need to be placed on plastic stands. Also, electric ignition fails due to grease deposits accumulated on the candles. To fix this problem you will need:
- disconnect the wire from the candle installed on the burner;
- remove the fixing plate and remove the spark plug;
- Wash the candle in a strong detergent solution, dry it and return it to its place.
These two reasons for the failure of electric ignition can be eliminated independently.
How to repair an oven door
It is necessary to repair the oven door when this element does not fit tightly to the body of the appliance. Such problems occur for two reasons:
- fastening elements have become loose;
- The sealing gasket has become unusable.
If the reason for the door not fitting tightly is due to loose fasteners, then the latter need to be tightened. A leaky gasket should be replaced with a new one.
How to adjust the gas supply
This procedure must be carried out if the flame disappears or burns intermittently. In this case, you will need to turn off the valve through which the gas is supplied and remove the partition. Next you need to find out which damper has failed. After this, you should unscrew the set screw that locks the plate.
At the end of the procedure, you need to re-check how the gas is supplied and, if necessary, re-adjust.
How to replace injectors
Over time, the nozzles on gas stoves become clogged, causing the flame to burn unevenly. To fix this problem, you will need to disassemble the burner and clean it with a wooden toothpick from traces of soot and other particles. If the burner stops working, the part must be removed and replaced with a new one. To do this, you will need to unscrew the screws that secure the element to the hob.
How to repair a piezoelectric element
To troubleshoot the problem yourself, you need to find out the cause, and then begin to eliminate it.
Finding out the cause
Often you have to deal with the fact that the electric ignition of one burner does not work.
This means that troubleshooting must be carried out along the path of the electric current to the faulty piezoelectric element. First of all, an external inspection is carried out. The presence of foreign objects on the contact surface must be excluded.
If the piezoelectric element is working and the gas does not ignite, turn on the burner using another fire source and carefully observe the combustion process. If the fire is dim or has a yellowish tint, then the cause of the malfunction is poor-quality mixture formation, due to the need to service the gas supply channels and burners.
A defect identified during inspection is eliminated by replacing the broken element. A tester is used to detect hidden faults in the electrical wiring of a gas stove. By measuring the voltage at the moment the button is turned on, the operability of the tested section of the circuit or control unit and the current coming out of it are determined.
Carrying out repairs
After inspecting the accessible elements from the outside and the need arises to examine the inside of the slab and carry out repairs, it is necessary:
- Remove the top cover of the stove or gain access to the lower part of the hob, embedded in the kitchen furniture.
- After diagnostics have been carried out and a faulty piezoelectric element has been identified, it is unscrewed from the inside of the hob. To do this, sometimes light tapping with a wooden object is required so as not to damage the ceramic body.
After installation, check the functionality of the slab and secure everything in its original places.
If a malfunction is detected in the control unit or contact wires, the faulty parts are replaced, and then the operation of the stove is checked.
First steps if it doesn’t light up
If the stove does not light, you need to find out the causes of the malfunction. This happens due to:
- clogged injectors;
- spark plug damage;
- electrical wiring insulation is damaged;
- the electric ignition unit has failed;
- the power button is worn out (oxidized);
- The thermocouple or electromagnetic sensor is faulty.
Due to the fact that all the described procedures require certain knowledge about the operating features of gas stoves, if there is no flame after turning on the equipment, it is recommended to first clean the nozzles.
Ignition produces a spark, but the burner does not ignite
In cases where the electric ignition produces a spark, but the burner does not ignite, you should try replacing the thermocouple. Sometimes the problem is related to the solenoid valve, and after updating it, the equipment operates normally. You should check the ignition unit, because if everything is fine with it, but ignition does not occur, you need to look for a problem in the power wire or burner spark plug.
If a spark is supplied, the flame lights up, but immediately goes out, try holding the gas button longer. It is likely that the sensors responsible for the formation of the flame simply do not have time to warm up.
Common breakdowns and causes of failure
Over time, a characteristic smell of gas may appear in the rooms where the stove is installed. This occurs due to a decrease in the tightness of the pipes and hoses through which fuel is supplied. To find the source of “etching”, it is necessary to apply a soap solution to the joints of these parts. If the foam begins to bubble, then there is a gas leak in this place.
In addition to these problems, stove owners also experience other problems that can be fixed with their own hands.
The burner lights up and goes out
This problem occurs due to insufficient gas pressure. To fix the problem, you will need to check the condition of the connection hose. It is possible that this element is being pinched by the plate. If only one burner goes out, then you need to clean the nozzles. In other cases, you will have to contact the gas service.
Does not burn well, goes out when released and does not burn at all
This malfunction is caused by the failure of a thermocouple or electromagnetic sensor. Due to both failures, the valve that shuts off the gas supply automatically closes. Only a third-party technician can fix this problem.
The power button doesn't turn well
The power handles do not turn well for the following reasons:
- Excessive amount of lubricant. This malfunction is typical for old-style slabs. To restore the functionality of the handle, it is necessary to disassemble and clean the element.
- There is a thick coating of grease or dust. In this case, you need to remove and wash the handles with soapy water. The parts can be returned to their place after drying.
- Lack of lubrication. In case of such a malfunction, you also need to disassemble and clean the handles. After this, it is necessary to apply a new layer of lubricant.
Less often, the handles on gas stoves turn without opening the damper. In such cases, it is recommended to replace the broken part.
All burners do not light
If all burners do not light, then the cause of this malfunction lies in a failed electric ignition. Also, the absence of a flame may be due to the fact that the gas supply has been stopped. In other cases, you need to call a specialist.
Electrical equipment does not work
If the built-in electronic units do not work, but the power supply is not interrupted (the plug is inserted into the socket, there is light in the house), you need to call a gas service employee. In this case, it is not recommended to repair the stove yourself.
Repair of electric ignition of Hephaestus stove
If you turn the knob, hear a characteristic hissing sound, press the button, but the gas does not light up, then there is a problem with the electric ignition of the Hephaestus gas stove, and you can try to fix it yourself.
If you hear characteristic clicks, it means that somewhere the system is triggered, there is no spark only on the burner in use. If there are no clicks, then the button or block generator of electrical impulses is broken.
The electric ignition of one burner does not work
It happens that the characteristic clicks of electric ignition are heard, but one of the burners still lights up only from a match, which means the problem is in the candle or the wire from it.
First of all, check the condition of the candle - it may be covered with a layer of dirt and grease.
It is easy to distinguish an electric spark plug from a gas control sensor: it is thick, in white ceramic insulation, located closer to the middle of the burner, in the recess of the divider.
A layer of grease and dust on the spark plug can act as an insulator that a spark cannot penetrate. Try to thoroughly wash the candle by removing the burner, and finally degrease it with alcohol or acetone. Blot dry with a paper towel or toilet paper, let it dry completely, return the burner to its place and check its functionality.
If cleaning does not help, you should look for the problem further. Lift the stove table and inspect the wire that goes from the spark plug to the generator block, while trying to press the auto-ignition button. Perhaps the wire touches the foil on the oven insulation, or the pipe, and a spark breaks out in this place? It will be better visible in the dark or twilight - close the window, turn off the light.
If there is a spark somewhere other than the spark plug, wrap that area with electrical tape and move the wire so that the spark is only on the spark plug, near the burner.
If this does not help, carefully inspect the spark plug along its entire height: perhaps the ceramic insulation on it is cracked, causing the spark to jump lower than necessary? If so, this part will need to be replaced. Before doing this, be sure to unplug the stove from the outlet.
When going to the store for a new spark plug, remember where you put the alligator clip, it is necessary for installing the new part
To remove the spark plug, remove the rubber gasket from it, squeeze and pull out the alligator clip under the spark plug, and then locate and pull the corresponding wire from the generator block. After purchasing a new part, repeat the steps in reverse order.
Electric ignition does not click
If the button does not light up a single burner, there are no characteristic clicks, or the button is not pressed, the problem is not with the candles. In the latter option, it is obvious that the button will need to be cleaned or replaced, but if there is no such confidence, you need to check the functionality of the unit.
To do this, do this:
- Unplug the stove from the outlet, lift the table and find the block to which the wiring from the candles and the auto-ignition button goes.
- Remove all wires from its connectors, remove from the fastening (bolts or latch).
- Insert a long piece of cable into the two thick connectors on the edge, and into the remaining sockets - pieces of wire of the same length, stripped of insulation on both sides.
- Place the free ends of short wires in a row or square, at an equal distance from each other.
- Plug the long end of the wire into an outlet.
There should be sparks between the free ends and rhythmic discharge sounds. If everything is so, the unit is working, the problem is in the button or wiring. If not, take it as a sample and go to the store for a new one.
When connecting, the main thing is not to confuse the two power wires with the others. Usually the plug on them is thicker, and the connectors for them are at the edge of the block. The wires from the burners can be swapped. If the unit is working, the problem is in the button or wiring.
When removing the button from the latch, hold the parts on both sides so that the inner part does not fall between the oven and the cabinet wall
First, wash the button thoroughly - it often gets stuck and stops working due to fat accumulation under the skirt. It is convenient to use an anti-grease spray or remove the button from the panel.
Read more about why piezo ignition on a gas stove does not work.
Gas control malfunctions
Such a breakdown often confuses housewives: the burner or oven lights up as usual by turning and pressing the knob, but goes out as soon as you release the knob. The gas control system automatically shuts off the gas if the burner goes out or the knob is turned but not pressed - to protect it from children.
Usually it is enough to hold the knob pressed for 3 - 5 seconds, the manufacturer recommends 10 - 60 seconds to be sure. If the burner goes out even after holding the knob for a minute, the leakage protection system is faulty.
Gas control can be installed only in the oven or on all burners. The tip of the thermocouple is located near the burner; it is metal and quite thin; it quickly warms up from the burning gas. The heat from it is transferred through a copper tube to the gas control sensor installed in the tap behind the burner switch handle. As soon as the heat stops flowing, the magnetic valve of the sensor opens, cutting off the gas supply.
It happens that the gas control sensor does not work on an almost new Hephaestus stove. The reason is simple: at the factory, the nut securing the thermocouple to the sensor in the gas supply tap to the burner was loosely tightened.
Just in case, check and tighten the thermocouple mounting nuts from all burners, so as not to disassemble the stove again later
Open the stove top, find where the copper tube attaches to the faucet (behind the burner control knob) and tighten that nut until it's snug.
Over time, carbon deposits and scale may form on the thermocouple sensor located near the burner. As a result, it heats up more slowly and does not work correctly. The problem can be easily fixed - clean the sensor using a thick cloth or fine sandpaper. It is not recommended to use coarser material: if scratches remain on the spark plug, it will clog faster next time.
The reason why the oven immediately goes out in a Hephaestus gas stove usually also lies in a problem with the thermocouple, but there is another option in the oven.
The oven burner is large, and the sensor is located at the very edge - at the first gas supply nozzles. It happens that the flame does not reach the sensor, or warms it up too weakly. Try bending the sensor with a screwdriver, or unscrew the fastening screw and move the thermocouple a little forward.
When none of the 3 proposed solutions helps, the thermocouple must be replaced. It is secured with a nut on one side and a clamp on the bolts on the other. After removing the faulty part, be sure to take it with you to the store for a sample.
Usually a thermocouple is inexpensive, but if you are ready to give up gas control on this burner, there is a free solution: connecting directly, bypassing the sensor.
The solenoid valve, which shuts off the gas supply when the burner goes out, can be fixed folded - just don’t wrap it too much
To connect directly, do this:
- turn off the gas;
- unscrew the thermocouple - a copper tube from the gas tap with the sensor;
- Using a 17mm wrench, unscrew the sensor housing from the back of the tap;
- the sensor looks like a plug with a rod on a spring. Lock it and insert it into place;
- Screw the sensor housing into place and tighten. Screw in the thermocouple;
- open the gas riser, check the tightness with soap foam.
Errors when assembling the valve can lead to a gas leak and the possibility of an explosion - be careful and be sure to check the gas valve for leaks after assembly.
Operating rules
When operating a gas stove, you must follow the following rules:
- if there is a smell of gas in the room, then you need to turn off the common tap, open the vent (window) and call a technician;
- do not place flammable objects near the burners;
- do not turn on the burners if the ventilation is faulty;
- do not use the stove to heat the room;
- Do not fill the burners with liquids.
Gas stoves are prohibited from being moved to a new location (the location of this equipment is reflected in the technical plan of the apartment or house).
Main causes of failure
Malfunctions and their causes:
- A burning smell appears when plugged in. In this case, you must first check the slab visually. To do this, turn it off from the power supply and inspect the burners. If the reason is accumulated and burnt food residues, remove them and rinse the surface well.
If the stoves are clean, but a burning smell still emanates from the equipment, then the problem may be a faulty wiring. You need to call a technician or try to repair it yourself.
- The heating element stops heating. The cause was the connecting wires or the burner. First, check the control parts, which often lose contact. If this does not help, you need to completely replace the heating element with a working one.
- Due to a broken switch, it is not possible to set the required heating temperature for the burner. The reason is the displacement of contacts, their disconnection.
- Problems with the coil are detected when the burner heats up poorly or is absent. The spiral may be damaged due to overheating, rupture, or moisture ingress.
- The oven may heat unevenly or may not reach the desired temperature. In this case, it's a matter of heating elements. Repair or replacement is necessary.
Important You can repair glass-ceramic stoves yourself if you carefully study the operating instructions and know the structure of the electric stove. Otherwise, you need to call a specialist at home
How to remove the door
To remove the oven door, you don’t need any special tools; almost anyone can do it. First you need to open the oven completely. After this, carefully examine the places where the loops are located. This is where the fastenings are located. On both hinges you can see small levers that lift up and move towards you. To remove the oven door, you need to point it up and pull it horizontally, after which it can easily be detached from the body. At the same time, you should take into account its severity so as not to break the glass or harm yourself. After removal, the door must be placed on a soft surface so that there are no scratches or damage to it.
The oven does not work - the main reasons
Before calling a technician to repair the oven, you should check whether there is a gas supply in the pipe. To do this, try lighting the burner on the hob. If gas enters the burner, it means that the oven is really faulty.
The second point that you should pay attention to is the presence of electric current in the network. Without it, the electric ignition will not work.
If everything is normal, then the oven is really faulty. You should not try to repair it yourself. Without the necessary spare parts and experience, doing this will be very problematic and even dangerous.
The main malfunctions of gas stove ovens Gefest, Hansa, Mora and others include:
- When you press the ignition button for a long time, you can hear the hiss of gas, but the flame does not ignite.
- The flame ignites, but after releasing the button, it immediately goes out.
- The flame burns for 5-10 minutes and goes out on its own for no apparent reason.
- The flame is very weak. Food cannot be cooked.
- The flame is very strong and impossible to regulate. The food is burning.
- It is impossible to turn the gas supply valve.
How to remove the glass part
The oven door is usually equipped with two glasses, one of which the owner of the equipment can remove independently. The second one is attached to the body, which is noticeable in the photo. Removing the glass from the oven is not at all difficult, but it is worth keeping in mind that to ensure safety, it must be removed with the door removed. This is due to the fact that it can slam shut if accidentally touched and harm a person. Another warning described in the instructions for Ariston, Gorenie, Electrolux, Samsung, Bosch cabinets is a reminder of the force on the front glass, which can crack if the user is not careful.
- First, you need to place the oven door, handle down, on a soft, flat surface.
- After this, depending on the type of device, unscrew the fasteners or immediately start moving from the bottom up if the presence of bolts is not provided for by the design. In some cases, it may be necessary to detach the retaining elements of the structure.
- After the glass part is freed from its fastenings, you need to carefully lift it and remove it.
Do-it-yourself troubleshooting for popular problems
Below we provide a list of the most common breakdowns of electric stoves. Many of them can be eliminated on their own, while others require professional diagnosis. Repairing an electric stove with your own hands can be done in the simplest cases. Let's take a closer look at them.
The burner is out of order
Follow these steps to change the burners on your stove:
Unscrew the nut and remove the grounding. Under it you will find a bracket or ring that presses the part to the body. The burners are attached with threaded connections or inserted into a special hole
In the first case, you need to pry the thread with a screwdriver and remove it, in the second, lubricate it with oil and try to carefully unscrew it from the body.
Heat switch problems
Follow these instructions to repair or replace a failed switch:
- If there is no click when turning the knob, this indicates a malfunction. To check its condition, you need to set the regulator in the middle position, apply voltage to the stove, as a result of which the automatic protection should work and turn off after 30 seconds.
- Then remove the adjusting knobs from the outside, unscrew the front panel.
- You will find a bar underneath that needs to be removed to get to the faulty regulator and replace it.
Electronic control unit
If you do not hear a click when you turn on the relay, check for the presence of a signal. If it is absent, we can safely say that the problem lies in the output cascade or microprocessor.
To repair an electronic unit, you need to find a diagram and understand the complexities of radio technology. If you do not have such skills and knowledge, then contact a specialist.
How to remove hinges
You will only need to remove the oven hinge if it starts to become too tight or, conversely, to open weakly. First, the same steps are performed as when separating the glass part, but then the additional fasteners are unscrewed. During the process, the body is divided into several parts, one of which contains the hinges.
If you observe carefully, you may notice a loose spring or a broken part of the hinges. In both cases, these parts will have to be removed and replaced. As a rule, in ovens manufactured by Ariston, Combustion, Electrolux, Samsung, Bosch, each hinge can be installed on both sides.
In order not to break these elements, you must follow several rules:
- Take your time when unscrewing and removing the hinges. If force is applied, these parts can break, damaging the oven body as well.
- Before removing the hinges, you need to make sure that each screw is unscrewed, otherwise when moving, the remaining fasteners will bend and become unusable.
- When separating the door, you should not apply much effort, because the design is created in such a way that all its parts can be removed with ease. The presence of resistance indicates the wrong direction of movement.
To learn more about the process, it's worth watching the video.
How to clean
Disassembly of the oven is required mainly during cleaning. This also happens when correcting breakdowns of this equipment. But to clean glass, you need to know what products will help deal with stains. These include several self-prepared compositions using soda:
- To effectively clean the Bosch oven door, you need to pour about 2 glasses of warm water into a spray bottle and add liquid soap to it. The resulting composition is mixed with half a teaspoon of soda and sprayed onto the surface. This mixture is washed off after about half an hour.
- Another way to use baking soda is to mix it with a small amount of water to form a thick paste and apply it to the stained area. The disadvantage of this type of cleaning is that the product must be left on the surface for several hours and only then removed.
- A baking powder containing soda and citric acid is also used. This mixture just needs to be scattered over the surface and wait an hour until the fat rolls into small lumps that can be easily removed with a sponge and soapy water.
Let's clarify something right away
Please make requests for replacement of internal or external glass on Hephaestus gas stoves by phone on weekdays from 9 to 19-30. Ask Igor. The work is carried out in Moscow and the Moscow region. Without sufficient qualifications, do not carry out such repairs yourself or with the involvement of persons who do not have relevant experience.
It is impossible to replace without performing the manipulations specified in this article, because Without removing it, it is physically impossible to get to the hinge, because it is inside the door frame, between the glass. Also, without dismantling the inner glass, replacement and replacement is impossible.
Has the glass broken in the oven of your gas stove?
So what's now?
We will need a new inner glass, a Phillips screwdriver and 10 minutes of time. To demonstrate replacing the inner glass of an oven door, we used a Hephaestus PG 1500 K32 gas stove.
Since I really didn’t want to break the glass on the new slab, and the glass itself never broke, we show the full cycle of removing the glass and installing it in its original place. Because if the glass were broken, we would only have to put it back in, which is even faster than taking it out and putting it back in. Before we begin, there is one more thing to say. We offer this option for installing and dismantling the internal glass “on the spot”, without removing the oven door and picking it up separately, but while being directly at the stove.
First, let's understand how the inner glass is attached and what holds it in place.
. This is important in the subsequent understanding of what needs to be done.
The top end of the glass fits under the groove of the strip. The glass is held at the bottom by two stops. There are no rubber seals provided, except for two rubber inserts located on the frame of the door itself on both sides, in the middle. The glass is placed on them. You should also know that no glue or other adhesive materials are required. We provide a photo of the plank from the end so that its design is clear.
The strip itself is secured to the door frame using hidden screws, which are not visible when the inner glass is inserted into the groove of the strip.
How to fix it?
Most often, when gas ovens malfunction, owners are in no hurry to contact specialists, hoping to carry out repairs themselves. What kind of breakdowns can be repaired without danger with your own hands? This is discussed below in our article.
- Cleaning the regulator knob. Before starting repairs, turn off the gas supply. Troubleshooting begins with cleaning the taps. After removing carbon deposits, dirt and grease from them, clean the spring. Wipe the cork carefully so as not to damage it. Disturbing the surface will cause gas leakage. Use only a soft sponge. Next, the plug is treated with graphite lubricant without touching the holes. Remove greasy deposits from the stem with a knife. Afterwards, the handle is assembled in the reverse order of disassembly.
- How to fix oven doors. Over time, the oven door becomes loose, causing it to not fit tightly or not to close. To fix the problem, unscrew the mounting screws connecting to the stove. Having loosened them well, move the door in different directions until you find a position in which it is firmly seated on the hinges. To control, place a sheet of paper between the seal and the edge of the oven. If it does not clamp well, do the procedure again. After installation on the hinges, the bolts are tightened into place.
If it is noticed that the loss of heat is associated with damage to the seal located around the perimeter of the door, replacing it will not be difficult.
- Remove the old seal. In some oven models it may be attached with screws; to get to them, pull off the protruding edge of the rubber, in others it is glued.
- Wash the channel and door with liquid detergent. Clean off any old caulk or adhesive residue. Degrease.
- Install a new seal by starting from the top, then down and to the sides. Complete the process by bringing the edges together at the bottom center. If the elastic needs to be glued, choose a food-grade adhesive that is heat-resistant up to 300º.
Among other failure options.
Checking and cleaning the thermocouple. The oven burns as long as you hold the handle - then you need to check the thermocouple mount. In the lowest position it should touch the tongue. If the placement is incorrect, most models allow you to adjust with screws. It is possible that the thermocouple contacts are dirty and this is preventing the flame from being maintained. Try cleaning the part with sandpaper.
Removing the inner glass
To do this, you first need to understand how it is attached. The upper end of the glass fits under a special groove in the bar, and is held at the bottom by a pair of stops. There are also usually two rubber inserts embedded in the door frame, on which the canvas is laid. The use of adhesives is most often not provided by the manufacturer. The bar with a groove is attached to the door with hidden screws, which are not visible because of the glass. But the stops are fixed using hardware that can be easily unscrewed. As a result, the glass will be released from below. All that remains is to push the glass out by lightly pressing it with your fingers. If things get tough, you can use a flat screwdriver, slip it into the gap formed and pry up the blade.
Pull the part slowly, do not make sudden movements
What to do if the oven stops working
Electric oven design
If the owner is at fault or the warranty period has expired, there are 3 options:
- fix the problem yourself;
- find a private master;
- contact a company engaged in post-warranty repairs.
The choice is made after self-examination. It happens that malfunctions do not require repairs. The equipment may stop working due to a door that is not tightly closed, a cord accidentally pulled out of the outlet, or a power outage.
If the model has an electronic display, malfunctions may be caused by the button sticking or pressing it for a long time. The error is determined by the codes; you can eliminate them yourself after studying the instructions in detail.
If the heating element is faulty, the food takes a long time to cook, the element is pale on one side and not hot (checked after turning it off by touching your hand with an oven mitt). It is impossible to determine if the thermostat is broken on your own. A malfunction is indicated by an increase in the cooking time at the set temperature.
If the timer fails, the electrical module burns out, or the contacts are damaged, you cannot do without a technician. Replacing these spare parts does not require large expenses. Another thing is the block. Its cost is quite high, so replacing it is slightly cheaper than buying a new oven.
If the equipment is gas, then you can independently eliminate only two reasons for poor performance: contamination of the burner and replacement of the door seal. If the burner is at fault, the fire is not distributed evenly. You need to remove the pan and clean all the holes. If the door is to blame, then the hand placed towards it feels the heat. The seal is inexpensive, anyone can change it.
If you have problems with gas equipment, you must remember that gas is explosive, so in case of any serious malfunction it is better to contact a specialist. The operating rules for this type of device do not provide for their independent installation and repair.
DIY gas stove repair
Everyone knows that flammable gas mixed with air is explosive, which is why, for the sake of safety, a special substance with a pungent odor is added in small quantities. In the event of a gas leak, you must call the Gas Control service.
In order to completely protect yourself and your home from a gas explosion during repair work, you must comply with certain requirements, namely:
- Completely de-energize the apartment, turn off the main circuit breaker or unscrew the plugs;
- Remove self-powered mobile devices and turn off the power supply;
- Open doors and windows throughout the entire room;
- Use only special tools and components;
- Close the shut-off valve;
- Eliminate existing faults;
- After completing the work, apply gas by opening the valve.
If, after carrying out repair work and supplying gas, an incomprehensible hissing or smell of gas appears, you need to turn off the valve again and contact a gas service specialist. You can repair a gas stove yourself and eliminate existing faults quite easily and quickly; the most important thing is to strictly follow the instructions and follow safety rules. If you need to repair a gas stove yourself, then you first need to decide exactly how the device is designed and which components and parts allow it to work properly.
A modern gas stove consists of such systems as:
The basic part consists of burners, burners, shut-off valves and pipelines. The electrical part is responsible for good lighting, electric ignition, and sometimes, in some models, also for the grill system if it is installed in the oven. The supporting structure mainly consists of a body made of stainless steel.
Each gas stove has a standard set of parts. Depending on the model of the device, it may have different configurations and certain nuances, however, their configuration is unchanged.
One of the main parts of a gas stove is the burner, located inside the stove under the hob itself, and on top of the burner there are burners with dividers, which can be removed and washed during wet cleaning, however, the most important thing is that water does not get into the dividers. Each burner is characterized by a specific specific power and is determined by such indicators as: minimum flame when the handle is in the far left position; medium heat – the flame regulator is in the middle; Maximum combustion when the regulator is in the right position. When choosing a product, you need to pay attention to such an indicator as the maximum combustion power. It is determined by the level of gas combustion and is indicated in the technical characteristics of the gas stove itself.
All gas stoves, without exception, use three types of burners, namely:
- Kinetic;
- Diffusion;
- Mixed option.
Diffusion burners are characterized by the fact that a stream of gas enters the burner, where it mixes with air. When the oven burner is lit, air is drawn from the inside of the stove. The principle of operation of a kinetic burner implies that gas is mixed with air during movement and then the combustible mixture is transferred to the burner. Modern models use a mixed version, that is, part of the air is taken from inside the device, and the rest is supplied from outside.
How to fix the Hephaestus stove timer?
You can only remove and repair a mechanical timer yourself; with an electronic one, it is better to contact a specialist. The alarm clock mechanism looks like a large metal tablet.
To get it, remove the handle, lift the stove table and unscrew the fasteners. Then open the timer case, blow it out and brush off the dust, lubricate the pendulum and gears.
To avoid pouring too much, use machine oil in a special oil can with a thin spout or an ordinary syringe
Try turning the knob to start the timer. Started ticking? This means you can assemble and install in place. No? Try taking it to a watch repair shop, or buy a new one.
Instructions: how to turn off a gas stove during repairs
Very often it is necessary to turn off the stove to replace the flooring or carry out repairs. When you turn off the electric stove, there are absolutely no problems; you just need to unplug the cord from the outlet. When turning off the gas stove, it is important to follow safety precautions and it is advisable to contact a gas service technician.
Regardless of the gas stove model, turning it off consists of the following steps::
- Blocking gas access;
- Removing the locknut;
- Removing the coupling on the descent to the plate;
- Installation of the plug.
Regardless of how long you need to turn off the gas stove, you must monitor the flow of gas into the burner, since an explosion may occur when fuel is mixed with air. If the stove needs to be turned off for a long time, then a plug must be installed on the pipe leading to the gas main.
Regardless of whether they are old gas stoves, in particular, such as Darina, Wrozamet, Brest 1457, Elekta, or new, modern models, the principle of their design and operation is identical. Models in which the surface of the hob is separate from the oven are considered very convenient and functional. In particular, we can highlight the following: Hephaestus, Ariston, Indesit, Ardo, Kaiser, Hansa. Multifunctional devices that are easy to maintain and repair are considered to be Hansa, Gorenje, Bosch, Zanussi.
Product cleaning and maintenance
To prolong the operation of a gas oven and prevent its breakdowns, you need to carry out regular preventive maintenance. The operating instructions for the product should not be neglected; it is important to follow them strictly. Food should be cooked according to its recommended temperatures. It is important to know the design of gas oven components and follow the instructions for washing and lubricating the connecting elements. After cooking, clean the walls and bottom of the oven from burning.
All dirt and food debris must be removed immediately. Follow safety precautions when using a gas oven. Do not leave the stove unattended, do not set the ignition modes to levels that are not described in the instructions. To ensure that the internal parts of the oven remain intact and do not oxidize, after washing the oven you need to dry them well or wipe them dry. For washing, use only high-quality household chemicals, since cheap products will damage the internal coating: they can make the seal hard, destroy the enamel or scratch the glass of the door (read about damage and repair of glass here, and how to repair the doors is described here).
Ovens are considered reliable equipment. If the device breaks down, the help of a specialist is not always required. You can fix some problems yourself.
Competent oven repair in a gas stove
Some gas ovens may not close the oven door tightly enough or have other problems. If the electric ignition function does not work well, it means that the device is clogged and requires urgent cleaning.
When repairing ovens, it is imperative:
- Inspect the integrity of all its parts;
- Check the tightness of the connection with the gas hose;
- Inspect the door for damage.
If the door is broken or does not close well, then you need to either carry out repairs and tighten all existing fasteners more firmly. In the event of a serious breakdown, if the oven cannot be repaired, it must be replaced. In addition, when carrying out repair work, you need to inspect the handles of the gas stove, as they can often break and for this reason the device does not turn on well.
The thermocouple is malfunctioning
The gas control function is a good contribution to the safe operation of the oven. If the burner goes out after releasing the handle, this system is probably broken. The fact is that the device is turned on by pressing and turning the knob. Automatic ignition ignites the burner, where there are special sensors - a thermocouple.
In turn, when the thermocouple heats up, millivolts are generated. This charge is directed along the entire actuator to the solenoid valve, which is magnetized and held open. This happens as long as millivolts are produced. If the burner does not heat the thermocouple, the valve will almost instantly shut off the gas supply, so the extinction of the flame after releasing the handle indicates a breakdown of the gas control.
Gas stoves with oven gas control
What can happen:
- The tip of the device has moved out of place (up or down), causing insufficient heating. You can fix the problem by placing the tip exactly in the flame;
- The thermocouple tip is dirty. Here a complete failure of operation or poor heating may occur. This issue is resolved through cleaning;
- break of the thermocouple tip - the rod overheats due to the action of high temperatures and a break occurs;
- safety valve malfunction - the valve cannot open due to voltage problems. This requires replacing the gas valve with the entire mechanism. Only a gas fitter can change this thing.
A new thermocouple can be purchased at a special gas store. All devices differ in length and connection nut.