For certain reasons, sometimes the printer does not print only black or does not output a specific color shade. If it is said that a certain color is missing on the used sheet, but the printing itself works, then it is most likely that the reason lies in consumables (cartridges, ink). But systemic failures should not be ruled out. Poor printer output with no colors can happen on a device from absolutely any manufacturer (HP, Canon, Epson, Brother and others). Why this happens and what can be done for each specific case is described below.
Physical problems
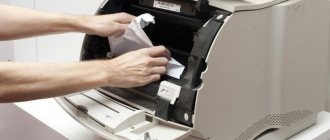
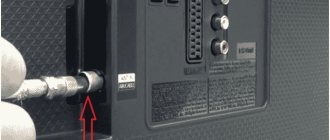
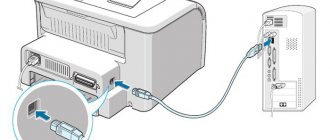
Checking the connection
The quality of the connection of the power cable and the cord connecting the printing device to the computer is immediately checked. The corresponding button on the body of the first one must be turned on. If the connection is made via Wi-Fi, the signal level is checked. The lights on the printer should be lit to indicate that it is ready for use.
The reason is paper
The paper may not be properly secured in the tray, or there may be paper jams inside the printer. Such problems need to be eliminated. Also check whether the paper meets the specifications of your printer model. The optimal paper density for the printer is 80 g/sq.m.
Do not use damaged or previously used sheets.
Check that you have loaded the paper the correct way into the tray. Photo paper and envelopes have a printable side, but a non-printable back side.
Clogged or dry cartridges or print head
With intensive and frequent printing without preventive maintenance, the ink passage channels in the middle of the cartridge or print head become clogged with ink, and dust or foreign matter from a low-quality consumable can also get into them. If you rarely print on the printer, the ink may dry out on different surfaces of the device. Sometimes, for any reason, the printer does not print not only with black ink, but also with color.
Cleaning can be physical or software. In the first case, user intervention is required to wash the equipment and remove any remaining ink. The second uses utilities or standard software from the manufacturer, which includes a head cleaning function.
The supply channel is cleaned as follows:
- Go to the printer settings and in the “Approximate ink levels” section, check the amount of dyes in the containers.
- Print a test sheet to make sure washing is necessary.
- Remove the print head and wash it with a special liquid. Typically, printer manufacturers produce liquids themselves; for example, HP offers formulations based on sodium sulfoethosylate and isopropylene alcohol. Article about flushing fluids for cartridges.
- The effect of the product begins 10-20 minutes after application.
- Wipe the head, dry it and put it back in its original place.
- Go to the print device settings and in the “Print head cleaning” section, select “Enhanced cleaning” and click on “Start”.
- To check the result, print a test page again.
- Repeat washing if necessary.
Cleaning cartridges must be done one at a time.
An ink tank removed from the printer should not be left outside its permanent location for more than 30 minutes.
Incorrect cartridge refilling
- Poor quality paint. Bad ink can be refilled in both black and color cartridges. Paints can only be purchased from an official manufacturer or a reliable supplier.
- Inappropriate dye. If the device refuses to print, but there is ink, check whether it matches your printer model. The dye markings are on the packaging, and recommendations for choosing ink are in the instructions for the equipment. When choosing ink for inkjet printers, you need to consider that they come in pigment and water-based types.
- Ink overflow. When refilling a cartridge, you need to fill ink no more than 90% of the total volume. If a color printer smears black on the paper, it means there is a problem with the black cartridge, and when it smears, for example, red, it means there is a problem with the container containing the color dye.
- The seal of the cartridge is broken. The container needs to be pulled out, checked for leaks, and, if necessary, sealed with tape over the hole through which the filling took place.
- The cartridge is installed incorrectly after refilling. It is enough to remove the container from the device and install it again until a characteristic click appears.
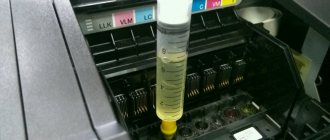
Checking Ink Levels
You can check it visually if the cartridge is made of transparent plastic. After aligning the cartridge, make sure that the ink volume is greater than half the capacity. If the level is low, refuel.
If it is impossible to estimate the amount of ink by eye, use a software method to check it.
- Go to “Control Panel” - “Hardware and Sound” - “Devices and Printers”.
- Find the printer you need in the list and right-click on it.
- From the list of options, select “Printing Settings”.
- In the “Maintenance” tab, click on “Status Information”.
- Select the “Ink Data” tab.
If the printer has stopped printing with color ink, you need to check its level first, since this is the main reason for failure to print for color printers.
Non-original or incompatible cartridges/ink
If the original cartridge that was sold with the printer is worn out or broken, and you buy another one, and then the text does not print, although there is ink, most likely the consumable is of poor quality or is not suitable for your model. A similar situation may occur if ink that is incompatible with the cartridge model was purchased. Before purchasing non-original consumables, you need to check their compatibility with your printing equipment.
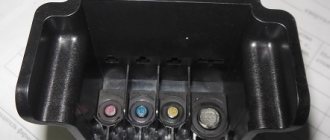
Print head problems
It is impossible to identify a broken head yourself, much less repair the part without sufficient skills. You need to contact the service center. It is difficult to visually determine such a breakdown, but sometimes burnouts and ink leakage can be seen on the PG, which are a sign of a malfunction in the electrical components of the printer.
Software problems
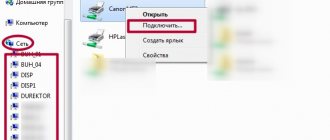
Checking settings in Windows
- Select the default printer. There should be a green checkmark next to your model in the list of devices. If it is not there, right-click and select “Set as default”.
- The print queue is full. Right click on the device name and select “View print queue”. If there are too many frozen jobs in the window that opens, you need to clear the queue through the “Printer” sub-item.
- Printing paused. If in the “Printer” menu item there are checkboxes next to the lines “Pause printing” or “Work offline”, then the checkboxes need to be removed.
Doesn't print after refilling
Sensors are often installed on equipment to count printed pages. When the number reaches a critical point, printing is blocked automatically by the system, assuming that the ink is running low. But the sensor does not always work correctly. In accordance with the algorithm embedded in the sensor, it is believed that each page is completely filled with text or image. In practice, printing is always uneven.
To resume printing, just reset the counter. Zeroing is possible by several methods and the technology differs depending on the manufacturer and the specific model.
- Using software like "IpTool", "Mtool".
- Sealing the contacts on the cartridge itself. The method is mainly for HP technology. First, the upper left contact is sealed, then the cartridge is inserted into the machine and a test page is printed, then the lower right contact is sealed in the same way and tested. Next, the adhesive tape is removed sequentially, and the contacts are wiped with alcohol.
- Buying a new compatible cartridge without a counter.
Additionally, you can disable the display of low dye level messages. For Canon printers, follow the algorithm below.
- Go to the already familiar “Devices and Printers” window.
- Call the context menu by right-clicking your printer.
- Goes into settings.
- In the “Maintenance” tab, click on “Status Information”.
- In the new window, click on the “Options” section and select “Output a warning automatically” from the proposed list.
- If there is a checkmark next to the line “When an ink warning appears,” uncheck it.
Driver Update
- First, the driver related to your printer is completely removed. To do this, in the “Run” window (Win + R combination), enter the command “printui /s”. A window will open where in the “Drivers” tab select the printer and click on “Delete”.
- Update the software through the device manager. By right-clicking, call up the “My Computer” icon menu and select “Properties”, then go to the manager.
- In the equipment list, left-click on the printer.
- In the top horizontal toolbar, select the driver update icon.
- Do automatic software updates or indicate the path to the downloaded driver.
Streaks when printing on a laser printer
What is the reason for the stripes
- Toner level is low.
- Cartridge depressurization.
- Filling the container for waste powder dye.
- Incorrect squeegee installation.
- Damage to the magnetic or photo shaft.
How to fix
When the amount of toner is low, uniform white streaks appear on the paper.
It is better to buy certified powder, and when refilling yourself, carry out all work in a well-ventilated area due to the high toxicity of toner.
To identify leaks in a cartridge, remove it from the printer:
- then inspect for cracks, chips, and loose areas;
- check the places where the bolts are screwed in;
- Gently shake the cartridge to check if the powder is falling out;
- pull the curtain near the photo roller and see if there is toner on it.
Often the printer streaks due to lack of periodic cleaning of the waste toner compartment. If cleaning is not done after each refill or at least once every two refills, then continuous wide stripes will be printed on the paper.
When the photo roller wears out, stripes will be printed on the side of the sheet: on the right, on the left, depending on the side of wear, or on both at the same time.
Example of worn-out photoconductor No. 1
Example No. 2
You need to act in the same way if the magnetic and photo shafts do not fit well together or the dosing blade (squeegee) is faulty. The blade changes along with the magnetic shaft.
If the blade is just dirty with toner or a foreign object has gotten under it, cleaning it will help correct the situation.
- The cartridge is removed.
- On its body, 8-9 screws located on both sides are unscrewed.
- The top cover is removed, under which there is a magnetic shaft with a blade.
- Excess objects are removed from under the squeegee, and the surface of the blade is carefully cleaned with detergent. It is better to clean the sharp part with a wooden stick.
Checking CISS
Sometimes the continuous ink supply system causes black or color printing to fail. The following problems are possible:
- not transferred to the working position from the transport position;
- there is low ink level in the containers;
- the supply line is crushed;
- out of ink;
- air lock in the ink plume;
- The ink has dried out due to the printing device being idle for a long time.
There are different ways to solve problems:
- The CISS is moved to the working position;
- ink containers are placed in the correct position;
- air is pumped in the loop, squeezing/kinking of the hoses is eliminated;
- The head is cleaned using the software method;
- The page is printed and the print quality is checked.
No ink or incompatible ink
The simplest reason that a device has stopped printing with black ink is a simple lack of ink. Due to various failures, the computer may not notify the user about what happened. The problem is solved by adding ink:
- about 2 cubic centimeters of paint are injected into the cartridge with a syringe;
- carry out testing;
- if the result is positive, then you can add the same amount of ink and print documents.
When refilling yourself, you should remember that in some models it can only be done after installing the cartridge in its place in the printer. To carry out the procedure you will need a special syringe.
Also, the equipment used may not print in black if the inks used and the ones added are not compatible with each other. Therefore, before refilling, you should carefully study the label on the ink bottle. Such information is always indicated there.
It is better to purchase consumables from well-known, trusted manufacturers to be sure of their quality.
Replacing the used cartridge with a new one suitable for the model used is an even easier option for eliminating this type of problem. But doing the refueling yourself will cost several times less.
What to do if a specific color does not print
When one color does not print, the problem must be looked for in each specific container with ink of a certain color.
- Yellow. Check for the presence of yellow ink, see if the CISS is in the working position, and if the caps of the containers are closed. Evaluate the permeability of the nozzles, and clean if necessary.
- Blue color. Due to long periods of inactivity, the paint could dry out on the PG.
- Green color. The reason why the device does not print green may be that the cable is strongly compressed. It would be useful to check the level of dye in the jars; the amount should not fall below the permissible value.
- Black color. The problem is that the CISS is in transport mode, not in working mode, or is located below the printer level. The reason may be that the plume is compressed or air gets inside the system.
- Red color. It is not printed due to the unavailability of the CISS, due to the cable being compressed, or due to the formation of an air lock.
- Pink color. The reason is that there is not enough ink or it has dried on the structural elements of the cartridge.
The procedure for correcting a problem with printing of any of the colors will be the same.
- Determine the volume of ink in all containers; if the ink content is anywhere less than 30%, refill.
- Inspect the containers and, if there are any, close the large holes and leave the small ones open.
- Check the plume for the formation of air plugs.
- Go to the printing machine menu, find the “Installation” item, select the second section “Technical”. Maintenance" and click on "Cleaning the print head".
- Clean it twice, then give the printer 40 minutes. recreation. If necessary, increase the number of cleanings, but no more than five times a day. Difficult cases require manual cleaning of the head using liquids.
- If cleaning does not produce results, contact the service center. All openings in paint containers must be closed during delivery.
5 / 5 ( 4 voices)