Connecting wired headphones
The first problem may arise already at the stage of connecting the headphone plug to the socket. Let's divide the available plugs into:
- Standard 3.5" three-pin - found on most headphones;
- Combined 3.5” four-pin – used on headphones with a microphone;
- The rare 6.5” plug looks the same, but is several times larger;
- The small three-pin 2.5” plug used to be on some mobile phone headsets.
On computers and laptops there are no connectors for 6.5" and 2.5" headphones, but they can be connected just like 3.5" headphones through special adapters. But there is always a 3.5" jack in front:
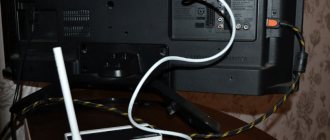
and behind the system unit:
According to the standard, it is green or with a “headphones” icon. You can insert headphones or a headset with a microphone into this jack. Sometimes, the front panel is not connected to the motherboard, and the headphones do not work when connected to the front panel, but work if they are inserted behind the system unit. In this case, you need to open the computer lid and figure out the wires and where they connect to the motherboard, according to the markings.
On laptops there are two separate or one combined connector:
If there are two connectors, then one is for headphones/speakers, and the second is for a microphone. If there is only one connector, then you can insert both regular headphones (three-pin plug) and headphones with a microphone (headset) with a four-pin plug into it.
Simply put, headphones with a microphone with a 4-pin plug can be inserted into any jack, but if it is not designed for a microphone, then it simply will not work, but there will be sound in the headphones. The three-pin plug fits into both a regular and a combination socket; no adapters are required.
Connecting headphones to a computer
In modern computers, the headphone jack is located on the front wall of the system unit. It is marked in green. If there is no such connector, look for it on the back wall of the computer - it will definitely be there.
Let's move on to the headphones themselves, or more precisely, to their plug, which is a metal rod with a diameter of 3.5 mm and is called a “jack”. Pay attention to the “jack” - it should have two or three black rings. To connect headphones to a computer, you need a jack with two rings (three contacts). If the “jack” has three rings, then it is a headset (headphones and microphone) that connects to a universal connector, usually used on laptops. This connector is marked with an icon in the form of headphones with a microphone.
First, let's look at possible problems with quiet sound.
- headphone malfunction. Perhaps the headphones are simply damaged or the sound volume suffers greatly due to their quality;
- problems with connection or output on the computer;
- software sound limitation.
So, the first thing to do is to trust the performance of the headphones and try a few simple mechanical methods.
Checking the functionality of the headphones
For this:
- Connect other headphones to the computer and check the sound quality in them. If this is not possible, then check your headphones on any other device. For example, on the phone;
- Check that the plug is inserted all the way. As usual, on a computer, headphones can be connected to acoustics or to the system unit. Try connecting your headphones to a different jack;
- Check all mechanical switches and volume controls. Turn them all the way up.
Software volume limiting
If you have used all of the above methods, but there is no increase in volume, then let's move on to more serious and complex methods.
Updating device drivers
- Open the Start menu and write “Device Manager” in the search bar. Let's open it.
- Find the line “Sound, video and gaming devices” in the list of devices. Right-click on the device and select “Update Driver”.
Right-click on “Device” and select “Update Driver” - Select automatic driver search.
Select “Automatic driver search” - The system itself will find the necessary drivers. Another option is possible - the system will inform you that the current version of the software is installed and no update is required.
The latest software version is installed
Next, let's check whether the volume is set to maximum in the operating system itself. For this:
- In the right corner of the screen, to the left of the clock, there is a button with a picture of a speaker. Click on it.
Click on the button with the image of a speaker - A volume scale will appear, the slider must be at the top, otherwise the volume of sounds will be limited by software.
Move the volume scale up - Under the scale you will see a button labeled “Mixer”, click on it.
Click on the “Mixer” button under the volume adjustment scale - Make sure that all the sliders are also at the highest point.
Move the sliders to the highest point
Checking physical pairing parameters
Before sinning on the system, it is worth checking the operation of the paired devices:
- Headset. There may be no sound due to a broken headphone wire. Even if this moment is not visually recorded, its presence cannot be excluded. Connect the headphones to your smartphone or player and check if there is sound in the speakers.
- Check the sound card input/output connections on your computer (especially if you are trying to connect to the audio jack on the front panel). There is a possibility that a contact has come loose or the panel is disconnected from the motherboard.
- Alternately pair playback devices with front and rear audio output. If there is sound on the motherboard side, but there is no sound on the front panel, check the type of audio connection. It is necessary to set “HD Audio” instead of “AC97”.
- In the UEFI (BIOS) settings, check the parameter set in the Audio section opposite “Front Panel”. If “SPDIF” is specified, replace it with “AC97”. Despite some limitations for audio in Windows 10, this option will work and output audio to analog headsets.
- Remember if you updated the drivers for the motherboard (in which the sound card you are using is integrated). If not, use the model number to find the required software on the manufacturer’s official website and update. After this, you need to update the audio driver.
Reasons for quiet sound on a laptop
In some cases, the sound is so quiet that you almost have to put your ear close to the speaker to hear anything. Too quiet sound on a laptop can be due to a number of reasons, both software and hardware. If, say, one audio file is played barely audibly, and another in the same program is much louder, then the reason is incorrect file encoding; the laptop is not particularly “faulted” in this.
The volume also depends on the applications running with sound. For example, the built-in Windows player has a quieter sound than VLC or other third-party players. At the system level, drivers that are not entirely suitable for a particular sound card are often the reason for the initially low volume or its decrease after updating the operating system to a new version. In such cases, replacing Microsoft drivers with “native” drivers downloaded from the manufacturer’s website can increase the volume on the laptop.
Finally, the reason often lies in the laptop itself, or rather in its weak speakers. Laptop manufacturers often skimp on devices that reproduce sound, although we must admit that there is a reason for this. Firstly, nothing prevents the user from connecting external speakers, and secondly, due to the design features of the laptop, placing powerful speakers inside its case is not a very simple task. All this, of course, does not mean that you should put up with poor acoustics. Now we will show you how to make the sound louder on a laptop if it is already at maximum.
“Fine” sound tuning: loudness compensation and communication
First of all, I still recommend doing two things:
- Click on the sound icon (as it looks in Windows 10 - , in Windows 7 - ) and try to run “Detect sound problems”. Such a simple thing in many cases helps to check and fix failures and problems in Windows;
- open the volume mixer (arrow 2, in the screenshot below) and increase the volume for each application that will be there. Sometimes it happens that the sound volume level is at a minimum only for some specific applications...
Volume settings
Now about something more interesting: communication
There is such an option in Windows as “communication” - the point is that “smart” Windows reduces the volume when using the computer for conversations (i.e., as if it does a plus for you - so that you can hear the interlocutor better).
But it happens that this option works very poorly - and it always reduces the sound, and not just during conversations...
To check this: go to the Windows Control Panel and open the “Hardware and Sound/Sounds” section (see screenshot below).
Equipment and sound – sound
Afterwards, go to the “Communication” tab and check the “no action required” slider. Save the settings and restart your computer (the last step is mandatory!). Then test what the volume is.
Sound - no action required
A few words about loudness compensation
There is another option in Windows that can significantly affect the volume. We are talking about loudness compensation - special. option to eliminate loudness differences taking into account the peculiarities of human perception. If you have problems with quiet sound, I recommend enabling this option.
To do this, you need to go to the control panel and open the “Hardware and Sound/Sound” section: in the “Playback” tab, select your sound source (speakers, headphones) and go to their properties (see screenshot below, arrow 1-2).
Then open the “Enhancements” tab and in the properties find the “Loudness Compensation” option - turn it on, save the settings and check the sound quality again (by the way, in Windows 8.1 this option is called a little differently - “Advanced features / volume equalization”).
Loudness compensation
How to set up headphones in Windows 7
When the device is connected, you can proceed to configure it:
- Open the Start menu and go to the Control Panel tab.
- Find "Hardware and Sound" and open it.
- Here we need the line “Manage sound devices”.
- A new window will open in front of you. Go to the “Playback” tab and make sure that there is no red icon or yellow exclamation mark next to the connected device.
- Click the “Customize” line.
Reference. If you are a music connoisseur, you can use more subtle settings. This can be done using the "Advanced" tab.
Ways to increase the sound level on a laptop with Windows 7/10
So, how to enhance the sound on a laptop using standard OS tools, without resorting to the help of special programs. The first step is to check your Windows audio settings. Their availability and scope will depend on the driver used and operating system version.
Right-click on the sound icon in the tray, select “Playback Devices” from the menu, select “Speakers” in the window that opens and click the “Properties” button.
In the next window, switch to the “Enhancements” tab, activate the “Bass Boost” option and click “Settings”.
Try playing with the settings in the small window that opens, changing the “Frequency” and “Boost Level” parameters, while checking the result in the “Advanced” tab.
By default, the value of the first parameter is set to 80 Hz, for the second – 6 dB. Increase the values to the maximum, check the “Loudness Equalization” box and apply the settings. This should increase the sound on the laptop.
As an aid, you can set the maximum bit depth and sampling rate values on the Advanced tab.
In Windows 8.1, it doesn't hurt to experiment with the Enable Sound Equalizer and Enable Room Correction settings in the Enhancements tab.
This is approximately how things stand if you use a standard Microsoft driver. If you have an audio driver from Realtek installed, you can enhance the sound on your laptop using the Realtek HD manager. This is a more convenient way, since all the tools are located on one panel. Its appearance, however, will differ depending on the driver version and motherboard manufacturer. Open Realtek HD Manager from the classic Control Panel. Next, switch to the “Sound Effects” section, turn on the equalizer and set all the sliders to the top position, then check the “Loudness” box and save the settings.
Setting the sound in headphones
If there is still no sound, then read the article about solving sound problems. When sound appears in the headphones, you can adjust the sound parameters; to do this, go to the sound control panel to the “Playback” tab and double-click on the device.
Volume and balance
Let's go to the "Levels" tab:
The slider sets the overall volume level, but it is also available by clicking on the speaker icon next to the clock. But the balance of the left and right channels is available only from this window. Press the "Balance" button and adjust the level of the right and left channels, if necessary. When you change the master volume, the levels of the right and left channels will change in proportion to the values you set.
Enhancements (Sound Effects)
On the “Enhancements” tab, you can configure sound effects; they are also called improving sound quality. The list of effects differs depending on the sound card and drivers, but the logic of application is the same. The “Disable all enhancements” checkbox disables all sound enhancements, so for the effects to work in headphones, you need to uncheck the box:
Next, mark the desired effect and click the “Settings” button. Each effect will have its own settings. Here is a list of some "improvers":
- Bass Boost: Increases the level of low frequencies. In the settings you need to select the frequency (Frequency) and gain level (Boost Level). For headphones, suitable frequency values are 50-100 Hz, gain 3-12 dB, selected individually by ear;
- Virtual Surround: encodes multi-channel audio as stereo (for receivers);
- Room Correction: allows you to adjust the sound using a calibrated microphone to compensate for the reflectivity of the room, not relevant when connecting headphones;
- Loudness Equalization: equalizes loud and quiet sounds, can be useful for listening to quiet recordings through headphones;
- Equalizer: an equalizer for adjusting the sound timbre, less common.
The “Preview” button will help you evaluate the impact of the effect on sound quality. It plays a test sound, or your audio file.
Sampling frequency
You don't need to change anything in the Advanced tab, but if you are listening to high-quality soundtracks with a sampling rate higher than 48 KHz, i.e. It makes sense to choose from the list “24 bit, 96000 Hz” or “24 bit, 192000 Hz (Studio recording)”. In the normal case, there is no difference in sound quality, but the load on the processor increases. The default setting should be "16bit, 48000Hz (DVD Disc)".
We don’t touch the “Exclusive Mode” block, but if there is no sound in your program after some other program is launched, then uncheck both boxes.
Spatial audio
In the Spatial Sound tab, try:
- select “Windows Sonic for headphones”;
- "Enable 7.1 virtual surround sound".
Evaluate whether there is an effect in movies or games. If you have any questions about the operation of the headphones, feel free to ask in the comments.
Many users use headphones when working with a computer or listening to music on it. But not everyone knows how to configure them correctly. Let's figure out how to optimally configure this sound device on a PC running Windows 7.
The best programs for sound amplification
Finally, audio amplifiers for laptops allow you to make the sound louder - special programs that allow you to adjust audio settings at the system level.
Equalizer APO
This advanced parametric equalizer works at the operating system level, allowing you to customize the sound in all applications, including system ones. During the installation process, the program will ask you to specify the device with which it will work, select the speakers. After installing the application, you will need to restart your computer. The sound parameters are adjusted by dragging the points of the equalizer curve; we achieve a suitable result experimentally.
All changes become apparent in real time, settings are saved automatically, and there is a function to reset parameters to default values (“Reset response” button). Using Equalizer APO is a great way to increase the volume on a laptop if it's already at maximum, and with the help of this program you can very flexibly adjust the tone and modulation of the sound.
Sound Booster
A program to enhance sound on a laptop for those who do not want to bother with manual equalizer settings. Allows you to increase the sound volume up to 500% in most programs, including media players, instant messengers, browsers, etc., and is easy to use and easy to manage. Sound Booster has its own volume control panel, which can be called up by clicking on the program icon in the system tray. By dragging the slider on this panel, you can increase the sound on your laptop by several orders of magnitude, even if the volume seems to be at maximum according to Windows indicators.
There are several operating modes available; if one is not suitable, nothing prevents you from switching to another. An important advantage of the application is the presence of built-in filters, thanks to which there is no gross distortion of the sound, as is often the case in similar, but not very high-quality programs. Unfortunately, Sound Booster is a paid product; it works in trial mode for 14 days.
Checking connectors and wires
One of the most common causes of sound distortion, noise, crackling, and decreased volume is poor contact between the speakers of the speakers (headphones) and the computer sound card.
This most often occurs due to “broken” connectors and plugs, as well as damage to the wire insulation (an example of a torn headphone wire is shown in the photo below). If such defects appear, I recommend replacing the wire (or re-soldering it, if you have such experience...).
Broken headphone wire
In general, a wire tear may not be “visible” - i.e. the braid on top will be unharmed, while the copper core inside will be damaged. Try to twist the wire, and if the sound disappears, then appears, there is distortion - the problem is obvious.
You can also check your headphones (speakers) by connecting them to another PC, tablet, music. center, etc.
Connecting a Bluetooth receiver to music speakers. center
If the problem is related to the connectors on the sound card, then either repair it or use an external sound card. Now, for example, there are such “babies” the size of a regular flash drive, while many of them can produce sound quality no worse than built-in sound cards.
External Sound Card
Checking and updating drivers
Drivers are to blame for every 3-4th sound problem! More precisely, their absence, or the wrong version for a given OS.
In general, most often, if there are problems with the sound driver, there is no sound at all (I apologize for the tautology). But it happens that there was (for example) Windows 7 - and then it was updated to Windows 8/10. According to my observations, after such an update, there are problems with sound...
First, I recommend opening the device manager. The easiest and fastest way to do this is to press WIN+R, enter devmgmt.msc, click OK.
Launching Device Manager – devmgmt.msc
In Device Manager, open the “Sound, Game and Video Devices” tab. This tab should display your sound card (for example, in the screenshot below - Realtek High Definition Audio).
If instead, the tab is empty, or you see the “Unknown device” icon with a question mark, then there is no driver.
Updating Drivers on Windows
To update the driver in Windows: just right-click on the device (for which you are updating the drivers), and in the context menu select “Update drivers” (arrow 1-2 in the screenshot above).
Note!
You can also update drivers automatically - for this you need a special driver. utility
For example, the screenshot below shows the Driver Booster program, with which you can update the sound driver in 1 click... Is it convenient? Comfortable!
Update everything - game components, sound and gaming devices, etc. / Driver Booster
❔ 1. Why the laptop does not see headphones - Windows 10 or 7
Audio devices, properties, driver.
If the laptop does not see headphones (wired) on Windows 10 or another version, then you need to check the audio card drivers and connectors . We check sequentially:
- Go to Start -> Control Panel -> System and Security -> Device Manager. Or simply type “device manager” in the internal search (near the “win” button on Windows 10).
- Select “Audio inputs and audio outputs” and the desired device in them.
- If there is an exclamation mark, update the drivers in the device manager (as in the screenshot) or manually.
- If there is no exclamation mark, set up the sound in the Realtek utility, and then in Windows.
- If it doesn’t help, check the functionality of the connectors.
By the way, first of all, if the laptop does not see the headset, check it on another source (from a computer or phone, for example). Perhaps it's not the laptop that doesn't see the headphones (Windows 7 or 10 doesn't matter