Mechanical causes of quiet sound
This fragment includes malfunctions of the device itself or the input connector .
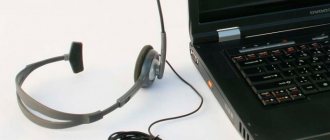
To check if everything is okay with the headphones, you need to connect them to another device, for example, a smartphone. If the sound quality in other media leaves much to be desired, it means that the device itself is faulty and requires repair or replacement.
We must not forget that the cause may be not only a breakdown of the headphones themselves, but also the connecting cord. A specialist at the service center can identify this. Replacing the wire will solve the problem.
The other most common cause is a loose headphone jack . This requires replacing it or reconfiguring the input to another socket. We'll look at how to do this below.
If the above reasons are not confirmed, let's try to increase the volume of the headphones using software settings.
How to adjust the sound on your smartphone using buttons and settings
Before moving on to radical methods of changing the sound, let's make sure that the standard adjustments available on the phone are fully used.
Let's go along the path Settings - Sound - Volume. Let's increase the level to the optimal value and check the result. Let's use the key on the side panel of the smartphone and move the sound volume up if the slider displayed on the screen is in the lower position.
REFERENCE! The latest generation models (Android 6 and higher) provide the ability to separately adjust the alarm sound, audio and video files, and ringtone. The call volume can be changed in settings, on the main screen, etc., using the corresponding buttons (depending on the device). To change the sound level of the alarm clock, you need to go to the window where it is installed and use the volume buttons. When viewing audio or video materials, you can press the key to change their volume.
Software methods for adjusting sound
There are several ways to increase the volume in headphones on a computer in Windows 7, 8, 10. Let's start with the simplest.
Setting the volume in the operating system
The first thing to do is make sure that the slider located in the lower right corner of the Quick Access Toolbar is at its maximum position. To do this, click on the speaker icon and drag the slider up.
Here below, select the “Mixer” parameter with the left mouse button and set all the sliders to the maximum value.
You should make sure that the required volume is also set in the player file.
Standard settings didn't help? This means you need to remove software volume restrictions.
Setting a volume limit when using a microphone
restrictions on other sounds during a conversation may be set . This setting can also reduce the volume during normal movie or song playback.
To remove these restrictions, you need to do the following:
- Right-click on the speaker icon in the lower right corner.
- In the list that appears, select “Sounds”.
- A window with several tabs pops up. Select “Communication”.
- Oh, click “Apply” and “Ok”.
If the reason was in the settings of these parameters, then the headphone volume should increase.
Setting the Loudness parameter
There is another way to boost the sound on your computer, after which the volume in your headphones will be doubled.
- Right-click the speaker icon and click on the “Sounds” option. You can also access this tab through “Start” → “Control Panel” → “Hardware and Sound” → “Sound”.
- Select the “Playback” tab. Usually the first line of the list is “Speakers” or “Headphones”. Click with one press of the left key.
- Below we set this action as “default”. Then click the “Properties” button.
- In the window that appears, select the “Improvements” (in Windows 7) or “Advanced Features” (in Windows 10) section.
- Check the box next to the “Loudness” parameter. Next, click on the “Apply” or “Ok” button.
Typically, these actions help increase the sound in headphones on a computer at least twice . Some Windows 10 users recommend setting the Volume Leveling option. You can try this option too.
Installing a headphone jack
Often the headphone jack located on the front side of a desktop PC becomes loose, resulting in crackling noise, noise, or no sound at all. This problem can be solved by installing headphones into the speaker jack on the back of the unit . You can do this as follows:
- Go to the Start menu and select Control Panel.
- In the window that appears, find “Realtek HD Manager”. In Windows 7, you must first go to the “Hardware and Sound” tab.
- In the “Realtek HD Manager” panel that opens, select the green connector and right-click on it. Select the “Change connector assignment” tab.
- In the additional window that pops up, select “Headphones”. Place a checkmark next to it and click “Ok”.
By reinstalling this connector from the speaker to the headphones, we turn off the sound limiting, and the volume becomes higher.
Don't forget, when you connect the speakers again, to reconfigure the socket for this type of device.
Reinstalling drivers
Poor sound from headphones can also be due to outdated sound card drivers , or they don't match your computer's software. To resolve this issue, you need to update these drivers.
- From the Start menu, type “Device Manager” into the search bar.
- In the dialog box, find the "Sound, video and game devices" option. By left-clicking on it, you can see the installed sound cards; there may be one or more of them. This is usually “NVIDIA High Definition Audio” or “Realtek High Definition Audio” and others.
- Now you need to update each device. To do this, right-click on the selected option and select “Update drivers”. Then click on the “Automatic search” sub-item.
- All that remains is to wait for the system to reinstall the drivers. You may need to restart your computer after this.
If you wish, you can use your own search for the necessary drivers by going to the official Realtek website.
How to remove volume limit on Android headphones
The limitation on headphones only occurs when the user listens to music for a long enough time at the same volume. To remove this limitation, you need to install a special application such as Volume Boost.
Having switched to this application, the user goes to the “Settings” tab and checks the box next to the “Auto Start” item. This way the restrictions will go away on their own. The app's features do a great job of this.
Vyacheslav
For several years he worked in mobile phone stores of two large operators. I understand tariffs well and see all the pitfalls. I love gadgets, especially Android ones.
Ask a Question
Question to the expert
What to do if the sound changes spontaneously?
This can come from many reasons, such as an outdated model or incorrect settings. To solve this problem, it is best to contact repair services, where the user will be consulted about this problem.
What to do if even after amplifying the sound it does not change?
Most likely, this is due to the device itself and the quality of the speaker. If after the above methods nothing has changed, then the problem is in the device itself, its dynamics. It needs to be replaced.
Is it possible to make mistakes in such methods?
Yes. The user performs all manipulations only at his own peril and risk. Only system settings and third-party applications may not affect the operation of the phone.
It turns out that removing restrictions and increasing the volume on an Android device is simple and easy.
4.6 / 5 ( 33 voices)