The presence of running water with hot water is part of the usual comfort for a modern home. However, it is not always possible to solve the problem of connecting centralized communications to suburban real estate.
Therefore, owners of private households arrange an autonomous supply of hot water, using a heating circuit as a heating source. To solve the problem, you just need to build an indirect heating boiler with your own hands.
We will tell you how to make a useful device for everyday life. The article describes in detail the rules for installing and connecting equipment that supplies sanitary water to water collection points. You will learn how to prepare the boiler for startup and how to put it into operation.
What is an indirect heating boiler
An indirect heating boiler is a water heating tank that operates in conjunction with central heating devices . Unlike traditional water heaters, an indirect type boiler does not require connection to the electrical network.
Indirect heating boilers may have different designs, but they all heat water using the energy of the boiler coolant
Heating of water occurs due to heat exchange between hot water flowing through the heat exchanger and cold water with which the boiler tank is filled. Externally, the boiler is a cylindrical container with a capacity of tens to several thousand liters.
Indirect water heaters are used both in private houses, the owners of which do not have the ability to connect to an autonomous centralized heating system, and in large industries where large amounts of hot water are required.
Advantages and disadvantages of indirect heating equipment
Among the advantages of an indirect type boiler are:
- profitability (no energy costs);
- high equipment performance, limited only by the power of the heating boiler;
- lack of direct contact between running water and coolant;
- the ability to consume thermal energy from several sources at once to increase the power and efficiency of the boiler.
Significant disadvantages of the equipment include:
- high cost. An indirect heating boiler costs 1.5–2 times more than a direct type water heater;
- insufficient power. Heating a large amount of water (more than 100 liters) may require quite a lot of time - from 1 hour. Some manufacturers offer boilers with a higher heating rate (30–35 minutes), but their cost is unreasonably high;
- large dimensions. The size of the equipment directly depends on the volume of the tank. Boilers with a capacity of over 200 liters take up too much space, so they are installed in a separate utility room;
- impossibility of year-round use. Effective operation only during the heating season (autumn - winter). In summer, when the heating boiler is turned off, the water in the boiler does not heat up.
An indirect heating boiler takes longer to prepare hot water, but it does not require an electrical connection
Video: experience using an indirect type boiler
Selection of capacity
A reservoir or storage tank can have almost any size and volume. The second criterion directly depends on the number of consumers and standard hot water consumption. As a rule, hot water consumption is about 50-70 liters per consumer, so the approximate volume of the tank for a family of four is approximately 200 liters.
Boiler tank
It is important to remember that the volume of the tank can vary significantly depending on the number of consumers and serviced hot water points.
Design features of an indirect boiler
The indirect type boiler is a tank made of stainless steel. The inner walls of the container are covered with a special material, which not only protects the surface of the water heater from corrosion processes, but also reduces the concentration of harmful bacteria and microorganisms.
Diagram of an indirect type boiler with a single-circuit coil
Otherwise, a boiler of the simplest design consists of the following components:
- heat exchanger - a spiral pipe or smaller tank. Depending on the volume of the tank, it can be located in its upper and lower parts;
- inlet pipe - a fitting at the bottom of the device for supplying a pipe with cold running water;
- outlet pipe - fitting for connecting the hot water outlet pipe;
- magnesium anode - additional protection of the tank walls from corrosion processes;
- internal thermometer - a device for measuring the temperature of heating water;
- thermostat - a device that prevents equipment from overheating;
- control unit - rotary knob with divisions for setting the heating temperature;
- thermal insulation - a layer of insulating material that helps maintain the desired temperature of the heated water;
- outlet - valve for draining stagnant water;
- revision - a large diameter hole intended for maintenance, repair and modernization of the boiler.
The design of new tank models may differ slightly and have a number of modifications from manufacturers, but in general, any indirect type boiler consists of the listed elements.
Operating principle of the boiler
An indirect type boiler is part of the heating system and is connected directly to a gas, electric or solid fuel boiler, which heats the coolant using the energy released when fuel is burned.
The coolant circulates through the DHW system and passes through a heat exchanger located in the indirect heating boiler. Due to the release of thermal energy from the hot coolant, the cold water that fills the device’s tank is heated. From it, heated water is transported through an outlet through a pipe to the bathroom, kitchen and other rooms with plumbing equipment.
An indirect type boiler can work with any type of heating boiler
When the heating boiler is turned off or switched to an economical operating mode, the coolant quickly cools down. Thanks to the design of insulating the tank walls with urethane foam, the water in the tank cools very slowly. This allows you to use the entire volume of warm water for several more hours.
Final assembly
The process of self-assembly of a water heating device consists of the following step-by-step activities:
- coil installation;
- soldering pipes on inlet and outlet pipes;
- welding of support legs or hanging loops;
- installation of a heating element;
- tight fit of the lid.
It should be noted that special attention should be paid to thermal insulation of the tank with basalt mats and their fixation on the surface of the outer walls.
To make the operation of the water heating device completely safe, it is necessary to screw on a protective steel casing coated with powder paint or galvanization.
Calculation of the main parameters of the boiler
Before you begin searching for material and directly manufacturing, you will need to calculate the minimum volume of the tank and the working length of the heat exchanger.
Volume and shape of the tank
The volume of the water tank directly depends on the number of residents permanently residing at the place where the equipment is installed. It is believed that a person uses up to 80 liters of water per day. For the calculated value, it is recommended to take 45–50 liters per person. If the norm is exceeded, the water in the tank will stagnate, which will certainly affect its quality.
The shape of the tank is selected taking into account the pressure in the plumbing system. If the pressure is low, then the use of homemade boilers with a square tank is allowed . If the pressure in the system is high, only equipment with a rounded bottom and top can be used.
Boilers with a storage tank of square and rectangular shape can only be used in water supply systems with low operating pressure
The fact is that increased pressure contributes to the occurrence of bending forces on the walls of the tank, so a square or rectangular tank can become deformed. A container with a round bottom is more resistant to deformation due to better streamlining.
Heat exchanger power and length
In vertical indirect heating models, a copper coil is usually used as a heat exchanger, located between the inlet and outlet.
Boiler coil made of copper pipe
For DIY production, it is best to use a copper pipe with a diameter of 10 mm. This product can be easily bent by hand without using any tools. When using a metal-plastic pipe, it should be taken into account that the heating temperature of the coolant should not be more than 90 °C, otherwise the pipe will be deformed and the joints will leak - this will lead to mixing of water in the tank.
The length of the pipe required for the manufacture of the coil is calculated by the formula L = P / (3.14 ∙d ∙∆T), where:
- L—pipe length (m);
- d—pipe cross-section (m);
- ∆Т – temperature difference between heated and cold water (оC);
- P is the power of the heat exchanger for every 10 liters of water (kW).
According to experts, for every 10 liters of water there should be at least 1.5 kW of thermal energy. Taking this into account, you can calculate the length of the pipe for making the coil.
For example, let’s calculate the material for a coil that will be installed in a boiler with a capacity of 200 liters. The temperature of cold water supplied to the container will be 15 oC, and after heating it is necessary to obtain water with a temperature of 80 oC: L = 1.5 ∙20 / (3.14 ∙0.01 ∙65) ≈ 15 m.
Table: length of copper heat exchanger for boilers with a capacity of 50–200 liters
| Storage tank volume, l | Equipment power, kW | Heat exchanger length, m | Boiler tank diameter, m | Coil diameter, m | Number of turns |
| 200 | 30 | 15 | 0,5 | 0,4 | 12 |
| 150 | 22,5 | 11 | 0,5 | 0,4 | 9 |
| 100 | 15 | 7,5 | 0,4 | 0,3 | 8 |
| 50 | 7,5 | 4 | 0,4 | 0,3 | 5 |
The number of turns of the coil depends on the method of bending and the distance between the elements. Typically, the coil is positioned so that the distance between the coils and the walls of the tank is at least 10–12 cm. The distance between the coils should not be less than 5 cm. The calculated values for storage tanks of various volumes can be seen in the table above.
If an indirect type boiler needs to be equipped with a tubular electric heater, then the power is calculated based on the fact that to quickly heat 50 liters of water, a heating element with a power of at least 1.5 kW is required. In addition, any combi boiler must be equipped with a thermostat.
What materials will you need?
First of all, you need to select a container for making the tank. The best material choice is stainless steel. You can use a ready-made barrel, order a tank of the required size, or purchase a gas cylinder. It has sufficient strength, suitable dimensions and shape. Another option for making a tank could be a container made of heat-resistant plastic.
Holes of the required size should be made in the tank. Two holes will be needed to connect the cold water supply and hot water supply pipes. One of them is done at the bottom of the tank, and the other at the top of it. Two more holes will be needed for the installation of a coil intended for the passage of coolant.
A tube made of brass or copper is perfect for making a coil. These materials transfer heat well and can be easily shaped into the desired shape. You can also use small diameter plastic pipes.
In order to make a coil, a pipe of the required length is wound on a base, which can be a strong metal pipe or a rounded log.
In order for the tube intended for the coil to be bent evenly, without creases, it is completely filled with sand before starting work. Then the coil will be of the correct shape, with the same diameter along its entire length.
Based on the volume of the tank, the temperature of the coolant and the temperature of the incoming water, the required length of the coil is calculated. To do this, use a special calculation formula. For a container with a volume of 200 liters, when using a coil with a diameter of 10 mm, its length will be about 15 meters.
Even before installing the storage boiler, you should decide how its thermal insulation will be carried out. It will not be possible to do without it, since natural heat losses are high and the efficiency of the water heater will be too low. The ideal way to insulate a tank is to place it inside a suitable container and then fill it with foam.
To assemble the boiler, you should ensure that you have fittings, nuts, rubber seals, and ball valves. When making a structure from a gas cylinder, welding equipment will be required.
Watch a video on how to make an indirect heating boiler with your own hands:
Required materials and tools
The storage tank of the device is made of heat-resistant plastic, stainless steel, aluminum or ceramic-coated steel. As blanks for the tank, you can take plastic barrels for food products, aluminum tanks or an unnecessary gas cylinder.
To make a heat exchanger, as mentioned above, it is better to use a round or square copper pipe. When assembling a heat exchanger from square pipes, 90° bends will be required.
As a tool you need to prepare:
- angle grinder;
- electric drill with core drill for metal;
- argon-arc welding machine;
- set of wrenches;
- disc for grinding and polishing metal;
- sandpaper.
To assemble the boiler you will need the ability to work with a welding machine.
Fittings, drain valve and other connecting elements are selected based on the size of the connected pipe. Additionally, FUM tape, a safety valve, a magnesium anode and a nozzle for its installation are purchased.
Device diagram and operating principle
Using a high frequency generator (tens of kHz), alternating current is generated in the induction coil. According to the laws of physics, at this moment a magnetic field with a constantly changing vector appears. Random eddy currents arise in a conductor exposed to a magnetic field. The molecules begin to move chaotically and the material quickly heats up.
With the help of such an inductor you can even heat a metal workpiece red-hot. Since water is flowing through the pipe, there is no excess heating.
The generator can be borrowed from a hob (induction, of course), or you can make it yourself.
Another donation option is an inverter welding machine.
Although, given the simplicity of the electrical circuit, many home craftsmen make similar generators from available radio elements.
Preparing the tank for water heater assembly
To make an indirect type boiler, you can use a new or old gas cylinder. This container is made of thick stainless steel 3-4 mm thick and is perfect for working with hot water.
Before assembling the heating structure, you will need to carefully prepare the cylinder. To do this, the product is cut in half using a grinder. The inner surface of the container is cleaned using an angle grinder with an appropriate attachment.
Before assembling the boiler, the cylinder must be opened and the inner surface cleaned
After this, the inside of the cylinder is washed, dried and coated with nitro primer paint. This work must be carried out without fail, otherwise after putting the boiler into operation, the heated water will smell like gas.
When using a tank from other metal containers, preparation is carried out according to a similar scheme.
Making a boiler yourself
Due to the rather simple principle of operation, such a device can be made independently. Now let's look at how to make an indirect heating boiler with your own hands.
All work on the manufacture of a water heater consists of assembling the component parts of the structure:
Tank
A tank is used as a boiler capacity. Its volume depends on the needs of the home owners for hot water and is calculated from the amount of 50–70 liters per person daily. Approximately, a 200-liter boiler is suitable for a family of 4 people.
For the heating device, the tank must be made of stainless steel, aluminum alloys or other corrosion-resistant material. An alternative is a gas cylinder, but its walls must first be cleaned and primed. Without this action, the hot water will smell like gas.
5 holes are made in the tank: 2 on the side for mounting the coil, one at the bottom for the inlet pipe, one at the top for water intake and one at the bottom for the drain valve. To use the boiler outside the heating season, it is necessary to install a heating element. The bottom hole is also drilled for it. Shut-off elements or ball valves are attached to the holes made.
Coil
A copper or brass tube is suitable for this element, the diameter and length of which depend on the volume of the tank. On average, for every 10 liters, 1.5 kW of thermal power of the serpentine tube is calculated. You can use a tube made of metal-plastic or other metal with good heat transfer.
The tube is wound in a spiral onto a cylindrical mandrel. To do this, you can take a log or a large diameter pipe.
When winding the coil, it is important to monitor the turns:
- in order to ensure the best contact of the heating surface of the tube with the heated water, the turns should not come into contact with each other;
- You should not wind it with excessive force, otherwise it will not be easy to remove the coil from the mandrel.
- The number of turns on the coil is calculated from the volume and height of the tank.
Thermal insulation
The outside of the tank must be covered with a layer of insulation. It is necessary to increase efficiency and reduce heat losses. To insulate the container, polyurethane foam, mineral wool or any other heat-insulating material that is attached to the base with wire, glue or strip ties is suitable. For a neat appearance, it is better to cover the tank body with thin sheet metal or foil insulation.
You can also insulate the tank using another container of larger diameter. To do this, a do-it-yourself boiler is inserted into a large tank, and the wall is filled with insulating material or foam plastic, using the principle of a thermos.
Heating element for combined BKN
Tubular heaters are sold in assortment in hardware stores. The following formula will help you calculate the performance of the heating element:
P= 0.0011*m*(tk-tн)/T
The following values are considered calculated:
- P is the power of the heating element;
- M is the mass of heated water;
- tk is the desired water temperature;
- tн - initial water temperature;
- T is the water heating time.
In a combined indirect heating boiler, the coil is placed throughout the water heating tank from bottom to top - the scheme ensures maximum efficiency and uniform heating of water. The heating element is installed at the bottom of the tank.
Installation
Assembly of a self-made boiler is carried out after preparing all the components:
- the coil is mounted in the center or along the walls inside the tank, and pipes are soldered to its inlet and outlet pipes;
- for a vertically standing boiler, supports are welded to the bottom, for a mounted device - “ear” loops;
- the heating element is installed;
- the boiler is tightly closed with a lid;
- connecting the coil according to the diagram for making an indirect heating boiler with your own hands to the heating system circuit;
- connecting the inlet/outlet pipe for water;
- pipe distribution to the kitchen or bathroom at the water collection point.
Indirect heating boiler piping
To connect an indirect type boiler, three working schemes are used:
- Trim with three-way valve.
- Connection to two circulation pumps.
- Tying using a hydraulic arrow.
Trim with three-way valve
The piping scheme using a three-way valve is used most often, especially when consuming a large amount of hot water. To do this, two heating circuits are installed in the system. The first is the main circuit used for heating rooms. The second is intended for heating water in the boiler.
The piping diagram for an indirect heating boiler with a three-way valve is most often used
To uniformly distribute and regulate the volume of coolant entering the boiler, a three-way valve is used, which is connected to the thermostat.
The principle of operation of the system is quite simple: if the temperature in the storage tank drops below the set value, the valve redirects part of the coolant to heat the water in the boiler. After heating the water, the coolant returns back to the heating circuit.
Piping with two circulation pumps
An indirect type water heater is installed in a system with two circuits: boiler and heating. A recirculation pump is used to regulate each individual circuit. In this case, the pump on the boiler circuit is mounted in front of the heating equipment pump.
In the piping scheme with circulation pumps, the supply of coolant to the boiler is automatically regulated
Both pumps are connected to the boiler thermostat. When the water in the boiler cools, the thermostat turns on the corresponding pump, which redirects part of the flow from the heating and vice versa.
Tying using a hydraulic arrow
Piping using a hydraulic separator is used in central heating systems consisting of two or more circuits. If in a system without a hydraulic switch, the redistribution of flows in the circuits necessarily affects the operation of any equipment, then when it is installed, a smooth redistribution of cold and hot flows occurs.
The boiler piping scheme with the installation of a hydraulic separator ensures the smoothest distribution of cold and hot water flows
For example, a hydraulic separator must be installed in private houses, where a heated floor system is connected to the central heating in addition to an indirect heating boiler. The design of this harness is quite complex to implement, especially with a large amount of equipment. Therefore, it is better to entrust the installation work to specialists.
Coolant recirculation system
This piping scheme is used when it is necessary to minimize the rate of heating of water in the boiler, since with frequent downtime, the water in the tank quickly cools down, and it takes from 30 to 60 minutes to reheat it.
To do this, a “return” to the water heater is installed in the pipeline running from the boiler to the water tap. A circulation pump connected to a thermostat is also installed in this area.
When the water in the pipeline stagnates and cools, the thermostat turns on the pump, which redirects the cooled water back to heating. When the water supply is restored, the user will not have to wait for it to heat up, since it will already be warm.
Important nuances
For good boiler operation, the number and location of heaters in the tank is important. It is recommended to fix them one above the other, at the same distance from each other and from the bottom. According to physical laws, warm water rises, flows to the back wall, smoothly falls, and is replaced by an even hotter stream.
Constant movement helps maintain the temperature and heat the entire volume evenly.
Number of heating elements
The number of heating elements in the boiler depends on their power and the desired performance of the device. The standard value for household heaters is 2 kW. They use 3 such elements (6 kW in total) to heat water with a volume of 300 liters to 100° in 3 hours. Based on this, you can calculate how many heating elements are needed for a homemade water heater. The more there are, the faster the device copes with the task.
If you are going to consume hot water in large quantities, then it is better to make a model with two heating elements.
Volume of the tank
According to statistics, a resident of an apartment uses 100-400 liters of water every day. When making a boiler, you need to take into account the number of people who will use it and the frequency of use. The minimum capacity of the container is 30 liters. You need to remember that the larger the water heater, the longer it takes to heat up.
Other details
Safety should be considered during the manufacture of the device and its operation. Helpful Tips:
- If the water circulates naturally in the boiler, you need to install a temperature sensor, which will turn off the heating element if it overheats.
- It is safer to connect the device not to an outlet, but to a separate line with a cable of increased cross-section.
- Exposed wires must be insulated and the entire structure grounded.
- The minimum distance from the device to the ceiling is 30 cm, and to the floor - 80 cm.
- If the connection is to a central water supply system, it is necessary to install a safety valve that reduces the pressure.
Features of operating an indirect boiler
For proper functioning, the boiler must be installed on a flat, solid surface. When installing a wall-mounted boiler, appropriate fasteners are used that are designed for the weight of the device filled with water.
A tank with a capacity of up to 100 l is mounted on dowel-nails 100 mm long, and for equipment with a capacity of 150–200 l you need to use fasteners up to 150 mm long. It is advisable to hang the boiler on walls made of concrete or brick.
On the line supplying cold water, a check valve must be installed in front of the boiler, which will prevent hot water from entering the cold circuit.
The indirect heating boiler is connected to the system through a check valve
The main problem when operating indirect type boilers is the formation of scale inside the storage tank and heat exchanger when water is heated above 80 °C. Therefore, with moderate consumption of hot water (washing dishes), it is advisable to reduce the temperature to a comfortable 40–50 °C. This will significantly extend the life of the equipment.
Boiler cleaning and repair
If the boiler is used frequently, the tank must be cleaned once a year. To do this, a concentrated solution of citric or acetic acid is pumped into the tank and heated to a temperature of 80–90 oC. After 20–30 minutes, the liquid is drained. If the heating system uses a coolant in the form of ordinary water, then for preventive purposes the heat exchanger is cleaned according to a similar scheme.
If a leak appears at the pipe connection, it is necessary to disassemble the problem area and reinstall it using more sealant. Instead of sanitary flax, more modern materials should be used, for example, FUM tape or sanitary thread.
Instructions for connecting and starting the system
First of all, a homemade homemade indirect heating boiler needs to be connected to the heating main. Where an autonomous heating system is used, the boiler is connected to the home boiler network.
Mechanical connection is made with the lid on the boiler tank open. After connecting, you need to slightly open the shut-off valve connecting to the return coolant line and make sure that there are no leaks both from the outside of the device and inside.
Before putting a homemade indirect heating boiler into full operation, it is recommended to conduct a leak test of the system. The photo shows a factory copy
If no leaks are found, open the coolant supply line. It is necessary to wait some time for the coil to warm up to the temperature of the heating system. In full heating mode, carefully check the coil and all connection points again for possible leaks.
If the check shows the integrity of the system, close the lid of the vessel and connect the heated water supply and discharge lines. The system is tested in real heat transfer mode.
Electric indirect heater
The use of heating elements does not apply to indirect heating methods, since there is direct contact of water with the primary heat source. An exception is the induction water heater. The liquid receives energy virtually, as it were, without touching the internal thermoelement. In fact, it is not in the design at all.
A do-it-yourself instantaneous water heater is made according to the principle of induction hobs. Only instead of a pan of water, a metal pipe is heated.
The main advantage of the system is that heating occurs not due to direct thermal contact with a source of electrical energy, but with the help of eddy currents. Losses on the heat transfer coefficient are minimal, efficiency tends to 100%. At the same time, both the metal pipe and the liquid itself are heated (if it is sufficiently thermally conductive). In addition, flow-through induction heaters are significantly safer than boilers with a traditional electric heater: there is no contact of water with an element connected to the electrical network.
The disadvantage is obvious: heating requires an electrical connection. That is, the option of indirect heating using a wood-burning (gas) boiler does not work. The room must be electrified.
Thermal insulation
To minimize heat loss, the tank should be wrapped in a layer of thermal insulation.
For this purpose, use:
- construction foam;
- isolon;
- polyurethane foam;
- foam;
- mineral wool.
Some craftsmen use a foil-based backing for the laminate. The water heater is wrapped in this case like a thermos. The insulation is attached using wire, glue or strip ties. We recommend insulating the entire building.
The lining will not only ensure long-term preservation of hot water, but will also shorten the duration of heating of the tank, which will reduce coolant consumption. Without well-equipped thermal insulation, the water in the device will quickly cool down.
Often they resort to the construction of a double tank: a small tank is placed inside a large one. The space created between them also performs a heat-insulating function.
To secure the container, hinges are welded to the top of its body, and a metal corner is installed on the wall to which they are attached.
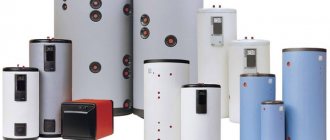
Installation methods and shapes of boilers
Boilers come in wall-mounted and floor-mounted versions, horizontal or vertical models. The capacity of the product, which is mounted on the wall, is naturally lower: it does not exceed 200 liters. Floor-standing devices can hold one and a half thousand liters. Boilers are mounted on the wall using standard brackets and suitable dowels. The most common boilers are cylindrical in shape.
Working pipes for connecting the system are located at the rear of the unit for convenience and aesthetic purposes. There is a temperature sensor and a thermostat on the front panel. There are models with the possibility of additional connection of heating elements if the power of the main heat source is not enough.
What can BKN be made from - materials
A home-made indirect heating boiler, provided that the coil is correctly calculated, the capacity is selected and thermal insulation, will not be inferior in performance to factory-made storage models.
Boiler manufacturing diagram:
- preparation of storage tank;
- heat exchanger production;
- installation of heating elements;
- thermal insulation of the body.
During the assembly, thermal engineering calculations, a sectional design of the boiler and a step-by-step execution plan will be required.
How to make an indirect heating tank
For the manufacture of containers, heat-resistant materials are used, which are durable and resistant to mechanical damage. You can make a tank from a ready-made container, for example, from a barrel or a beer keg, or use a pipe of sufficient diameter (in this case, welding work will be required).
Another popular option is an indirectly heated storage boiler made from a plastic barrel. The advantages include the small weight of the container and ease of installation of the coil and pipes. If a plastic storage device is installed, the polymer must meet the following criteria:
- suitable for food water;
- withstands heating up to 90°.
| Dimensions | Description | 1500 l |
| N | Height | 2285 mm |
| ø ext | External diameter (including insulation) | 1200 mm |
| ø int | Inner diameter | 1000 mm |
| F | Cold water inlet (1″1/4) | 315 – 1″1/4 mm – ” inch |
| G | Water outlet from the lower coil (1″1/4) | 470 mm |
| L | Hole for bottom temperature sensor (1/2″) | 582 mm |
| M | Water supply to the lower coil (1″1/4) | 1180 mm |
| N | Water outlet from the upper coil (1″1/4) | 1330 mm |
| P | Hole for top temperature sensor (1/2″) | 1500 mm |
| Q | Recirculation (1″) | 1460 – 1″ mm – ” inch |
| R | Water supply to the upper coil (1″1/4) | 1735 mm |
| S | Domestic hot water outlet (1″1/4) | 1935 – 1″1/4 mm – ” inch |
| A | Inspection flange (ø internal 114 – ø external 168) | 520 mm |
| B | Additional electrical resistance (1″1/2) | 1255 mm |
| C | Thermometer (1/2″) | 1825 mm |
The indirect heating tank is mainly installed vertically: hung on the wall or mounted on the floor, which must be taken into account when choosing the shape of the tank.
The metal most suitable for a homemade indirect water heater is stainless steel. It should be noted that there are dozens of grades of stainless steel and only a few are suitable for household needs. An indirect heating boiler made of stainless steel is the most reliable. It will last a long time due to its good anti-corrosion properties.
The structure of a stainless steel tank does not differ from that used in a standard storage tank, but requires the use of special equipment. The weak point of all containers (made independently or in a factory) is the weld seams. The final result and, accordingly, the duration of operation of the water heater depend on the qualifications of the welder.
Electric water heater market overview
Currently, there are a larger number of manufacturers, both domestic and foreign, on the Russian market of electric water heating equipment. Of course, foreign manufacturers such as MTS and Lorenzi Vasco mainly dominate, but their products cannot be called pure imports. Most companies open their own full-cycle production facilities in Russia, with the production of basic components. This allows us to reduce the cost of production and make it available to a wide range of buyers. One of such companies is the Italian corporation Thermex, whose products have almost become a Russian brand.
It has been successfully operating in Russia for more than twenty years, opening its own factories and providing our market with high-quality electric water heaters. The product range from this manufacturer includes all types of electrical equipment for heating water. The popularity of the Termex water heater among consumers is very high due to the innovative ideas used in its manufacture. The operating principle of the Termex water heater, regardless of the type of device, does not differ from similar products from other manufacturers. But it should be said right away that the company’s products have won the trust of the Russian buyer with their technical characteristics and affordable price.
Why are water heaters from Thermex Corporation so good? Everything is very simple! The product range is very wide and allows almost any consumer to select water heating equipment to suit their needs. Termex electric storage water heaters are available in a wide range of internal volumes from 10 to 300 liters. Flow-through heaters of varying power allow you to almost instantly heat running cold water to the required temperature.
Other advantages of Termex electric water heaters include the following technological and design features:
- the model range of storage water heaters consists of both round and flat models of various volumes with a laconic design;
- high-quality thermal insulation of products and automatic control of operating modes allow significant energy savings;
- various models use both electronic and mechanical control, which allows you to optimize the entire water heating process;
- storage water heater tanks are made of special stainless steel with high corrosion resistance;
- in instantaneous water heaters, the heating module is made entirely of copper, which increases its reliability and durability;
- In some models of storage water heaters, the inner surface of the tanks is covered with bioglass porcelain, which completely eliminates corrosion of the tank.
In addition, the product range includes electric water heaters with a combined water heating system.
Stages of work on creating a boiler
The boiler drawing may look like this.
Creating a Heat Exchanger
When choosing the diameter of the future coil, it is important that the water in the tank comes into maximum contact with such a pipe. To do this, leave free space between the turns of the pipe.
To make the work easier, you can use a log or pipe around which the heat exchanger tube will be wrapped. One end of this tube is fixed, and then turns are smoothly created, controlling the density of the resulting spiral.
Preparing the boiler tank.
Having chosen a suitable container, you need to make two holes in it for cold water in and hot water out. Ball valves should be built into each of them for ease of operation. You also need two holes for mounting the heat exchanger. Another hole will be needed for the drain valve, which is located at the bottom of the device.
Installing a water heater safety valve
This small device plays an important role in the boiler connection diagram. When the water in the tank begins to heat up, it expands in volume and as a result the pressure increases.
When it reaches a critical value, the safety valve is activated and releases some of the water to reduce the pressure. Therefore, the valve pipe must be connected with a flexible tube to the sewer outlet.
In large-capacity tanks, it is customary to additionally install a membrane expansion tank (expanzomat). It is able to compensate for a larger volume of expanding liquid. It is important when buying a tank to choose one that is intended for water supply systems, not heating. It can be recognized by the maximum operating pressure of 7-8 Bar (for heating tanks 3 Bar).
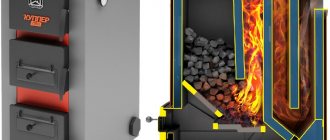
Manufacturing and lining of the firebox
The most difficult task in producing a homemade Titan is rolling the steel sheet into a cylinder. With a significant thickness of the metal, this is not so easy to do; the parts must be welded without stress, because when exposed to high temperatures, the strength characteristics of the weld are greatly reduced.
Initially, you should select the expected internal diameter of the firebox in the range of 50–70 cm and cut two disks to this size. According to the diameter, the circumference is calculated, and a strip is cut out of it from the sheet, from which the walls of the combustion block will be formed. The height of the firebox, as already mentioned, is selected according to the volume of the tank: about 5 kW of heat is consumed to heat every 50 liters of water, which corresponds to approximately 1 kg of dry firewood. Thus, for a 200-liter heater, the firebox should freely accommodate 4 kg of firewood without taking into account the volume of the ash pan. The higher and narrower the heating column, the more efficient the heat transfer occurs, but the stability of the Titan decreases.
The cut steel sheet is laid horizontally, and two disks are installed vertically on its short edge. One is placed parallel to the long edge with a slight indentation - this disk forms the bottom of the combustion block. The second disk is installed parallel to the first with a distance of 20–25 cm from it - this is how a partition is formed between the firebox and the ash pan. You can immediately cut an opening in the partition, the size of which is 40–50 mm smaller than the existing grate.
Two disks act as a rigid mandrel for rolling the cylinder. First, they are welded to the strip on both sides with tacks 10–15 mm long, carefully monitoring the perpendicularity of the installation. Next, the metal is driven over the discs with a sledgehammer; if the metal thickness is more than 5 mm, heating with a propane torch may be required. When the two parts to be welded are pressed tightly, the perpendicularity of the disks is checked, after which the welding seam continues for another 10–15 mm and so on until it goes completely around the circumference. When the seam is completed to its full length, it is covered with another one: the electrode is drawn without separation with heating and surfacing of a wide area, the weld pool is displaced in a zigzag. After welding the discs to the wall, a longitudinal seam is welded on the outside.
When the firebox body is assembled, it is lined from the inside with fireclay bricks without any binder in the seams; the thickness of the lining is about 50–70 mm. To accurately adjust the stones to the size of the firebox, they are first placed vertically on a flat surface in a cylindrical well, the internal diameter of which is approximately equal to the diameter of the firebox. In this case, the bricks are located closely on the inside and with the most uniform indentation from each other on the outside, diverging in rays.
The distance between adjacent stones at the most extreme points must be divided in half and the bevels of the resulting size removed with a diamond wheel, achieving a wedge-shaped shape. After this, the bricks are installed against the walls of the firebox from the inside; if necessary, they are adjusted to each other using an angle grinder. The stability of the lining can be ensured with the help of a steel strip rolled into a ring and installed from the inside. After lining the walls, a grate is placed inside.
Choosing a tank for the boiler
The volume of the storage tank of the water heater should be calculated based on the daily consumption of hot water in the house. If several people live in an apartment or house, a tank of 100 liters will be sufficient. And for a family of 4-5 people, you should choose a container with a volume of 200-300 liters.
The tank used should be made of an aluminum alloy, stainless steel or other metal that is resistant to corrosion. You can use a large-sized gas cylinder, the walls of which are additionally cleaned and primed. If the walls of the cylinder are not primed, the hot water may have an unpleasant gas smell.
Five holes must be drilled in the selected tank. Two at the bottom for the inlet pipe and emergency drain, two at the side for installing the coil and one hole for water extraction at the top. If you plan to use such a boiler outside the heating season, you must also make holes for installing an electric heating element. For the heating element, one or two holes are drilled from below. Ball valves or shut-off elements are installed in the holes made, after which the tightness of the storage container is checked.