Manufacturing process
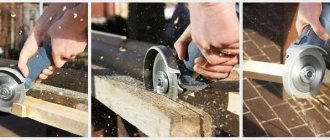
When figuring out how to make a grain crusher with your own hands, you need to take a responsible approach to the process of designing and assembling the future device, since the quality of the finished product directly depends on this. For assembly, the master will need a standard set of tools, as well as a drill with a set of drills, a jigsaw, a chisel and knives.
Preparation of drawings
There are several varieties of such a device, and therefore it is necessary to decide in advance on the model to be manufactured. The amount of necessary materials, as well as the assembly process itself, directly depends on its type. The simplest option is a household grinder made from a grinder, where a pan is used as a working chamber.
Be sure to read: Potato planter for walk-behind tractors
Necessary materials
In order for the grain crusher to meet all expectations and have a long service life, only high-quality materials with a minimum degree of wear should be used during its assembly. This is an angle grinder, on the basis of which the new device will be assembled.
Other materials will be required:
- pan of the required volume;
- knives that will be used as the main working element. For this purpose, it is recommended to use products with a thickness of at least 3 mm;
- fasteners - bolts, angles, nuts;
- sheet plywood with a thickness of at least 1 cm;
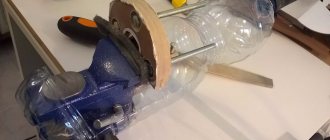
- container for loading and unloading grain - a 5-liter water bottle or similar item can be used.
Also during the assembly process, you can use metal brackets, with which you can attach the grinder to the base of the future device. If desired, the plywood for the crusher body can be replaced with another material, for example, metal or boards.
Necessary tools for work
Assembly order
Once all the necessary materials and drawings have been appropriately prepared, you should proceed directly to the assembly process. You will need to make a sieve using an old saucepan. To do this, you need to use a drill to make several holes in it of the required diameter, through which the ground grain will fall into the container for the finished product.
Then you should begin forming the base and subsequent actions, adhering to the following instructions:
- Cut holes for angle grinders in a sheet of plywood, and attach the bracket using bolts or other similar elements.
- Install the grinder into the holes made, and then mount the working knives. They can be equipped with either 4 or 2 blades, but in the first case the efficiency of the device will be much higher.
- Attach a raw material compartment made from a plastic bottle to the resulting structure, and then place the resulting device on a container for ground grain.
Be sure to read: Buy a tractor on lease
This option is suitable if you need to obtain medium and coarse grain, but for a finer analogue you should use an alternative design. It involves installing working knives attached to an angle grinder directly in the bottom of the pan, through specially cut holes.
Such a device will have low productivity, but is perfect for preparing small portions of finely ground grain. When assembling this unit, it is extremely important to install a gasket on the shaft, which will prevent contamination from getting into the mechanism and causing it to break. To avoid the spread of dust indoors, it is highly recommended to use a cover.
A fine grinding device can be used not only for crushing grain crops, but also for solving other problems, for example, for preparing powdered sugar or combined feed.
Types of grain grinding machines
Types of machines for grinding grain
Depending on the grinding method, design and location of the working parts, there are 4 types of grain crushers:
- Rotary – crushing of grain in such devices occurs due to a rotor located horizontally and moving at high speed.
- Hammer crushers - the design of such grain crushers includes a rotating vertical drum and stationary hammers located in a circle, against which the grain is crushed. When grinding in this way, the finished flour is poured down and, passing through a sieve, ends up in a container placed under the deck of the housing.
- Roller crushers crush grain due to 2 rollers located in one chamber, rotating towards each other. At the same time, the gap between them is so small that the incoming raw material is not simply crushed, but, due to high speed, is crushed into dust. The advantage of such devices over others is the ability to crush grain with high humidity.
- Millstones are grain crushers in which grain is crushed when it gets between two discs (millstones) located with a small gap. In this case, one disk rotates at high speed, and the second is stationary.
Be sure to read:
Harvesting haylage in rolls in film: step-by-step instructions
Among these varieties, the most common are rotary and hammer ones - they are more productive, reliable, and easier to repair and maintain.
Do-it-yourself grass cutter driven by an angle grinder
I have birch trees growing in my dacha. Leaves are falling from the trees. We have to clean it up, burn it, and fill up the compost pit. The foliage takes a long time to rot. I decided to chop it up. For this you need a grass cutter. I looked at what they were making on the Internet. I turned on my brain and this is what I came up with.
Do you like an inexpensive option for a garden shredder? Read the article further and find out how to make a homemade product from an angle grinder and a metal tank. Tok2Z acted like this:
- He thought about how to twist the chopper blades. The choice is small - install a motor from a washing machine, or buy an electric motor. According to the user, the motor from the washing machine is weak, and I didn’t want to purchase a three-phase unit and convert it to one phase.
- Tok2Z bought on the market, for 2 thousand rubles, an old grinder with a power of 2 kW and blades from a lawn mower for 700 rubles. I ordered an adapter sleeve from a turner, spending another 500 rubles.
- I welded the frame and placed a galvanized water tank on it. I assembled the structure and turned on the grass cutter.
The turnover is crazy. I threw a shovelful of leaves into the tank, and they blew away! I checked where the flow was going. Air goes up from the edge of the tank and is sucked in in the middle. I cut out a galvanized ring and installed it in the center of the tank. Threw the leaves. The knives crushed it just right, and it flew into the lower pipe.
To grind the grass into a very fine fraction, the user installed a corner in front of the “exhaust” pipe.
The grass cutter shreds the leaves directly into the compost bin.
Compare: a pile of leaves.
The grass cutter threshes everything - grass, leaves. Sometimes, along with the foliage, a wire comes across. Pebbles. Pieces of metal. The crusher crushes the stones. No iron. You have to turn it off, look for trash and throw it away. The noise is terrible. One of the disadvantages is the thin walls of the tank. It breaks through. I will redo it. I will make a tank from a sheet of iron 1-2 mm thick.
Crushers for home use
“Vikhr ZD-350K”
Among factory-made grain crushers, the following models are most suitable for private farms:
- "Whirlwind ZD-350K";
- "Zubr-2";
- "Three Little Pigs 350";
- "Farmer ISE-05";
- "Cyclone-350";
- "Bison 400";
- "NIVA IZ-250".
"Zubr-2"
Important! The average cost of a factory installation, depending on power, performance and brand, ranges from 2000-2300 to 6200 rubles. Assembling a homemade device if you have an unnecessary working washing machine, an old vacuum cleaner, or an angle grinder will cost only 500-1000 rubles.
"NIVA IZ-250"
Assembling the chopper body from metal scraps
Now we had to think about how best to make the side walls of the case. It was decided to scald the plate with corners on three sides. The fourth must be left open, because it is through it that the chips from the ground branches will spill out. And then a large washer caught my eye, which I decided to weld in the center, reducing the diameter of the hole cut earlier. She came at the right time.
The corners were located as follows: a plate was welded on the inner edge, the second edge was directed upward. The washer is also located at the back. This is clearly visible in the photo example.
The corners and washer are welded, work is in full swing
Attaching brackets for fixing the angle grinder
Now it was necessary to think about how to fix the angle grinder in such a way that it could be removed at any time and used for its intended purpose. It turned out to be easy. For this, ordinary lock loops were used. Once upon a time I didn’t finish them, so they were left waiting in the wings. The grinder itself has holes for screwing in the handle on both sides. So it was decided to fixate with them. Having laid the angle grinder on top, I marked the locations of the lugs, after which they were welded. There is no need to be afraid that they will move a little. Subsequently, they can be slightly bent.
We weld the eyes for the lock on which the grinder will be fixed
But eyelets alone will clearly not be enough. In order to chop larger branches, more serious fixation will be required. To do this, it was necessary to weld two pieces of reinforcement, which would act as a continuation of the platform. Their task will be to firmly “hold” the handle of the grinder. They should be located parallel to the eyes with a slight narrowing, approximately diagonally across the square of the platform. This is probably not easy to understand in words, so there is a photographic example below.
This is how the pieces of reinforcement that secure the handle of the grinder will be located
The metal holding rods were thoroughly welded, after which it was possible to try the grinder on the platform. I had to bend the lugs a little to get them to fit exactly in the holes. After the bolts in them took their places, giving the structure a general appearance, it was necessary to think about how to secure the handle of the grinder to the reinforcement rods.
The fastening bolts securing the angle grinder through the eyes are screwed in
The answer came naturally - an ordinary bracket made of a hairpin with threads cut on both sides. It was welded to the reinforcement, and at the bottom there was a small plate with two holes into which these threaded edges of the bracket would go, clasping the handle of the grinder. And the nuts and washers will be tightened from below. The design is simple, but trouble-free, like a Kalashnikov assault rifle. Bringing my plans to life was a matter of five minutes - I found such a bracket with a plate, and therefore did not have to spend time on manufacturing.
The bracket is welded, now fixing the grinder on the platform is as reliable as possible
Grain crusher from a washing machine
Grain crusher from a washing machine
You can make a simple and productive grain crusher from an old vertical type activator machine (Oka, Volga, Fairy) as follows:
- The squeezing device is removed from the machine.
- With the washing machine on its side, unscrew the fixing (locking) screw or bolt on the activator pulley.
- Having installed the machine in the working position, the activator is removed along with the shaft.
- A plate of galvanized sheet metal of the appropriate size and shape is attached to the activator niche.
- The shaft is unscrewed from the activator.
- A trapezoidal knife is cut out of an old circular saw and rapid blade, the diameter of which is slightly smaller or the same as that of the removed activator.
- The knife is sharpened using sandpaper and secured to the shaft using two nuts.
- The shaft with the attached knife is inserted into the hole in the tank and secured in the pulley with a locking screw.
- To collect the final grinding product - flour - the drain hole at the lowest point of the tank is widened using a hammer and chisel, a piece of steel pipe is inserted into it and brought out at an angle.
- To prevent large particles from getting into the final product, a fine-mesh steel mesh or a sheet of galvanized sheet with holes 4-5 mm in diameter is installed in front of the hole for collecting flour at an angle of 60-700.
- To load grain into the removable lid of the machine, widen the existing hole and insert a 5-liter plastic bottle with a cut bottom into it.
The advantage of such a homemade grain crusher is that its assembly does not require drawing up a drawing or making a base for the engine.
Be sure to read:
We assemble an electric shepherd with our own hands: operation diagram, number and height of lines
In addition, it has good stability, has a spacious tank (up to 30-40 l) and low electricity consumption.
