Having your own sawmill is not only useful, but also profitable, allowing you not only to save your own money on sawing large volumes of wood, but also to use it on a production scale. These devices have gained particular popularity among those who live in the private sector and are forced to constantly solve construction and repair problems.
It is far from being a cheap purchase. why an alternative to an expensive factory model can be a chain sawmill, which you can make at home from an electric saw.
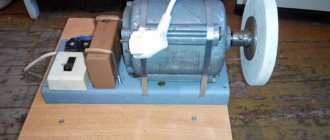
Homemade sawmill and circular saw from an electric saw
Your own sawmill is a profitable device, since wood is one of the most popular building materials.
There are two options for getting a sawmill: make it yourself or buy it in a store. Of course, the second option is simpler, but the first has more advantages. First of all, a homemade electric chain saw is a cheaper product, and in addition, such a device will fully meet the owner’s requirements. Below we will present two options for homemade saws: a sawmill from an electric saw and a circular saw from a hand-held circular saw. To make the first one, you will have to make some purchases, as well as stock up on a welding machine; the second option can be made from materials that any owner will probably have in his garage or on his property.
Types of sawmills
The sawmills that are sold in the store are excellent productive devices with great functionality, designed for large volumes of wood. Such a tool can pay for itself in 2-3 months, but it is not advisable if used exclusively for domestic purposes. In this case, you can make it yourself using a small electric saw.
Currently, three types of sawmills can be found on the tool market:
Circular saws are one of the most common saws on the farm. Their disadvantage is the high cost of high-quality discs, as well as the relatively large amount of waste. Band saws are the most economical, they are not afraid of bad weather, leave little waste, but at the same time they have a complex structure, which makes making them at home a very difficult task. The simplest version of a sawmill made from an electric saw is a busbar; they are distinguished by their elementary design and can also process large volumes of wood of any thickness.
Features of sawmills
The structures consist of chainsaws. They are mounted in a special trolley, which in turn is equipped with rollers. This allows you to move the tool along the paved path and process the wood.
- Chainsaws are used when working with round wood. They leave behind a lot of sawdust.
- Band chainsaws cut large diameter logs. They are universal, but scatter sawdust in different directions.
It is not always advisable to use ready-made stations at home. In the best case, it is better to create a mini sawmill from the saw that you have on hand.
Making your own splint saw
In order to make a sawmill yourself, you will need drawings and certain calculations. The manufacturing process is not particularly complicated; the only point is the availability of all the necessary resources. Naturally, a homemade sawmill will be inferior in performance to factory-made products. However, it is perfect for making beams and boards.
To make a chain saw you will need certain materials:
- metal rails;
- metal tubes with different diameters;
- electric motor;
- chainsaw tire;
- drive sprocket (also suitable for a chainsaw).
As an electric motor, you can use any engine, for example, from a semi-professional electric saw, from an old chipper, or you can purchase it specially.
If the choice falls on the purchased option, then a three-phase electric motor with a power of 5.5 kW is ideal for household needs.
Assembly of the cutting part
The cutting part is represented by a tire and an electric motor connected to each other. The entire structure is placed in a metal frame, which is mounted on a vertical strong axis. In other words, the frame in which the saw is enclosed will be able to move vertically within another frame. This movement will occur due to the guide axis.
The first stage will be the manufacture of a frame in which the tire will be installed. The frame has the shape of a rectangle. On one side of the tire it is attached to a vertical axis, which ensures rotation.
The sprocket that allows the tire to move has a central hole. An axle made of a strong alloy, which has high strength, must be inserted into it. Low carbon steel works great. The axle resists the horizontal movement of the tire, that is, the tire itself has a horizontal position in space, and the axle is vertical. Bearings are placed on both sides of the axle close to the tire - this helps to avoid vertical displacement of the cutting part. After this, bushings are put on top, which clamp the bearings.
The upper part of the axle is attached to a metal profile. The opposite part of the profile is welded to the frame in which the electric motor is installed. Thus, the rectangle is formed as follows: the lower part is the tire, on both sides of it is the axle and the electric motor, the upper part is the bar.
This design does not allow the tire to play during operation.
The electric motor and drive drum are mounted in the opposite part from the axis. To attach them to the bar you will need the remaining parts from the electric saw. The electric motor is installed on a rigid housing. Here we must take into account large vibrations, which means that the base for the engine must be very rigid. A metal axle or rigid profile is welded on the engine side. It is due to this that the entire cutting structure will move vertically to ensure that the log is cut in the right place.
Transferring the body with the saw to the base
The next step is to transfer the entire structure to the main frame, which has the shape of a parallelepiped. This frame is installed on rollers that will move along the rails and cut the log. The sides are a welded frame made of thick metal. They are fastened together at the top. In other words, the front view will resemble the letter P mounted on rails.
The distance between the side posts is 1-1.5 meters and is calculated based on the length of the tire: it should be slightly larger. The side posts themselves are so wide that a structure with a cutting base can be installed inside. If this structure is 60 cm wide, then the width of the side edges should be the same. This is done with the expectation that a saw will be installed inside one of the racks. The axis along which it moves is attached at the top and bottom inside the side frame.
Thus, vertical movement is ensured by the axis. Horizontal movement occurs using rollers that roll on rails.
Making a circular saw from a hand-held circular saw
For a home craftsman, having a circular saw at home is a matter of vital importance. It’s quite possible to do it yourself. The easiest way to make a circular saw is to use a hand-held circular saw. To manufacture a machine, the design of an existing saw does not need to be altered. It is enough to make a table for her. Obviously, the saw will be fixed under the tabletop, and the disk will be located above it through a special hole.
To make a table you will need 40*40 wooden blocks and plywood. A square base is made with a side length of 80 cm and a height of 40 cm.
A square sheet of plywood is used as a tabletop; it is best to use varnished or laminated plywood - it ensures smoothness and easy sliding . A cut for the disk is made in the central part. Holes are pre-drilled in the corners for attaching the table top to the table.
A circular hand saw is attached to the bottom of the tabletop. The easiest way to do this is with bolts. The hats must be carefully sunk into the surface.
To turn on the saw, you need to fix the power button on it, and insert the power plug into the socket that will be connected to the start button.
For ease of use, you can attach a metal corner to one side, which will serve as a longitudinal stop. To move it, you can make cuts at right angles to the disk, and move it by loosening and tightening the bolts that secure this stop.
Do-it-yourself goat for sawing wood
The folding firewood trestle is a convenient and compact stand. It makes sawing logs and thick boards easy. The folding stand does not take up much space and can be stored in a shed or garage. To manufacture the structure, you will need to prepare high-quality timber and boards. Assembling the stand takes about 2 hours.
Necessary materials
Assembling a wooden goat for sawing firewood with your own hands is not difficult. But it is recommended to use durable materials in the work. To maximize the service life of the structure, you should pre-treat the wood with an antiseptic. This will protect the materials from moisture and prevent them from being damaged by harmful insects.
A wooden sawmill for sawing firewood is made with parameters of 1×1 m. This size of the product is sufficient for sawing both large logs and small stumps. Before starting work, the contractor will need to prepare the following materials and auxiliary products:
- timber: 6 units with a length of 1 meter;
- board: 4 units with a length of 1 meter and a width of approximately 7-8 cm;
- M8 bolts: 3 pieces;
- nuts and washers: 3 pieces each;
- wood screws: 24 pieces.
Using these materials and consumables, you can assemble a compact folding goat that will have increased stability. Additionally, to carry out the work you will need a screwdriver and a wood saw.
Step-by-step instructions for making sawhorses
Next, you need to install an M8 bolt with a semicircular head between them.
You need to connect the first pair of legs, tighten the bolt, install the washer and nut.
Repeat the procedure for two more support pairs. Further work is carried out according to the following scheme:
2. On a pair of boards located on one side of the trestle, two vertical holes should be drilled at a distance of 67 mm from each edge (see drawing of the trestle). Additionally, holes are drilled on one side at a distance of 245 mm.
3. On the second pair of boards, you need to prepare the following pairs of vertical holes: at a distance of 22 mm from the edge on both sides, at a distance of 335 mm from one edge.
4. Prepared boards, pre-divided into pairs, are screwed to the legs: the bottom ones at a distance of 80 mm from the edge, the top ones at a distance of 535 mm from the edge (see diagram of the wooden trestle). The indicated indents are measured to the extreme bottom line of the board.
Features of storage and operation of goats
When carrying out work according to these instructions, it is recommended to additionally use the attached drawings, photos and video materials. They will help you easily make durable sawhorses
The finished structure can withstand a lot of weight, but it is important to store it in normal conditions: a dry room. Constant exposure to moisture or humid air will cause materials to deteriorate
It is especially important to consider the rules for using the workpiece. It is not recommended to overload it with heavy logs
Folding sawhorses are suitable for sawing firewood with a chainsaw and a hand saw. The reliable design will become indispensable in a summer cottage or in a private house. With its help, you can easily and quickly prepare firewood, logs for lighting a stove, barbecue or home fireplace.
Video of making a goat for sawing firewood with your own hands
Varieties of homemade chainsaw sawmills
A standard woodworking sawmill is a stationary installation or a mobile device that can be moved from place to place. The use of an electric drive is advisable only when operating equipment near premises equipped with electrical wiring. Electric motors are used for industrial installations connected to a 3-phase network. The reduced power of small-sized equipment with motors designed for 220 V does not allow sawing large logs.
A homemade sawmill made from a stationary type chainsaw comes with forced movement of the workpiece and machines with a movable working tool. When moving the workpiece, improved cutting quality is achieved due to the rigid fixation of the tool. But due to the complexity of the guide mechanism, the circuit is rarely used in homemade sawmills.
The mobile unit is characterized by reduced frame dimensions and the use of removable elements. It is allowed to use the workpiece as a guide element for installing a gasoline saw. The equipment is used when carrying out work in the logging zone, as well as when sawing wood in parks or on personal plots. A portable circular sawmill allows you to cut boards into elements with reduced width or thickness, and cut the material into pieces of the required length.
Any mechanical installation for sawing or processing wood is a rather dangerous unit that requires compliance with safety regulations.
The working area of the sawmill is equipped with additional lamps, and an area for storing the resulting material is provided next to the installation. Cables or crossbars must not be pulled into the sawmill operator's movement area. When using an electric motor to drive units, it is necessary to install circuit breakers that cut off the power in the event of a short circuit.
How to choose an engine for a homemade sawmill?
The engine is the basis of the sawmill, so the choice of its characteristics must be taken with special responsibility. First of all, you need to figure out what type of motor is suitable for assembling a homemade product. The best solution has always been and remains a standard gas engine. Electric motors do not have sufficient power and thrust. In addition, not all electric chain saws are equipped with high-quality protection from dust and moisture, but they are the ones that constantly accompany the dissolution of logs into boards.
The second important factor is the power of the chainsaw engine. The ability of the motor to cut logs in the longitudinal direction depends on this parameter. Most often, powerful gasoline engines are used to make a homemade sawmill, the crankshafts of which rotate at a speed of at least 12,000 rpm. In this case, the engine power must be at least 5 liters. With.
The third factor is the anti-vibration system. During operation, any motor creates vibrations that affect the evenness of the cutting line. In order for a mini-sawmill to produce perfectly even boards, the chainsaw for its assembly must be equipped with an effective anti-vibration system.
How to make a sawmill from a chainsaw: step-by-step instructions with drawings
To make a homemade sawmill at home, you will need to prepare the following materials:
- a tool equipped with a gasoline or electric motor;
- guide channels with a shelf height of up to 150 mm (the length depends on the size of the future installation);
- a special mechanism for moving a tool or workpiece;
- steel angle used to strengthen the structure and manufacture workpiece clamps;
- design drawings and diagrams;
- welding machine;
- a set of tools for connecting components.
The sequence of steps in making a homemade tire-type sawmill:
- Mark channels or other metal profile for making the base. The sawmill parts are welded together using arc welding; additional cross braces are used to increase rigidity and accommodate log clamps.
- Make a vertical frame that moves along the base on rollers or ball bearings. Additional braces are installed to the main profile to increase the rigidity of the structure. The supports are equipped with adjusting bolts that allow you to select the gaps between the outer part of the roller and the guide. The width of the frame corresponds to the length of the bar mounted on the saw.
- Mount a mechanism to adjust the position of the saw on the vertical frame. The product must use a special screw clamp that can hold the saw during operation. The design of the clamp must withstand vibrations and possible shock loads.
- Install the nodes, adjust the relative position of the elements and carry out a test cutting. During operation, breakdowns are possible that will require modification of the design and the introduction of additional parts, clamps or regulators.
The described algorithm for making a sawmill from a chainsaw with your own hands is not the only design option. There are freely available drawings of installations created by different authors, which differ in the configuration of units or methods of position adjustment. Designers film their products on video, which can be viewed on specialized websites.
For example, a simplified homemade sawmill made from a chainsaw consists of a section of channel on which an adapter plate with a fixed tool is installed. The installation is mounted on a wooden beam (which is also a blank), laid on supports. After each cut, the tool moves a distance equal to the thickness of the board being made. The disadvantage of the sawmill design is instability; if the unit overturns, there is a risk of injury to the operator.
Disc units are assembled on the basis of an electric motor; it is possible to use a gasoline unit to rotate the disc. The motor is mounted on the frame through standard mounting points; at the base of the equipment there is a rectangular or square unit made of channel material. The design includes a steel protective casing covering the upper part of the disk. It is recommended to install a small switch that does not allow the engine to be turned on with the shield open (only for versions with an electric motor).
For household sawmill installations, it is recommended to use steel circular saws with a diameter of 500-600 mm. The working element is mounted on the output shaft of the engine rotor; it is possible to use a step-up gearbox with a belt drive. The tension is adjusted by moving the motor housing on the base. When manufacturing structural elements, it is recommended to place the working edge of the disk at a minimum distance from the base. There are designs with a special groove in the base designed for a rotating disk.
How to make homemade chainsaws?
All the capabilities of a chainsaw in your homemade device can be realized using various attachments and additional accessories.
The basis of any homemade device made on the basis of a chainsaw is the usual principle of power take-off from its engine; the device you need is attached to the output shaft. A chainsaw as a tool for creating devices with your own hands is very suitable, because it has the following characteristics:
- powerful motor;
- compactness;
- relatively light weight;
- autonomy;
- Possibility of use in any conditions.
clutch design is also of great importance , since it is able to protect saw systems and components from possible overloads and breakdowns. Any DIY chainsaw tool is sealed, which makes it suitable for use regardless of position.
What devices can you assemble from chainsaws with your own hands?
All homemade devices based on chainsaws are divided into simple and complex.
Simple devices include the following:
- pumps;
- Bulgarians;
- boat motors;
- bicycles and mopeds;
- ice screws;
- walk-behind tractors;
- winches.
Among the complex mechanisms and devices that you can assemble with your own hands:
- chainsaw sawmills;
- snowmobiles and snow removal equipment;
- helicopters;
- power plants;
- snowmobile;
- solid forged knives.
The listed devices can be based on any brand of chainsaw, it all depends on the required power for the correct operation of the device that you assemble with your own hands. The following brands are most often used for sawmills using chainsaws and other devices:
- "Ural";
- "Calm";
- "Friendship".
Which sawmill design is optimal?
The owner independently determines the design and dimensions of the future installation, based on the available space and the specifics of the planned work. For small-sized boards used for the manufacture of containers or pallets, a sawmill design with a simplified diagram is suitable. If the user wants to obtain boards with uniform geometric parameters, then the manufacture of a stationary installation is required with the frame placed on a concrete foundation.
The band saw design is rare among homemade installations due to the complexity of manufacturing the components. The design of the equipment uses special blades; it is impossible to sharpen and set the teeth correctly on your own. An additional disadvantage is the increased danger of the sawmill; the use of protective covers is required to prevent the operator from getting under the moving cutting belt.
How to work on a homemade sawmill
Algorithm for self-sawing on a stationary installation with a movable tool:
- Place the log or finished timber on the guide crossbars. If necessary, the workpiece is fixed with screw-type clamps or steel gussets, which are fixed on the crossbars.
- Adjust the position of the saw on the movable frame. Tighten the tool attachment points and check the security of the locking device.
- Refill the tanks for fuel and oil, which is necessary to lubricate the chain.
- Start the engine and warm up the unit at idle speed, and then bring the blade to the end cut of the workpiece.
- Raise the speed to the operating range (determined by ear) and fix the position of the trigger that controls the throttle valve. A clamp or homemade device is used to hold the element.
- Start making a horizontal cut, moving the tool at a uniform speed. When working, you must be careful, since there is a risk of shock loading when the blade comes into contact with compacted areas of wood (the area where branches grow).
- At the next stage, the saw is retracted to a distance equal to the thickness of the future board and the operation is repeated again. During operation, it is necessary to check the oil level in the tank; when operating the chain saw without lubrication, intensive wear of the working edges begins.
When operating a disk installation, the log is placed on the lower frame of the installation and then smoothly fed in the direction of the rotating working element. It is recommended to use a guide element to prevent the log from moving sideways. Wood is dissolved in a similar way on machines equipped with a band saw.
When operating a homemade sawmill, it is necessary to use personal protective equipment (glasses, headphones) to protect the eyes and hearing from injury. It is recommended to use special clothing and gloves made of dense material that can protect your hands from damage from sharp fragments of wood. Some users install protective shields made of organic glass on homemade installations, which reflect the flow of sawdust from the working blade.
Another way to create a homemade sawmill
You can use another method of making a sawmill. In terms of technology, this option will not differ much from the previous one. The tools and drawings will be identical as in the first version.
The drawing shows the main components. First of all, this is a chainsaw, its drive and a mechanism with which it will be possible to regulate the thickness of the resulting board. It is also worth noting the mechanism that allows you to move the cutting part of the structure, and a device for securely fixing the log.
The process of sawing a log on a sawmill is carried out by lowering or raising the base of the device, which is held on by four screws or welded to the plate with nuts with bent edges. A lock nut is placed on the top of the base and tightened once the sawmill is fully set up. The adjustment takes place to the desired thickness of the processed log.
The cutting part moves along the corners, which serve as guides along the frame. A gap of 50-55 cm is maintained between these elements. Two rollers are attached to each rack, the upper one rests on the guide angle, and the lower one will keep the sawmill from lifting. Instead of rollers, you can use 20 mm bearings.
The wood on this structure is secured using two combs, one of which moves with a screw, the second remains stationary. After installing the log, the first movable element is fixed in a stationary state with several screws. After installing the fixing device, you can start working on the sawmill.
What is a chain sawmill?
The principle of operation of a chain sawmill is to a certain extent reminiscent of a band saw: the log being cut is firmly fixed, while the cutting is carried out by the saw. The saw is attached to a moving carriage. The only difference between chain and band sawmills is that in this option only a chain saw is used, not a band saw.
The main disadvantage of a chain sawmill is its lower productivity and efficiency compared to band machines. Despite such disadvantages, people use such machines precisely because of their high cost and convenience, but real craftsmen create chain sawmills with their own hands. Some people want to save money, while others simply want to make a machine that fully satisfies all the individual wishes of the master.
DIY chain sawmill
What do you need to create a chain sawmill with your own hands? First, you should look at the drawings of a chain sawmill on the Internet. The drawings vary, but any such sawmill consists of a chainsaw, a steel frame and rail guides.
In order to create a chain sawmill, you need to firmly attach a metal frame to the saw bar. The gap between the chain and the frame will be equal to the thickness of the resulting lumber. For this reason, you need to decide in advance what kind of lumber you need. By the way, if you make the distance between the chain and the frame larger, you can create not only boards, but also beams.
An excellent frame will be made from two steel channels, 8 meters long and 0.14 meters high. In addition, you can use rails or metal corners. You need blanks of a perfectly straight shape. Along the entire length of the channels you need to make holes with a diameter of 14-16 millimeters at a distance of up to 1.5 meters.
According to the number of these holes, you need to make special ties from sections of water pipe. All parts are attached using threaded rods or bolts.
After this, you need to assemble all the components of the chain sawmill into a single device and install it on racks. The number of racks depends on the dimensions of the frame. The very last posts should be no more than 1 meter from the end of the rails.
To give greater rigidity, you need to fix the braces.
After this, the movable trolley is mounted. It can be created from a steel plate with a thickness of 4 to 6 millimeters and a length of approximately 0.6 meters. The size of the trolley depends on the dimensions of the electric motor.
Next, you can begin selecting gaskets and clamping plates for the trolley. The elements must ensure free movement of the mechanism. At the same time, the gap should be minimal. The gaskets should be tightened using bolts.
It is imperative to eliminate the transverse play by installing a thrust angle to the base of the trolley. The trolley can be placed on bearings or rollers. Please note that you should use new bearings; used ones are definitely not suitable.
The chain needs to be tensioned as much as possible. The steering wheel is mounted on one of the side sprocket bushings located along the perimeter of the guides.
In order to create a fixing device for a log, you need to take pipes with a diameter of 3 - 4 centimeters, insert movable rods into them, which fit into the stopper at the required height with an M8 screw.
Pressing parts, the length of which is at least 1.5 cm, as well as cam clamps, are attached to the rods on top.
After this, you can install an electric motor and a saw, the diameter of which is 1 meter. Choosing a chainsaw for a home sawmill is also not an unimportant process. The chainsaw must have high power and high efficiency indicators. In addition, its chain must be well sharpened. Making a chain sawmill with your own hands is not difficult. But remember that in addition to creating the device, it is important to guarantee safe operation.
This is how “home” chain sawmills are created. A video of the manufacturing process of such a sawmill is presented below.
Choosing a chainsaw for a home sawmill
The main part of the installation is the chain saw and its choice must be taken with the utmost care. You can install either a new, just purchased saw, or a used one, such as the Ural brand. To create a sawmill, you can use not only a chainsaw, but also an electric saw. The only thing you need to remember is that you will be limited in your movements due to the length of the network cable.
To select the correct saw, it is important to initially understand the intended purpose of the installation. For semi-professional, commercial use, give preference to stationary sawmills with powerful and productive saws. Domestic use of the equipment allows you to choose a less powerful chainsaw by creating a mobile mini sawmill with your own hands according to drawings from the Internet.
Safety at work
Having high productivity, sawmills are sources of increased industrial injuries. Many people have heard horror stories about “he turned his head away, but his finger was no longer on his hand.” There are many similar stories and they are all real.
The most reliable method of reducing the number of injuries and accidents when using such equipment is scrupulous compliance with all safety regulations. Before starting work, you need to familiarize yourself in detail with the operating principles and operating instructions of such a device, as well as with the fire safety rules.
The highest level of safety is achieved when the sawmill is equipped with a reverse feed system due to its design.
Chain sawmills, video
Do-it-yourself sawmill from a chainsaw. Assembly diagram, drawings. Tips and tricks
Of course, a homemade conversion of a sawmill from a chainsaw cannot be compared in power and functionality with a professional mega-machine with a power of 15 kW, capable of easily processing 20 cubic meters of wood per shift.
But such a goal is not set when creating a mini homemade product. For a home sawmill, the most important thing is the ability to cut boards and timber with greater accuracy than with a conventional chainsaw. Moreover, it is quite possible to make a household machine from improvised means, while saving a significant amount of money, with your own hands.
A simple homemade sawmill using a chainsaw
Since a home sawmill does not require huge industrial performance, you can use an old chainsaw as a drive. Craftsmen also use other engines - diesel or electric motors. The chainsaw at the heart of the sawmill design is convenient in that in any case it retains its main purpose - sawing is carried out with a chain mounted on a bar.
On the Internet you can find various drawings of homemade sawmills - mobile portable devices, power saws, portable and mini machines.
Advantages of a chainsaw design
Based on a chainsaw, you can make many useful tools, for example, a lawn mower, which makes the chainsaw a unique device. The use of this tool will allow you to design the desired device almost without the use of additional units and parts.
The engine and gas tank are already there, the housing is also there, the chain will remain in working order. There is no need to change any of the listed components. You only need to design a metal frame that will be attached to the body of the chainsaw.
The main advantages of this category of tool are:
- minimal cash expenses;
- the same effect as from factory copies;
- the likelihood of making it from scrap materials, which can always be found in the household.
Homemade device diagram
The approach to designing and creating a sawmill from a chainsaw should be the most serious, because the chainsaw itself is dangerous equipment, especially the sawmill. First of all, you should decide on the tasks that are supposed to be solved with the help of a home sawmill.
Naturally, a mini sawmill will not be a multi-saw machine with expanded functionality, and the produced lumber will require further specific processing. But it will be possible to perform the simplest operations - cutting boards, slats, timber - at a fairly good level and in decent volumes.
The general design of the device must have: a solid base, a clamping device, a rail track, a frame on which the chainsaw is mounted.
Tools and Parts
To assemble a sawmill from a chainsaw, you will need a saw, a metal profile, guides and rollers, bearings, nails, screws, equipment - a welding machine, and ordinary tools.
Assembly diagram, drawings
When preparing drawings of a future design, you can use the technical documentation of manufacturers of industrial sawmills, transforming them to suit your own needs and capabilities.
To install the sawmill, choose a place with the possibility of ventilation - a hangar, barn, or under a canopy on the street if a gasoline saw engine is used as the power plant. Places for storing raw materials and obtained lumber should also be provided.
Base
The sawmill must be fixed to a solid base to eliminate the slightest vibration, strictly according to the level. This could be a foundation, a concrete floor base, or the ground. Depending on the purpose and weight, the base of the sawmill is made of some kind of metal profile. Then the rails are installed.
Next, you should install fasteners for the wood to be cut. This is a very important point for ensuring high-quality sawing with a chain, so fasteners are installed along the edges or intermediate, but not circular.
Movable frame
The moving part moves along the rail track on rollers along with the chainsaw mounted on it. It is important to correctly and reliably make fastenings for the saw in two planes - horizontal and vertical. For fasteners, you can choose the option with metal clamps, with clamps, or simply weld the frame in the form of a box. You can purchase ready-made fasteners, not forgetting to install protective rubberized gaskets between the chainsaw body and fasteners.
Tips and tricks
- After assembling the sawmill, it is important to test for level compliance and stability of the entire structure.
- To ensure the accuracy of sawing, it is advisable to make markings, for which a piece of an old tape measure or a metal ruler is suitable.
- It is recommended to purchase chains that are more durable - carbide.
- It should be noted that there must be free access for periodic tensioning of the chain, since during operation the chain stretches quite often.
- A protective screen should be installed on the moving frame; any transparent plastic will do.
- When making a sawmill from a chainsaw, it is necessary to calculate what the longest and shortest lengths of logs will be, so that the short ones do not fall through when sawing, and the long ones fit normally into the guides.
- You should not skimp on the rotating mechanisms that control the position of the chainsaw.
- Owners of home sawmills should remember the need to strictly adhere to safety requirements when operating a homemade chainsaw sawmill.
- When performing sawing, you should use chainsaw techniques, taking into account the need for smooth movements, without coercion or special effort.
Preparation for production
Before directly assembling a homemade sawmill from a chainsaw, the manufacturer is obliged to study the manufacturing diagram. The drawings should tell you in what sequence to assemble the parts, what sizes they should be, and how to install them into the overall structure of the sawmill.
Next you need to start preparing materials.
The manufacturer will need:
- 2 8-meter channels with a height of 15 cm. They can be thicker, since during the operation of the homemade product, it is the channels that will take on the entire load from the wood;
- 2 steel rails - these are required for the manufacture of the upper part of the equipment. In addition, the rails will act as two movable guides. That is why the parts must be perfectly smooth and even;
- calm and corners with dimensions 4x4 and 5x10 cm;
- screeds - 2 25-centimeter pieces of water pipe will cope with their role;
- 60 cm steel plate with a thickness of at least 4 cm;
- movable hoses connected into 1 element - they are needed to protect electrical wiring from moisture and breakage;
- several steel pipes with a diameter of at least 3.5–4 cm.
When choosing metal components, you need to pay attention to their surface. There should be no spots of rust on it. Otherwise, the parts of the sawmill will begin to rot intensively and may break at the most inopportune moment.