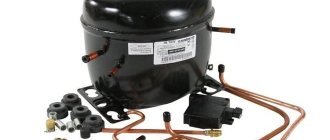
Checking and replacing the thermostat in “Stinol-101/103” refrigerators
STINOL brand refrigerators are widely used in Russia. Experience in operating such refrigerators shows that after only 5-7 years their temperature controller (or thermostat) breaks down. The most common reason for this is a leak in the bellows, a temperature-sensitive element in the regulator. The reason is that the service life of these devices, manufactured by the German company RANCO, is about 5 years. Let's look at the malfunctions of the "K" series thermostats in the "Stinol-101/103" refrigerators, as well as the procedure for replacing them.
Note.
- The difference between STINOL refrigerators models 101 and 103 is that the second one has two compressors (separately for the refrigerator and freezer compartments). The circuit diagrams for switching on the compressors in these refrigerators are almost identical, with the exception of the types of elements of the automation system (see Fig. 1 and 2, respectively).
Rice. 1 Electrical circuit diagram of the refrigerator STINOL-101
| TN1 - refrigerator thermostat | RH1 - compressor thermal relay |
| RA1 - compressor start relay | CO1 compressor |
| IL1- lamp switch | SL1- indicator lamp |
| L1 - refrigeration chamber illumination lamp |
Rice. 2 Electrical circuit diagram of the refrigerator STINOL-103
| ТН1 - refrigerator thermostat | RH1, RH2 - compressor thermal relays |
| TN2 - freezer thermostat | RA1, RA2 - compressor starting relays |
| CO1 - refrigeration chamber compressor | IL1- lamp switch |
| CO2 compressor for freezer | SL1, SL2 indicator lamps |
| L1 - refrigeration chamber illumination lamp |
- The article does not list defects in refrigerators caused by malfunctions of compressors, thermal and starting relays, as well as other elements.
Possible defects in refrigerators that require checking and, if necessary, replacing temperature controllers
- The refrigerator compressor does not turn on at any position of the temperature control knob. When moving the handle to the OFF position, there is no characteristic click.
- The refrigerator compressor runs constantly even when the temperature control knob is turned OFF. The temperature in the freezer and refrigerator compartments (MK and HK) is significantly lower than normal.
- The temperature in the MK and HK is higher than normal even at the maximum position (extreme clockwise) of the temperature control knob.
Replacing and checking the refrigerator thermostat
Using the example of the “Stinol-103” refrigerator, we will consider the procedure for replacing the K-59 type XK thermostat (the type and pin numbers are marked on its body). The replacement steps are shown in Fig. 3-9.
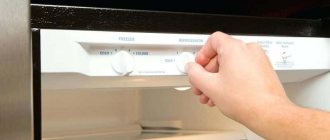
Using an awl or a thin screwdriver, pry up the handles of the temperature controls and remove them (Fig. 3 shows the left handle).
Note
- The Stinol-101 refrigerator has only one temperature control knob.
Then remove the decorative trim 2. The trim has 6 protrusions that hold it in the dashboard control panel. Two protrusions are located on the sides of the lining and two (bottom and top) at a distance of 17 cm from its edges. Since the cover is made of fragile material, be careful when dismantling it. Having removed the cover, unscrew the nuts 1 securing the temperature regulators (Fig. 4).
Then unscrew the hex screws securing the instrument control panel. It should be noted that when removing the panel, the last ones to unscrew are the screws securing the door hinge 1 (Fig. 5).
The door must be supported. After unscrewing all the screws, lift the panel and remove the door. Then unscrew the fastening screws on the back of the refrigerator and remove the top cover.
Remove the thermostat from the dashboard (Fig. 6), having previously disconnected the contact connectors from it.
To avoid mixing up the connectors when connecting a new regulator, they should be marked. In the HC, unscrew the plastic cover 1 (Fig. 7) and release the capillary tube 2.
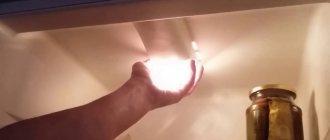
Remove the lighting unit 1 (Fig. 8), having previously unscrewed the screw recessed in its housing.
Pull the capillary tube of the thermostat out through hole 2.
Install and connect a new thermostat. In this case, pay special attention not to damage the capillary tube. There is a section at the end of the tube where there is no insulating material. When installing the tube, make sure that this end is completely hidden under the decorative trim 1 (Fig. 7). To maintain the tightness of the cooling unit, close the hole on the back of the refrigerator, formed during installation/dismantling of the capillary tube, with plastic mass 1 (Fig. 9).
Since the length of the capillary tube is much longer than necessary, it is carefully placed in the free cavities under the top lid of the refrigerator.
Reassembling the refrigerator is performed in the reverse order. It should be noted that after installing the door, the screws securing its hinge 1 (Fig. 5) are tightened last.
Checking thermostats
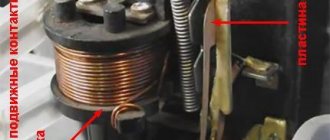
It is clear that it is impossible to check thermostats at home; this requires special equipment. However, there is a simple way to check these devices “by eye”. At room temperature, contacts 3 and 4 of “K” series thermostats must be closed. If signs of malfunction 1 occur, close its contact with a jumper. 3 and 4. If the compressor turns on after this, we can conclude that the thermostat is faulty and needs to be replaced.
It should be noted that thermostats have adjustment screws. They are usually painted over and their adjustment without special equipment is not recommended.
Table 1 shows the technical characteristics of “K” series thermostats.
| Thermostat type | Temperature range within which the thermostat C operates | Adjustable range, C | Response differential, C |
| K50 | -40. +40 | 4.40 (option A) 5.15 (option B) | 3. 14 10. 25 |
| K52 | -40. +40 | 5. 20 | 3. 40 |
| K54 | -40. +40 | 4. 30 | 3. 14 |
| K55 | -40. +40 | 4. 30 | 3. 14 |
| K56 | -40. +40 | 4. 30 | 3. 14 |
| K57 | -40. +40 | 4.30 (option A) 5.15 (option B) | 3. 14 10. 25 |
| K58 | -40. +40 | 4. 30 | 3. 14 |
| K59 | -32. +6 | 4. 18 | 2. 8 |
| K60 | -40. +40 | 4. 14 | 4. 14 |
| K61 | -32. +6 | 4. 18 | 2. 8 |
Where is the thermostat located in single-chamber, double-chamber refrigerators Atlant
In modern models, the concept of “thermostat” is supplemented with new technological terms. The role of a thermostat here is played by temperature sensors, which would more accurately be considered motivator elements in an electronic processor for controlling and even programming the operation of the refrigerator.
If in classic products the handle is located in the same place as the regulator, then in the new refrigerator manufacturers can place the electronic control module anywhere. The most likely place to locate the thermostat is the refrigerator door. It is easy to get to the object by removing the inner plastic door panel. We emphasize again the importance of maintaining the integrity of the rubber seal, latches and other fastening parts.
Thermal sensors are placed in different chambers of the refrigerator separately, since the control process for each of these chambers occurs individually. Separate sensors send a signal to turn on the heating element of the quick defrosting system.
They also often fail, which leads to malfunctions of the electronic control module. Timely replacement of the temperature sensor in the refrigerator is very important. As a result of failures, it is often necessary to “reflash” the processor’s RAM. This operation requires a special computer program and firmware codes.
In principle, no matter where the thermostat is located, its repair will be approximately the same:
- get to the details;
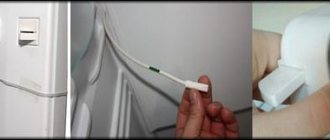
- disconnect the capillary tube from the evaporator body;
- carefully pull it out of the body;
- disconnect the relay itself;
- carefully insert the new bellows tube and securely fasten it to the evaporator;
- connect all the necessary wires and attach the relay in place.
About the location
Thermostats in Biryusa refrigerators are located in different places in the device depending on the model. Experts say that this element can be located:
- Not far from the evaporator of the refrigerator or freezer.
- Inside the camera.
- In certain parts of the refrigeration device, where additional temperature sensors are located. For example, the freshness zone for vegetables in the Biryusa refrigerator can be equipped with an individual thermostat.
At first glance, replacing the thermostat in the Biryusa 22 refrigerator may seem simple. However, it is better to entrust this work to professionals. You need to understand right away that the thermostat cannot be repaired. It only needs to be replaced with a new one.
Temperature regulator inside the refrigerator chamber
Connection diagrams for the thermostat in Atlant refrigerators
How to check the thermostat in single-chamber, double-chamber Atlant refrigerators before replacing
Before replacing the thermostat, it is recommended to check its operation. The test procedure depends on the detected signs of malfunction. If the refrigerator operates continuously and the motor does not stop, you need to perform the following steps:
- disconnect the refrigerator from the power supply and remove all food from the chamber;
- switch the temperature control knob to the coldest mode or turn on the quick freezing function (if equipped);
- leave a thermometer on the central shelf of the chamber that can measure negative temperatures;
- run the refrigerator and leave for 2-3 hours;
- remove the thermometer and check the temperature - it should display 6-7 degrees, and if there is a strong deviation, the thermostat needs to be replaced.
To simplify the check and not waste a lot of time, you can get to the thermostat and move the plate to the sides, which is located near the pin that holds the handle. If no clicks are heard when the plate moves or it remains motionless, replace the thermostat.
How to determine that the temperature sensor is broken
We will describe how to check the temperature sensor in the refrigerator. Do not confuse the diagnostic methods of the thermostat and the sensor: the first device may be broken, but the second may be working, and vice versa.
Tips to help determine that the temperature sensor is broken:
- for options with microcontrollers: measure the resistance of the electronic sensor (thermistor) with a multimeter. The value must coincide with the data in the table showing the dependence of the nominal value on t°. The method does not always involve removing the sensor;
- Often the electrical module itself signals the failure of the sensor by producing sound signals, and if there is a display, error codes;
- inspecting the bellows tube for holes or depressurization;
If the refrigerator does not turn on, then find the thermostat wiring and close them directly - the unit does not need to be dismantled. If the device works, then the problem is in this device. But this method does not provide 100% diagnostics - it may be the thermal relay that is broken, and not the sensor.
Most often, the thermistors of the evaporator break down - there the environment and loads are more aggressive (high humidity, constant significant temperature changes).
Diagnostics of electronic temperature sensor (thermistor)
We will separately describe how to check the temperature sensor on a microcontroller for a refrigerator. For example, let's take a Samsung Rb30j3200ef refrigerator with a DA32-10105q sensor equipped with a 502AT-2 thermocouple (thermistor).
We find the thermocouple model in the refrigerator instructions, and the technical description for it on the Internet:
The search for a specification (specification, datasheet) is usually carried out using foreign sources; the PDF file of the technical documentation contains all the characteristics of the thermistor. From the table we see that the resistance is 5 kOhm at +25° C, the operating range is from −50 to +110° C.
We find 502AT-2 and look at the rest of the data, comparing it with temperature:
Next, look at the graph to see how the resistance changes as the temperature rises/falls. The higher it is, the lower the Ohm number and vice versa.
We remove and diagnose the electronic sensor
Removing the compartment cover:
Under the cover:
Disconnect the thermocouple connector. We measure its resistance at room temperature: at +25° C it should be 25 kOhm. If the indicator is different, then there is a breakdown:
If a breakdown is detected, the thermocouple must be removed and replaced. Unscrew 3 screws and remove the entire large rear panel:
This hole is an air duct through which the cold goes into the freezer; there is a damper here, it is visible if you turn over the removed lid:
If we disassemble the cover, we will find a thermocouple:
The thermocouple is removed, immersed in water at room temperature (this will make the environment more stable), and the multimeter is switched to measuring resistance. We compare the values with the factory ones (available in the specification tables).
Add heated liquid and boiling water - the resistance decreases.
The thermistor is working properly - the readings correspond to the graph and tables in the datasheet. In practice, there is no point in immersing the thermocouple in water; it is enough to measure the resistance at the current temperature without removing it from its seat (for clarity, we repeat the photo):
The operating principle of the thermostat in Atlant refrigerators
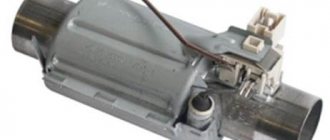
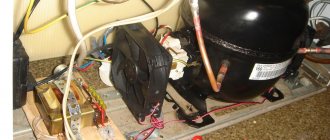
First, let's figure out what it actually is. A thermostat is a device that controls the temperature in your refrigerator and sends signals to the compressor, causing it to turn on and off depending on the degree of cooling in the chamber. It works very simply. The thermostat is a relay. On one side there is a special hermetically sealed tube filled with freon. On the other hand, there are electrical circuit contacts, with their help the compressor is controlled.
It all works very simply. The end of the capillary tube is attached to the evaporator. Since it is filled with a refrigerant, for example, freon, when the t˚C rises inside the refrigeration chamber, the pressure in it increases. This closes the corresponding relay contacts and turns on the compressor. After some time, the t˚C in the refrigeration compartment decreases, the pressure in the bellows tube drops and the contacts open. The compressor turns off.
Another important component of the thermostat is a spring that compresses and releases its contacts. It depends on her how and when they will work. For example, in order to open contacts at low pressure in the system (low t˚C) less effort is needed, for high pressure - more. The spring tension is adjusted using the thermostat switch knob. This is how the temperature regime changes in the Atlant refrigerator and other models with mechanical control.
Some refrigerator models have an electronic thermostat. It consists of a temperature sensor and a control module. In modern models, several sensors can be installed for each cooling zone. If your refrigerator has electronic temperature control, repairing it may require specialized knowledge.
The thermostat and thermostat perform the same or different functions
Thermostat and thermostat are two similar devices. But each of them has its own characteristics. For a refrigerator, these two concepts are combined, and it is not entirely correct to consider them separately.
The thermostat is designed to maintain the same temperature, which is due to its design features.
The refrigerator temperature control device is conventionally divided into a mechanical thermostat and an electrical (electronic) module - a thermostat. Although these are components of one control unit.
What indicates a breakdown of the thermostat in Atlant refrigerators
Do we really need a temperature controller? Maybe the reason for the breakdown is something completely different? Most often, the signs of a thermal relay failure are obvious:
- the refrigerator runs non-stop and does not turn off on its own;
- the unit begins to freeze very much in the refrigeration compartment, where in normal mode there should be a low, but still positive temperature;
- The refrigerator switches off spontaneously and no longer makes any sounds.
The cause of each of these malfunctions may be the temperature controller. In order not to waste money on calling a specialist, we will try to fix the breakdown ourselves.
Atlant refrigerator does not turn off by itself
To make sure that the temperature controller is the cause of the malfunction of the Atlant refrigerator or any other, you need to do this:
- disconnect the refrigerator from the power supply;
- remove all food from it and defrost well;
- move the thermostat knob to the “Max” position or turn on the freeze, if available;
- Place a thermometer on the middle shelf of the refrigerator compartment (not in the freezer), it is best if it has a negative measurement scale;
- turn on the refrigeration unit (empty, without food);
- wait 2 hours, then quickly remove the thermometer and evaluate its readings.
On the thermometer you should see at least 6–7˚С. If this is not the case, repairs are inevitable. And if the thermostat in your refrigerator is electronic, then it is unlikely that you will be able to carry out the repair yourself.
The Atlant refrigerator turns off and is silent
There can be only 3 reasons:
- The thermostat is broken;
- the engine start relay has burned out;
- The refrigeration unit motor burned out.
The last two reasons are, of course, very serious. But we are now interested in the first one. To make sure that it is the thermal relay that you need to replace, you need to check it:
- unplug the refrigerator;
- find the location of the thermal relay and remove the protective covers;
- inspect the device carefully.
Most often, the temperature controller has three or four different colored wires. One of them is usually yellow with a longitudinal green stripe. This is grounding. We won't need it, so put it aside so you don't accidentally snag it. Connect all wires that fit into the thermal relay body directly to each other. If, after turning on the refrigerator, you hear a steady hum from the engine, it means that the temperature controller has failed and you will have to replace it with a new one.
By the way, the wires suitable for the thermostat have the following purpose:
- orange, red or black - connects the thermostat to the motor;
- brown - zero, wire leading to the socket;
- white, yellow or green - leads to a light indicating that the refrigerator is on;
- striped yellow-green - grounding.
The appearance of a snow coat in the refrigeration chamber of the Atlant refrigerator
If you find such a problem, there may be several factors causing it. So first you need to do all the steps described in the first paragraph. If the thermometer reading was +6˚C or less, quickly turn the thermostat adjustment knob until the refrigerator turns off.
If the refrigerator turns off, everything is fine. No? It is due to be replaced. In the event that the refrigerator turns off, leave it to work without food for at least 5–6 hours. After this, we begin to note the time intervals between turning on and off the compressor. For a properly operating refrigeration unit, this period should be approximately 40 minutes. If you get less, “add” the cold a little, that is, turn the switch a little to the right, clockwise.
If everything went well, you can load the products. No? The temperature regulator will still have to be replaced.
Services and prices
| Services and symptoms of failure | Price |
| Consultation | FOR FREE |
| Visit of the master | FOR FREE* |
| Delivery of components | FOR FREE |
| Diagnostics | FOR FREE |
| Diagnostics (in case of refusal of repair) | 490 rub. |
| Symptoms of malfunction | |
| Refrigerator won't turn on | from 900 rub. |
| The refrigerator is leaking | from 900 rub. |
| Fault Error | from 900 rub. |
| Loud noise from the refrigerator | from 1,500 rub. |
| The compressor turns on for 1-15 seconds. and turns off | from 2,000 rub. |
| The main compartment of the refrigerator is freezing | from 2,200 rub. |
| A fur coat made of snow freezes (freezes) | from 1,800 rub. |
| The main chamber does not gain temperature | from 1,400 rub. |
| The freezer does not reach temperature (it does not freeze well) | from 2,200 rub. |
| Name of service | |
| Replacing the start relay | from 300 rub. |
| Replacing the thermostat | from 500 rub. |
| Replacing the filter | from 500 rub. |
| Installing/Replacing the Shredder Valve | from 500 rub. |
| Replacing the defrost timer | from 700 rub. |
| Replacing the capacitor | from 700 rub. |
| Cleaning the drain | from 700 rub. |
| Replacing the network cable | from 700 rub. |
| Replacing the fuse | from 700 rub. |
| Electrical wiring work | from 700 rub. |
| Repairing the leak | from 1,000 rub. |
| Refilling with freon | from 1,000 rub. |
| Replacing the temperature sensor | from 1,200 rub. |
| Evaporator repair | from 1,500 rub. |
| Control unit repair | from 1,900 rub. |
| Replacing the Fan Motor | from 1,900 rub. |
| Removing capillary pipe blockage | from 1,900 rub. |
| Replacing the capillary pipe | from 2,000 rub. |
| Replacing the air damper | from 2,000 rub. |
| Replacement / Repair of motor-compressor | from 2,000 rub. |
| Replacing the defrost heating element | from 2,400 rub. |
| Repairing leaks in the foam part | from 4,000 rub. |
| Other | |
| Replacing the door seal | from 1,000 rub. |
| Re-hanging doors | from 1,500 rub. |
| Door adjustment | from 1,500 rub. |
| Replacing door hinges | from 1,500 rub. |
The final cost of repairs is determined by a Cold Group specialist after preliminary diagnostics.
Warranty
We are confident in the quality of our work, so we offer our clients a full range of services for repairing Atlant refrigerators at home, including:
- Drawing up a receipt indicating the repairs carried out. If during the warranty period a similar breakdown occurs again, the technician will fix this fault completely free of charge;
- Ordering diagnostics from us does not mean that our specialists are required to repair refrigerators in the office or at home. If you do not want to use our services for any reason, then you can only pay for diagnostics (500 rubles);
- If you have any questions, you can always contact us, because feedback is important to us. To receive up-to-date information, write to the director by email - [email protected] ;
- We are confident in the quality of our refrigerator repairs, so the warranty period reaches 3 years. Rest assured that we will not “disappear”, because we work with you on the basis of honest agreements.
Do-it-yourself thermostat repair in Atlant refrigerators
In most situations, repairing the thermostat does not make sense, since only replacing the component can completely eliminate the malfunction. At the same time, there are modern types of refrigeration equipment with electronic thermostats that are subject to repair. Such thermostats consist of a temperature sensor and a control module.
There are also models with multiple sensors designed for different cooling areas.
Repair is possible if the relay elements that need to be replaced are damaged. It is carried out like this:
- Gain access to the temperature sensor. Sometimes this requires removing the upper chamber door. To do this, remove the hinge cover and unscrew the screws. Before dismantling the adjusting handle, remove the plugs and unscrew the bolts. All actions are performed carefully, keeping the fasteners in a small box.
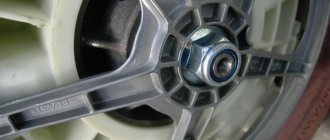
- The sensor attached to the bracket is removed by unscrewing the screws.
- If the regulator is located in the main chamber, you need to remove the protective cover of the lighting system. After removing the bolts, the sensor is removed from the seat.
- Inspect the item. Sometimes it does not work correctly due to a broken bellows (capillary tube). This part can be replaced, eliminating the need to dispose of the relay.
- The bellows is disconnected from the condenser and removed from the thermostat housing. Install a new tube, connect it to the evaporator, and assemble the relay. The sensor is inserted into the seat. Reassemble the refrigerator in the reverse order.
Main signs of failure
It is possible to detect a faulty thermostat based on various symptoms. When faced with signs of breakdown, it is recommended to immediately begin repairs so as not to provoke a deterioration in the condition of the equipment.
See also
Instructions on how to repair a clothes steamer with your own hands
Doesn't turn off on its own
Any type of refrigerator provides for periodic shutdown when the temperature inside the chamber reaches the required level. If the thermostat breaks down, the relay does not receive a signal about temperature fluctuations, and the refrigerator continues to operate continuously. Typically, this symptom requires replacement of the component because repair is not practical.
Turned off and silent
When the refrigerator turns off and does not resume operation after a certain period, several factors may be the cause of the breakdown. If the light inside the chamber is on and the motor does not work, the likely cause of the malfunction is a burnt-out compressor. A breakdown can often be determined by the quiet clicks that the start-up relay makes when it tries to turn on.
The thermostat itself, which controls the temperature in the refrigerator compartment, does not transmit information through the contacts if it breaks down. Lack of temperature rise data results in the motor not turning on.
Snow coat
The formation of ice and a layer of snow on the back wall of the camera is one of the most popular problems. The malfunction is especially relevant for equipment with a drip defrosting function. If there is a snow coat in the chamber, the normal food storage regime is disrupted. The products in the chamber begin to freeze, lose their taste characteristics and presentation. In addition, there is a risk that the snow coat will sometimes melt and the refrigerator will begin to leak.
To fix the problem, many try to defrost or break off pieces of ice, but this is not a solution to the problem if the ice appears due to a broken internal part.
When the thermostat is not working correctly, a new layer of snow will re-grow over time.
If the thermostat malfunctions, the sensor erroneously sends a signal that the temperature is not low enough, and the motor turns on more often to cool the chamber. As a result, the back wall of the chamber does not have time to thaw and becomes covered with snow. In most situations, replacing the thermostat completely solves the problem.