Carburetor design
A petrol mower (motor mower) contains a base - an aluminum body, which houses the remaining parts that work harmoniously as a single whole. The carburetor body has a diffuser - a passage with internal channels through which air is pumped.
The larger the cross-section of the diffuser, the more actively oxygen is supplied along with the air - an oxidizer, in which the fuel (gasoline-oil mixture) burns.
Channels branching from the diffuser deliver fuel, with which the injected air is mixed, carrying gasoline vapor with it. Outside the main compartment of the carburetor are located:
- jets;
- mini fuel pump;
- a unit that regulates the mixing of fuel with air.
The latter forms that very explosive mixture that ignites in the combustion chamber of the carburetor.
Principle of operation
The procedure for pumping and filtering fuel into the lawn mower engine is as follows.
- The throttle valve controls the amount of air supplied to the diffuser. The more air supplied, the more oxygen the gasoline needs to burn, and the more power is released in the form of heat. The heat energy is further converted into mechanical energy.
- The diaphragm pump pumps the required amount of gasoline.
- Next, gasoline passes through the engine fitting.
- Fuel passes through the intake and exhaust valves.
- Fuel is filtered using a mesh filter.
- Through the needle valve, it enters the chamber with the membrane.
The stages of operation of the carburetor are as follows.
- The air enters the pipe with an air damper. The damper sets the desired air flow intensity.
- In the gasoline injection unit, the diffuser is narrowed - this is necessary to give greater air flow speed.
- The fuel passes through the compartment with the float and bypasses the nozzle and enters this narrowing of the tube. The float compartment meters the supply of gasoline. In this compartment the pressure is in a state of equilibrium. In a narrowed tube it decreases. Due to the difference between both pressure values, gasoline passes through the nozzle.
- The accelerated flow atomizes gasoline, converting it into aerosol vapor. The resulting gasoline-air mixture is ready for ignition in the combustion chamber.
- After passing through the fuel pipeline, this mixture ends up in the carburetor cylinder.
Conclusion: To set the required power, you will first adjust the rate of fuel combustion using the choke. If the gap is too small and the oxygen in such a mixture is less than 10%, the fuel does not burn, therefore, the engine will not start or will stall immediately.
If you buy a Chinese trimmer, it is worth considering that it differs little from European ones - the same 2- or 4-stroke engine and drive.
However, they skimp on the quality of parts, forcing the consumer to change them more often. Check what compatible parts non-Chinese companies offer for your device.
The design of a gas trimmer carburetor and its purpose
Petrol mowers are equipped with two-stroke internal combustion engines. A carburetor is used to supply the air-fuel mixture to the engine cylinder. In the design of gasoline units, this is a key element, without which the operation of the internal combustion engine is impossible. Moreover, this carburetor differs from a car device not only in size, but also in its operating principle. In particular, this difference lies in the presence of a membrane, which plays the role of a fuel pump. It is due to the presence of a membrane that the devices under consideration in the design of two-stroke internal combustion engines are called membrane ones.
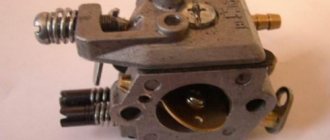
Structurally, the entire mechanism is a small part, inside of which there are channels, valves and membranes. The carburetor body is made of aluminum, and the internal structure is shown in the photo below.
Before you adjust the carburetor of a lawn mower with your own hands, you need to understand all the components of the device in question. The carburetor of a lawn mower and trimmer consists of the following parts:
- Diffuser or Venturi nozzle - air is sucked into the system through this nozzle
- Air damper - opens and closes the filtered air supply
- Maximum speed fuel channel
- Fuel channels (nozzles) for idle speed and medium speed
- Throttle valve - the opening value is adjusted by pressing the gas
- Pulse channel fitting - connects to the internal channel of the engine crankcase
- Fuel inlet channel (fitting) (2) - provides fuel supply from the gas tank
- Membrane (4) - responsible for sucking fuel from the gas tank
- Tank fuel suction valve (3)
- Fuel supply valve to the carburetor channel (5)
- Filter element (6) or fine fuel filter
- Fuel channel (10)
- Needle valve needle (14) - responsible for supplying fuel to the control membrane chamber
- Chamber - the fuel mixture, which is supplied through the jets and throttle valve into the cylinder
- Control membrane (18) - ensures manual fuel suction using a primer
- Lever connected to membrane (17)
- Idle speed screw(15)
- Screw for adjusting the amount of fuel supplied to the diffuser (13)
Having an idea of how the carburetor works inside, you have to understand the principle of its operation. A detailed description of how a carburetor works on a two-stroke internal combustion engine using the example of a chainsaw is described in this material.
Basic problems
Malfunctions of the carburetor of a lawn mower or trimmer, despite the relative ease of their elimination, sometimes require a long search by elimination. The main reasons are:
- unsatisfactory quality of gasoline purification;
- air filter clogged;
- accumulation of deposits and carbon deposits in the compartments and passages of the carburetor.
Each of the problems has its own reasons.
Fuel injector malfunction
The most recurring failure is wear and tear of the membrane. As a result, its non-adherence. Fuel passages are not sealed at certain stages of the engine cycle. The reasons here are:
- you work for too long on a lawn mower or trimmer without a break;
- low-quality fuel was filled;
- exhaust gases enter the pulse channel.
A deformed membrane has several bad consequences:
- there is not enough gasoline or oxygen in the created combustible mixture;
- the engine starts after 10 or more unsuccessful attempts;
- the engine knocks, clatters during operation, etc.;
- the working piston is deformed.
As a result, the internal space of the fuel pump becomes contaminated on the pulse channel side.
Strainer clogged
The reasons for a clogged strainer are poor fuel cleaning, damage to the hose and/or injection head.
Failure of the adjustment lever
Wear of the contact edge of the lever is a consequence of incompletely purified fuel, which contains grains of sand or particles of clay, metal, or other inclusions that are insoluble in liquid hydrocarbons. A problem appears with fuel injection; the engine operates intermittently without load.
Inlet needle is damaged
The inlet needle breaks due to the presence of metal and stone particles in gasoline. As a result, the intake needle seat does not fit tightly to it, and the fuel mixture flows. There is too much air in the combustible mixture created by the carburetor, which can cause the engine to “sneeze” during operation. Finally, the needle may become stuck due to low-quality gasoline, or the unit has been idle for a long time.
Clogging of the adjustment space
Deposits may accumulate in the adjustment compartment. The needle does not close the hole completely, and a lot of gasoline enters the fuel chamber - the engine overflows it, possibly flooding the spark plugs. Because of this, the gasoline-air mixture contains an increased amount of gasoline vapor. The efficiency drops noticeably.
The adjustment membrane is damaged
The membrane often becomes deformed (and sometimes breaks) due to the continuous operation of a lawn mower or trimmer for several hours. If you abuse this “impact” mode of operation, damage to the membrane occurs more often. New breakdowns will rain down like from a cornucopia:
- the piston breaks;
- the number of attempts to unsuccessfully start the engine will increase sharply;
- the fuel mixture will contain too little gasoline;
- The useful (thermal) power will drop sharply.
Intake control lever sticks
Sticking of the adjustment lever is a consequence of its incorrect installation or accidental bending. The contacting edge will be in the wrong position. This will disrupt the additional injection of gasoline.
The valve is worn out
The throttle and air dampers become unusable due to the entry of dust, metal particles, etc. with the air flow. Damaged dampers look like parts that have been sand blasted. Due to wear on the dampers, the efficiency of the motor decreases and breakdowns are detected. The piston and cylinder wear out.
The dampers become unusable due to improper maintenance of the air filter or its breakdown.
In some cases, this filter is simply not suitable for your model of lawn mower or trimmer. Ultimately, the motor shaft will suffer - pieces of it will fall into the engine channels, causing the piston to break.
Diagnostics and repair of lawn mower carburetor
To carry out diagnostics and repairs, the carburetor will need to be disassembled. This is not difficult to do, the process is similar for devices of different types, such as Shtil FS 38, Patriot or a trimmer of another brand. A detailed description of the procedure and disassembly diagram can be found in the operating instructions.
Materials and tools
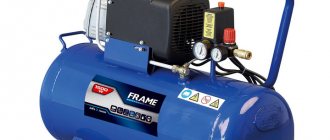
To disassemble and service the carburetor, a number of tools are needed. To dismantle the device, a simple Phillips screwdriver is enough, but for maintenance and repair of components this list is wider. So, to purge the carburetor you will need a compressor or a special cylinder to clean it.
On a note! In stores and services, repair kits for carburetors for various trimmers are available for sale. They include both membranes, a gasket, a spring and a needle valve, that is, all those elements that usually break.
Disassembly
The process of disassembling the carburetor is simple, you only need:
- unscrew four bolts;
- remove the primer (swap bottle);
- remove the pump cover;
- remove the membrane;
- remove the carburetor cover with the injection mechanism;
- remove the second membrane and the gasket under it;
- turn the carburetor over, unscrew two bolts to get to the air supply system;
- pull out the valve that increases the air flow entering the engine;
- All parts have been removed, only the body remains.
To assemble the carburetor, you need to perform the above steps in reverse order, starting with placing the needle valve and spring in the carburetor cover.
Malfunctions in the fuel pump
The main failure that is typical for a fuel pump is a violation of the shape of the pump membrane . It no longer fits tightly, and as a result, the pump channels do not seal. This happens if the owner uses the lawn mower for a long time or fills with low-quality fuel. Another possible option is that combustion products enter the pulse channel. As a result, the efficiency of the pump decreases, the fuel mixture becomes leaner, the engine starts with difficulty, and runs intermittently. This ends with the piston breaking or the pump cavity becoming clogged and dirt getting onto the membrane. The way to solve the problem is to disassemble the carburetor and thoroughly clean the membrane.
Dirt clogged jets with channels
Debris in the openings and jets of fuel systems is the most common cause of breakdowns. The filter elements of the tank and the carburetor itself do not always provide reliable protection, which means that small particles of debris penetrate inside. For purging, ultrasonic baths filled with gasoline or a special liquid are used. The carburetor is placed in them and the channels are cleaned under the influence of ultrasonic waves.
Advice! In garage conditions, you can use a home compressor, but this method is effective only with minor contamination. Another solution is special cans for purging the carburetor.
Fine filter element clogged with dirt
This filter is located on the carburetor cover and is a metal mesh with small cells, which tends to regularly become dirty and covered with a film. As a result, fuel does not flow into the carburetor, and as a result, the equipment operates intermittently or stops starting altogether. To clean this element, you can use an ultrasonic bath, a compressor or a special spray can. And if the filter is tightly clogged, you can carefully wash it with a soft brush dipped in gasoline.
Membrane failure
If the lawn mower is used for a long time and intensively, or the owner pours aggressive fuel, the adjusting membrane may become deformed . In this case, the possibility of normal adjustment disappears, which leads to piston breakage, starting problems, fuel depletion, and incorrect engine operation. To correct the situation, the diaphragm should be replaced and henceforth use only fuel recommended by the manufacturer and tested.
Wear of the manual fuel pumping element
A bubble button is used to manually pump fuel. Under the influence of gasoline, the rubber from which this element is made corrodes and sticks together. Another problem is that it bursts at low temperatures. It should be replaced, especially since it is inexpensive.
Inlet needle wear
This part breaks due to exposure to abrasive particles in the fuel. The intake needle seat becomes leaky, the fuel mixture overflows, and due to over-enrichment of the fuel, the engine does not operate correctly. Another possible breakdown is a jammed inlet needle.
Adjustment lever malfunctions
Such a breakdown is a consequence of wear on the contact surface of the lever due to the presence of abrasive particles in the fuel or due to significant engine vibration during mowing. As a result, problems arise with the supply of fuel, and the engine does not operate correctly at idle speed.
Broken intake control lever
A malfunction is possible if the adjusting lever was bent before installation or placed incorrectly. As a result, the contact pad is in the incorrect position and prevents additional fuel flow.
Damper wear
Due to the constant presence of debris in the air, air and throttle valves wear out over time and look as if they have been sandblasted. Failure of these parts reduces engine performance, it breaks, the piston and its rings, as well as the cylinder coating are deformed.
Wear of the damper shaft: air and throttle
The damper shaft usually wears out if the air filter is not regularly cleaned, or if it is damaged or not suitable for the device . Poorly purified air gets inside, affects the shaft, and it eventually wears out or breaks. Pieces of it may end up in the combustion chamber or in the engine crankcase and cause serious damage to the equipment. To fix problems, you need to blow out, wash and dry the filter or install a new one.
Elimination methods
The list of upcoming work on the engine may be as follows:
- replacing the fuel pump;
- disassembling and washing the strainer;
- replacing the adjustment lever;
- it is also necessary to clean the adjustment space;
- replacing the membrane (or the entire block where this membrane is located);
- adjusting intake, exhaust and needle valves;
- replacing dampers;
- cleaning fuel channels and diffuser;
- replacing screw springs;
- change of primer.
Not all of these jobs can be completed. It often turns out that many of them are not needed if a specific malfunction is immediately detected.
How to clean the carburetor on a trimmer: comprehensive cleaning with photo description and video
If your lawn mower is many years old, and you feel that the tool is working intermittently, and attempts to adjust the carburetor are not crowned with success, then you need to resort to the procedure of cleaning it. To do this, we dismantle the part from the tool and, using a table with high-quality lighting, get down to business. The following is a step-by-step process for disassembling, repairing and cleaning the carburetor from a brush cutter, which will be useful not only for novice mowers, but also for experienced craftsmen:
- We have a carburetor that needs troubleshooting and cleaning.
- It is best to carry out work on a clean cloth or clean sheets of paper to eliminate the possibility of contamination.
- For the convenience of considering the cleaning process, we will divide the mechanism into three main parts: upper, middle and lower. The lower part is on the same side as the primer.
- We start disassembling from the top part, where the mechanism connecting to the throttle cable is located. To do this, unscrew the two screws with a screwdriver.
- We remove the upper part along with the internal contents.
- Most often, the spring in the upper part of the carburetor wears out, which is responsible for returning the valve to its original position.
- The upper part must be thoroughly washed in gasoline. In this case, pay attention to the serviceability of the spring. If it is worn out, it is recommended to replace this part.
- Next, we move on to disassembling the lower part, which is the basis of the carburetor.
- Initially, we check the serviceability of the primer. To do this, you can connect the hoses and lower them into a can of gasoline. If gasoline comes out of the outlet hose, this means that the primer is working correctly. You can also close the hole in the supply fitting with your finger and pump it with primer. The absence of a corresponding sound indicates that the device is working properly.
- The primer still needs to be checked for compression strength. Over time, the silicone material from which the element is made begins to harden, which leads to the need to exert significant physical effort. If this situation happens to your lawn mower, it is recommended to replace the carburetor immediately.
- To clean the carburetor of a brush cutter, you need to unscrew the four screws that connect the lower part to the middle part.
- After this, separate the lower and middle parts.
- We remove the gaskets (2 pieces - they are made of different materials).
- We evaluate the condition of the middle part. Clogged channels must be cleaned and blown out with a compressor.
- If there is significant wear, the gaskets should be replaced. To do this, you will need to buy a repair kit for the carburetor of the corresponding model. The use of sealant as a gasket is strictly contraindicated.
- Using flushing liquid, it is supplied to all available channels.
- Next we move on to the bottom part with the primer. We remove the screws and remove the cover to which the silicone “prick” is attached - also known as a primer.
- The primer is attached to the steel cap using an O-ring, which must be in place.
- Next, we evaluate the condition of the rubber channel located on the plastic part. If the rubber element is dry, it should be replaced.
- Between the plastic and metal parts, where the foot with the needle valve is located, there is a membrane. We assess her condition. Signs of wear indicate the need to replace it.
- If there are remnants of the membrane gasket on the metal part, then the latter must be noticed. Residues should be cleaned out.
- Next, we disassemble one of the main devices - the rocker arm or foot, which is connected to the needle valve. This is done in order to clean the needle valve along with the channel. To do this, unscrew the screw shown in the photo.
- When unscrewing it, it is very important to hold the rocker arm so that it does not shoot under the action of the spring force.
- We remove the rocker arm along with the spring.
- Very carefully remove the needle valve.
- We thoroughly wash the valve in gasoline, avoiding the slightest warping, residues and contamination. Similarly, we clean the channel in which the valve is installed.
- After washing and purging all parts and components of the carburetor, you can begin assembling it. The assembly process is performed in the reverse order of disassembly.
This is interesting! For flushing, it is recommended to use gasoline or a special flushing fluid, the photo of which is shown below.
At this point, the disassembly and washing process is considered complete. Now let's sum up the conclusions about the work done. A video on how to clean a trimmer carburetor is shown below.
Adjusting the carburetor on a lawn mower
Diagnosing and adjusting the carburetor yourself can only take a few minutes.
Before it starts, rinse the filters (see instructions). You can adjust the carburetor yourself using three adjusting screws.
To do everything right, start the engine. Your actions are as follows.
- Find the maximum idle speed. To do this, unscrew screw L to the right and then to the left. The rotation step is a quarter turn counterclockwise.
- Using screw T, you can adjust the idle speed of the engine: increase when turning the screw clockwise, decrease - vice versa. The adjusted engine runs confidently without load and without warming up. When warmed up, it does not increase speed.
- If you are setting up not a brush cutter, but a trimmer, then turning the T screw sets a larger reserve of revolutions per minute. For both types of devices, stable speeds are set when selecting the cutting height with a knife (or fishing line).
- Screw H is turned last. It sets the rate of supply of gasoline with air at close to maximum speed, engine power, engine warm-up temperature and fuel consumption.
To adjust the motor from screw H, do the following.
- Open the throttle and squeeze the gas at maximum speed.
- Turn screw H clockwise until the engine speed decreases.
- Turn the same screw slowly counterclockwise until the engine produces inconsistent speed.
- Turn the screw back a little (clockwise) until the motor runs smoothly. It is important to grasp this line.
The result of precise adjustment is complete combustion of the fuel and a white-brownish color of the spark plug. A spark plug filled with gasoline is much darker than a spark plug that is not filled with gasoline.
How to adjust the carburetor of a lawn mower, see below.
Adjusting the Husqvarna carburetor
Before adjusting the Husqvarna, do maintenance on the trimmer (wash the trimmer and engine, replace the spark plug, eliminate minor defects).
Be sure to wash the foam air filter element. Wash the element in warm water and soap, then wring out and dry (or replace if it is old or damaged).
Note: If you adjust a Husqvarna carburetor with a dirty air filter, the fuel mixture will become much leaner after cleaning the air filter (which can lead to poor performance or even engine failure). Install a trimmer head with the maximum permissible diameter and standard length of cord (up to the cutting blade in the additional protection) to create a load on the engine when adjusting the high speed screw of the Husqvarna carburetor. Start the trimmer according to the Husqvarna Manual and warm it up for 10 minutes (if the trimmer head rotates at idle speed, then the idle speed screw, i.e.
the bottom one must be turned counterclockwise until the rotation of the trimmer head stops). Carefully turn both needles (right and left) to the middle position between fully unscrewed and fully screwed in (do not turn by the stopper!, this may cause damage to the Husqvarna engine)
There are three adjusting screws for adjusting the Husqvarna carburetor: right, left and bottom.
1) Right screw L - adjusts the enrichment of the low speed mixture (adjusted first): Find the maximum idle speed by slowly turning the right screw to the right and left. Then turn this screw ¼ turn counterclockwise. Note: From the Husqvarna factory the right hand screw was turned out completely (0.5 turn). Now he is looking at 11 o'clock. 2) Lower screw T - adjusting the idle speed of the Husqvarna engine (if necessary): turning the screw clockwise increases the idle speed, counterclockwise decreases it.
The idle speed adjustment is considered correct when:
- A cold engine idles steadily.
- A hot engine does not idle too high.
- Before the trimmer head starts rotating, there is a sufficient reserve of revolutions.
- The engine operates stably in any position (for example, when the knife is sharply lowered).
Note: From the factory (Husqvarna), the idle screw was turned from fully tightened to 8 full turns and “2 o’clock” (now it remains so). The recommended idle speed of the Husqvarna lawn mower engine is 2,900 rpm. 3) Left screw H – regulates the enrichment of the mixture at high speeds (adjusted last). It regulates maximum speed, engine power, temperature and fuel consumption.
Note: The Husqvarna engine should not be run at full speed for more than 10 seconds!
- Open the throttle fully (full throttle) and slowly turn the left screw clockwise until the Husqvarna engine speed is reduced (audibly).
- Then turn the left screw very slowly counterclockwise until the engine starts to run rough.
- After this, turn the screw slowly back a small distance clockwise until the Husqvarna engine starts to run smoothly.
This completes the Husqvarna adjustment.
Note: The recommended maximum speed of the Husqvarna engine is 11,500 rpm. The maximum engine power output of the Husqvarna 333R trimmer is 1.6 kW (2.1 hp) at 8,400 rpm.
Note: On a new Husqvarna trimmer from the manufacturer (Husqvarna), the left screw was completely unscrewed (0.5 turn) and blocked (filled) with hard plastic, which I drilled out after the warranty expired. Now the left propeller (like the right) is pointing at approximately 11 o'clock.
Checking the correct settings of the Husqvarna carburetor
The engine revs quickly, smoothly and confidently, and revs a little at maximum speed; the T-35 trim head should not rotate at idle.
You can adjust the carburetor of a lawn mower yourself
Petrol mowers, like all petrol-powered garden tools, are not difficult to maintain equipment.
You can and should repair and configure yourself. For example, adjusting the carburetor of a lawn mower with your own hands is a matter of five minutes. The carburetor from a lawn mower is a component in the power system. In it, like any carburetors, the process of mixing air and fuel (gasoline) takes place for further supply to the engine cylinders.
In this process, the main thing is the correct proportion of fuel and air, for which the carburetor is adjusted.
Video: Setting up the Carburetor of a Chinese Petrol Mower
If you have a blood pressure monitor, and if the recommended speed is indicated in the product data sheet, the correction can be made more accurate, focusing not on the ear, but on the readings of the device.
Adjusting the brush cutter carburetor in the video is done by ear.
to the post “Adjusting and repairing a gasoline brush carburetor”
- Dmitry Pavlovich 07/04/2016
Please explain. In section 5, adjust screw L. Error? Should screw A be read? Thank you
Tell me the starting position of the HL LA screws
PLEASE PREVIOUS POSITION
Tell me the starting position of the HL LA screws
Thank you very much for the video about the accelerator, and I don’t know, but the defect is very important and creates a huge problem that almost everyone is silent about. BRAVO….
Possibly the tachometer. This is a speedometer, not a blood pressure monitor. Blood pressure meter.
And I have L, H, LA, is that LA instead of T?
The heart of any chainsaw is a two-stroke internal combustion engine.
The trimmer is not used for complex appliances, so most of them are floor.
Reliable and accurate mechanical instructions must be purchased.
Gone are the days of Soviet agro-industrial gigantism. They did a concert.
Motoblock. This is an economical tractor option for small jobs.
In order to make a harrow type attachment with your own hands, in addition to the bodies.
Source
Gas cutters, like all gas-powered gardening tools, are not easy to maintain. You can and should repair and adjust yourself. For example, self-control of a carburetor using a homemade brush. It's a matter of five minutes.
The brush cutter carburetor is a component in the power system. In it, as in any carburetors, the process of mixing air and fuel (gasoline) takes place for subsequent supply to the engine cylinders.
Main problems and malfunctions of the carburetor.
Mesh filter. There are usually only two problems with this element:
- Blockage.
- Breaking.
In order to find out the cause of the breakdown, unscrew the fuel filter cap to remove the strainer. If dirt has simply accumulated on it, then washing it in gasoline or blowing it out will help.
If there is visible damage to the mesh filter, be sure to install a new one. There may also be damage to the fuel supply pipe (during repairs, it is practiced to check this element).
In most cases, the carburetor starter does not function due to blockages. Acetone or the same gasoline should be used for washing.
Blowing clogged carburetor parts with compressed air is an acceptable and convenient repair practice.
The throttle body, carburetor parts, intake or exhaust pipes - all of these parts are subject to depressurization. You can definitely check it in a primitive way - spread soap foam on the problem area.
The structure of a lawn mower carburetor
The basis of the lawn mower carburetor is an aluminum body.
It contains a diffuser (a hole with internal contours). Air is forced through this hole. The oxygen (air) supply rate depends on the cross-section (pass hole) of the diffuser. The diffuser is equipped with fuel channels. Fuel is drawn from them using an air flow.
Install externally on the carburetor:
- fuel pump;
- jet system;
- system for adjusting the fuel-air mixture;
Petrol mower device
The structure of the Shtil FS 55 lawn mower should be clear to you if you plan to operate the equipment, and even more so to repair it. The internal combustion engine in this unit is almost the same as in a chainsaw. But the last tire is fixed to the motor gearbox with a long tubular rod. Inside there is a shaft that transmits torque from the motor to the working tool. This design is suspended on a belt that is thrown over the shoulder. This allows you to hold the tool suspended, which is important when the weight of the chainsaw is sensitive.
A handle is fixed to the rod of the unit, with the help of which you can move the end of the rod with working equipment. The petrol mower "Stil FS 55", a repair manual for which is presented in the article, has a protective shield on the human side in the form of a casing, which prevents injuries during operation. The instrument itself is a round drum with a thick fishing line coming out of holes on both sides of it. Adjusting the carburetor and chainsaw repairing lawn mowers Stihl fs55 fs 38 carburetor. When the drum spins, the line is pulled under the influence of centrifugal force and hits the grass, cutting it.
The Shtil FS 55 petrol mower, the technical properties of which will be presented to your attention below, has a fast-wearing nylon line. Features of the Stihl fs 38 lawn mower, adjusting the carburetor of the Stihl fs 38 lawn mower. It is sometimes updated by the method of unwinding the coil, which is located inside the drum.
The principle of operation of a lawn mower carburetor
The throttle valve determines the amount of air supplied, and engine power directly depends on this.
Fuel is sucked into the carburetor system by a pump (its membrane). Then it passes through the fitting in the carburetor. The liquid then moves through the inlet and outlet valves of the pump. Filtered with a mesh. It moves along the needle valve into the membrane chamber.
Step-by-step operation of the device:
- Air supply into a tube with an air baffle (damper). The partition regulates the intensity of the air flow.
- The fuel supply system is necessarily narrowed with a diffuser to increase the flow rate.
- Gasoline through the float chamber and the nozzle tube with a narrowing. A chamber with a float regulates the temporary volume of gasoline. In the float chamber the pressure level is neutral, and in the tube with a narrowing it is already low. Due to the pressure difference, fuel penetrates through the nozzle.
- Accelerating air flow promotes the transfer of fuel (gasoline) and its atomization. As a result, an air-fuel mixture of the required proportion or density is formed.
- The air-fuel mixture enters the engine cylinder through the fuel pipe.
The level of air density in the system depends on the area of the open air damper. The wider the throttle is open, the greater the fuel consumption and power.
Simply put, adjusting the carburetor on a lawn mower is creating an optimal fuel mixture due to the correct air supply.
Schematic diagram of the carburetor operation
The operating principle of the carburetor is the same for Chinese, European or Russian-made brush cutters . So, a vacuum is created in the engine diffuser, and the device sucks in air. At the same moments, fuel is injected from the combustion chamber, enriched with air. As a result of this process, gasoline is atomized, forming a fuel-air mist. This mixture moves into the engine cylinder, where it is exposed to the action of the piston.
At the top point of piston lift, the fuel is ignited by a spark generated by the spark plug. Then the membrane rises, the valve opens, and air enters the chamber below it. When the chamber is filled with the fuel mixture, the membrane lowers, closing the valve. Then the process is repeated.
How to adjust the carburetor on a lawn mower
Before adjustment, the filters must be thoroughly cleaned according to the maintenance instructions.
Further adjustment of the lawn mower carburetor is done with your own hands using adjusting screws. There are three in total:
Right (L) – adjusting the fuel mixture for low speeds.
You need to find the maximum idle speed. To do this, slowly turn the screw (L) to the right and left.
To adjust, turn the screw a quarter turn counterclockwise.
Lower (T) – is responsible for adjusting the engine at idle.
- clockwise – increase;
- counterclockwise – decrease.
For correct adjustment of idle speed it is typical:
- stable operation of a cold engine;
- not over-revving a hot engine;
- there is a large reserve of revolutions for the trimmer head;
- stable operation of the engine when changing position (sharp raising or lowering of the knife).
Left (H) – mixture adjustment at high speeds. (The screw is adjusted last).
The overall adjustment of maximum speed, engine power, temperature and gasoline consumption depends on the left screw (H).
Setting up the carburetor of a lawn mower with the last screw is done as follows:
- Open the throttle to full, while releasing full throttle. Turn the screw clockwise until the speed drops (in this case, use your ear).
- Turn the screw as slowly as possible counterclockwise until the engine runs rough.
- Then turn back just a little, barely hearing stable, smooth operation.
- For a more visual application of skills, it is more convenient to consider the work of an experienced user:
It is interesting that from the point of view of the author of the video, the setting (its correctness) is determined by the color of the spark plug, and not just by the engine speed and stability.
Correctly adjusting the carburetor with your own hands in this case means combustion of the fuel mixture without residue; the color of the spark plug should be light brown.
How does a gas trimmer carburetor work?
It is almost impossible to cover all types of carburetors produced by gas trimmer manufacturers. But, since the design of this module, as well as its operating principle, is largely similar between different models, it is possible to make a generalized description of the processes occurring in the carburetor. This information will allow the user to understand the principles of operation of the device, troubleshoot problems and operate it correctly.
The basis of the trimmer carburetor is a solid aluminum body. Below is a diagram of this block.
At the bottom there is a diffuser, which is also called a Venturi nozzle (18). Air is sucked through this nozzle by a motor.
The smaller this hole is, the faster the air flows, and the higher the level of its rarefaction will be in the area with the smallest diameter.
In the upper part of the diffuser there are fuel channels (11,12). Air flows through these channels and draws in gasoline. The fuel pump itself, the jets and the system used to regulate the flow of the fuel-air mixture can be built-in or installed externally.
The throttle valve (9) regulates the amount of air drawn into the carburetor. Its amount affects the power that the engine develops. The flap (7) is used for cold starting. It must be closed if you are going to start the unit. After the engine has started, it must be opened, otherwise the engine will immediately stall.
The impulse channel (1) connects the impulse chamber of the pump with the engine crankcase, namely, with its internal volume. The piston located in the cylinder, performing reciprocating movements, consistently changes the pressure in the crankcase (vacuum or increase in pressure). Pressure differences cause the membrane (4) to move. Therefore, the operation of the pump is synchronized with the operation of the engine.
The suction of gasoline from the tank occurs precisely with the participation of the membrane (4). Gasoline enters the carburetor through fitting (2). Further, its path lies through the inlet valve (3), exhaust valve (5), through the mesh filter (6), fuel channel (10), passes the needle (14) and fills the chamber (16), which has a control membrane (18) .
The valve (14) is connected to the membrane (18) via a lever (17). The cavity, which is located below the membrane, is connected to atmospheric air through the hole (19).
The device operates as follows.
- A vacuum is created in the diffuser during the suction stroke. This fact causes air leaks. The position of the throttle valve (9) determines the amount of air entering the carburetor chamber, as well as the engine power and the number of revolutions.
- At this time, fuel is sucked from the chamber (16) through the jets (11,12), after which it is mixed with the flowing air. Gasoline, mixing with air, begins to atomize. This creates an air-fuel mixture.
- The finished mixture enters the cylinder, where it is compressed by a rising piston and ignites at its top point from a spark generated by the spark plugs.
- Since the volume under the control membrane (18) is connected to atmospheric air through the channel (19), the membrane goes up, opening the valve (14) through the lever (17). After opening the valve (14), a new portion of fuel enters the chamber (16).
- Once the chamber (16) is filled, the membrane (18) returns to its original position and the valve (14) closes.
Further, when the motor is running, all the above processes are repeated. To adjust the amount of fuel entering the diffuser through the jets, a screw (13) is used. A screw (15) is also used to adjust the idle speed. When the regulators are unscrewed, the fuel mixture becomes richer, and when the regulators are tightened, the mixture becomes leaner. Also, in some carburetor models, you can adjust the engine idle speed using a quantity regulator. It is usually located on the outside and, when tightened, rests against a lever mounted on the throttle valve axis.
Thus, using 3 adjusting screws, you can achieve maximum engine performance, as well as configure its uninterrupted operation at any ambient temperature, and even in mountainous areas.
How does a lawn mower carburetor work or its operating principle?
Adjusting the carburetor of a Chinese lawn mower is completely identical to the adjustment of lawn mowers from European, Russian and other manufacturers. To cope with the task of adjusting the carburetor on lawn mowers and gas trimmers, you need to understand the principle of their operation. How a carburetor works on a lawn mower is described step by step and in an accessible manner below.
- The operation of the lawn mower carburetor begins with the supply of fuel through the channel, as shown in the diagram
- Fuel is sucked into the carburetor using a pulse channel connected to the engine crankcase. Due to rarefaction of air, the flexible membrane at number 4 in the diagram above moves
- Fuel is supplied through valves 3 and 5. Valve 3 is an inlet valve, due to which fuel is supplied to the sub-membrane space, and valve 5 is an outlet valve
- Next, the fuel moves along the channel and, passing through a fine filter, reaches the needle valve 14
- The needle valve is connected via a lever to the control diaphragm 18
- The needle valve is activated by pressure on the membrane. When it is necessary to pump up fuel to start the engine, it is necessary to operate the soft cover of the hand pump. When exposed, the needle opens and the chamber is filled with the fuel mixture
- When the engine starts (cold), the needle opens due to vacuum when the air damper is closed. This vacuum acts through the idle and high speed jets on the membrane 18
- The membrane acts through a lever on the needle valve, thereby filling the chamber
- After starting the engine, the air damper opens, causing the engine to run lean as fuel mixes with air.
- When the chamber is full, the fuel mixture is supplied (sucked in) through the idle and medium speed jets (when the engine is running)
- The throttle valve is shifted from its original position by 10-15 degrees
- When work is carried out under load, fuel begins to flow into the chamber through the high-speed nozzle, and at the same time the throttle valve rotates at an angle of up to 90 degrees (depending on the force of pressing the gas). In all operating modes, the air damper must be open, through which the fuel is mixed with air, thereby igniting the mixture in the cylinder
Below is a diagram of the operating principle of a lawn mower carburetor. Based on the diagram, you can not only understand the principle of operation, but also identify breakdowns and other malfunctions of the mechanism.
When operating the tool, it is necessary to take into account the presence of another jet. This jet is located between the idle and full power passages. It is necessary in order to avoid severe leaning of the mixture, which occurs when the engine operates at partial load. In such a situation, the occurrence of a bullying couple cannot be ruled out. Through an additional channel (nozzle), fuel is sucked into the chamber, thereby enriching the fuel-air mixture. The diagram below shows an additional jet, which is designated by the number 1.
Having an idea of the design of the diaphragm carburetor of a brush cutter and the principle of operation, it will not be difficult to configure it yourself. To adjust the carburetor of a lawn mower, adjusting screws are used. The diagram above shows two screws for adjustment, however, most modern models of gasoline trimmers are equipped with three screws. The presence of three adjustment screws allows for more precise adjustment, while achieving stable and uninterrupted operation of the internal combustion engine.
This is interesting!
What is the difference between a trimmer and a lawn mower? Many people think that trimmers are low-power electric lawn mowers. However, trimmer is a generic name for gas trimmers, walk-behind trimmers and electric mowers as they are designed for a common purpose.
Common carburetor malfunctions
Trimmer carburetor breakdowns occur due to the use of poor quality gasoline, a damaged air filter, and the accumulation of dirt in the chamber of this unit. Most often, it is quite possible to repair a carburetor yourself. Listed below are typical problems with the carburetor of a brush cutter.
Fuel pump problems
A common malfunction that “haunts” the fuel pump is deformation of the pump membrane. For this reason, it does not seal properly and the pump channels do not seal.
The reasons for membrane deformation may be the following:
- long-term trimmer operation;
- use of unsuitable fuel;
- entry of gases into the pulse channel.
As a result, damage to the membrane reduces pump performance, and as a consequence:
- the combustible mixture becomes depleted;
- it is difficult to start the engine;
- there are interruptions in the operation of the motor;
- the piston is damaged.
Also, the above-described consequences for the engine can be caused by clogging of the pump cavity on the impulse side. In this case, dirt enters the membrane through the pulse channel.
To remove the blockage, you will have to disassemble the carburetor and clean the membrane.
Strainer clogged
The strainer can become clogged when contaminated fuel enters through a fuel hose or a defective suction head. In the photo below you can see what a clean filter looks like and a dirty one (the parts are separated by a line).
To eliminate the problem, you will need to thoroughly clean and rinse the strainer. It is also recommended to blow out all the holes in the trimmer carburetor body with compressed air.
The adjustment lever is faulty
This breakdown occurs when the contact surface of the lever wears out.
Abrasion of the contact surface occurs due to the presence of abrasive particles in gasoline or due to strong vibration of the engine during operation. This defect in the adjustment lever causes problems with intake, as well as improper operation of the engine at idle.
Inlet needle wear
The inlet needle fails, usually due to the presence of abrasive particles in the fuel fluid.
- the tightness of the inlet needle seat is disrupted;
- leakage of the flammable mixture appears;
- Engine malfunctions appear due to over-enrichment of the fuel mixture.
Also, the inlet needle may simply jam.
Sticking of the inlet needle can cause dirt in the fuel, or the device may remain idle for a long time.
Clogged adjustment cavity
If dirt accumulates in the adjustment cavity, the inlet needle cannot tightly close the hole and a lot of fuel pours into the chamber.
This causes the fuel to become over-rich and the engine starts to operate incorrectly. It is necessary to disassemble the carburetor and clean the cavity of the adjusting membrane.
Deformation of the control membrane
The membrane may be subject to deformation during prolonged operation of the unit and when using aggressive fuel.
The impossibility of normal adjustment due to a defect leads to:
- piston damage;
- difficulty starting;
- fuel depletion;
- improper engine operation.
Intake control lever problem
This problem can occur if the adjustment lever is not installed correctly or if it is bent before installation. As a result, the contact surface takes an incorrect position, which disrupts the additional fuel supply.
Damper wear
The throttle and choke valves mostly wear out due to abrasive particles in the air. Defective dampers look as if they have been sandblasted.
As a result of wear on the valves, engine performance decreases, malfunctions appear in its operation, and the piston rings, piston and cylinder coating wear out.
Worn throttle and choke shaft
The air and throttle valve shaft may wear out due to the following reasons:
- insufficient and improper maintenance of the air filter;
- the air filter is damaged;
- The air filter is not suitable for this unit.
The Chinese lawn mower won't start. We climb into the carburetor.
4.7 / 5 ( 26 votes)
“It doesn’t pump gasoline into the cylinder, you spray it from a syringe, it starts and stalls,” - these are the words with which a large number of lawn mowers arrive at our service center in the summer.
Can it be cured? Unfortunately, not always... We will try to talk about common malfunctions of this carburetor and how to fix them yourself.
Before performing any manipulations with the carburetor, it is necessary to eliminate possible malfunctions that could affect the operation of the lawn mower (create an imitation of a non-working or not configured carburetor:
Fuel filter (hoses): no mechanical damage to the filter housing, no contamination, good throughput
Air filter: no mechanical damage on the filter surface, no contamination, good throughput
Malfunctions of the ignition system: a working spark plug “paired” with the ignition module should ensure stable engine operation
A working exhaust system: the cylinder exhaust port, as well as the muffler, should not be clogged with carbon deposits - as a result of which the scythe will “chop” and not develop speed - creating an imitation of a faulty carburetor.
Engine crankcase tightness. Crankshaft oil seals and rubber intake adapters - as a result of damage (natural wear) allow excess air into the engine - usually manifests itself in a strong increase in speed and the inability to adjust the carburetor.
If, after checking all these components, suspicions remain about the carburetor, you can proceed to its initial inspection. Relatively speaking, after unsuccessful attempts to start the engine, the spark plug was unscrewed and it was “dry”
Disassembly of the carburetor should be carried out on a clean, light surface so as not to lose small parts. The disassembly process can be recorded on a photo/video camera, making it easier to reassemble.
What can you check at home with your own hands?
“Standard” version of a modern Chinese lawn mower. It has the same layout and many manufacturer options (Patriot, Forward, Green, Etalon, Prorab, Varyag and many others)
Remove the air filter cover by unscrewing the screw.
Next, unscrew the two screws securing the air filter housing and remove it.
Next, unscrew the cable securing nut and remove it from the throttle valve boss. The screw indicated by the arrow adjusts the idle speed on these carburetors.
We pull off the fuel hoses.
The carburetor gasket should not be damaged; if necessary, replace it.
This quality screw is adjusted by the manufacturer; it cannot “go out of adjustment” by itself. During operation, adjustments are possible due to wear of the piston group, but it will have “minimum values”.
As practice shows, the factory value of this adjustment is 1.5 turns (If you have “misadjusted” it, tighten it completely and unscrew it by 1.5 turns. With this value, provided that the components are in good working order, the trimmer must start. After warming up, the screw may need to be adjusted (should be stable operation at gas speed))
There is no need to twist it unnecessarily!
Carburetors of Chinese lawn mowers are on the left for engine volumes of 26 and 33 cm³, on the right for engine volumes of 43 and 52 cm³. The design is the same, the difference is indicated in the photo. They are understood the same way.
Let's start disassembling:
Unscrew the 4 mounting screws
Let's sort it out in sequence
We immediately examine the condition of the aperture blades. They should not be “bent” from the plane of the carburetor. The diaphragm itself should not be damaged.
The membrane gasket must also not be torn or damaged.
The carburetor body is also free of dirt or deposits that could clog the channels and impair the operation of the carburetor.
The membrane must be “integer” and have no damage to its surface.
The “patch” of the membrane should not “scroll”
Pay attention to the “inlet needle area”. If there is any dirt or even traces of rust, be sure to clean everything.
The needle stroke should be smooth, without jamming or wedging.
To check the needle, press the “sandwich” to the carburetor - fill the needle area with gasoline (carburetor cleaner) (highlighted by an orange arrow)
We put a hose on the fuel supply fitting (marked with a red arrow), blow in air, and at the same time inspect the needle for the absence of air “bubbles”.
If there are no bubbles, then the needle holds, there are no problems. If bubbles are present, we disassemble further.
Unscrew the screw securing the rocker arm axle.
There is a spring under the rocker arm, be careful when disassembling it so as not to lose small parts.
We remove the axle with the rocker arm, the needle and the spring.
I would like to note the following: if the “seat” itself for the needle is broken, then no manipulation will help - you will have to replace the carburetor.
Let's continue.
A very important point in checking the condition of the rocker axis. We check this way: by turning the axle in the rocker arm, we observe that if there is no dirt or damage on the axle, the rocker arm should remain in place.
If, when the axle rotates, the rocker moves along with the axle, jams and “prevents” the axle from rotating freely, it is necessary to clean the axle.
You can try cleaning the axle with gasoline or carburetor cleaner.
If this does not help, you will have to resort to mechanical action.
We clamp the axle in the screwdriver chuck and rotate it at low speed.
We press fine-grain sandpaper (“zero”) against the axle. Don't get carried away - just a few seconds.
The needle itself, if necessary, can be cleaned in the same way. BUT! The sandpaper should not touch the “tip” of the needle.
Go ahead.
Just in case, we use carburetor cleaner to blow through the channels (on the back of the sandwich)
Go ahead.
Just in case, we use carburetor cleaner to blow through the channels (on the back of the sandwich)
The filter mesh must be perfectly clean; under no circumstances should the carburetor be operated without it.
Well, actually the injector valve itself. It is precisely because the membrane of this valve “sticks” that gasoline does not enter the combustion chamber and the lawn mower does not start.
Further actions should be as careful as possible. This valve cannot be purchased separately. If it is damaged (lost) or malfunctions, the entire carburetor will have to be replaced.
By leaning the hose close to the valve, we check its operation. We blow in and suck in air. Correct work - if
If this valve does not work, we will try to “reanimate” it.
First, we try to fill it with the well-known WD-40 liquid.
Next, using a blunt object, we try to “stir” the valve membrane a little as CAREFULLY as possible.
If after these manipulations no changes for the better have occurred, all that remains is to replace the carburetor assembly.
Of course, you can try to remove the valve membrane, but there is a very high chance of damaging it. Using a blunt object from the back of the sandwich, carefully “push” the membrane out of its seat in the valve.
And we carefully monitor the membrane so as not to lose it.
Perhaps you can make it yourself. Diameter - 3mm, thickness 1mm. But it is necessary to select the appropriate material and a suitable “punch”. Does anyone have any manufacturing experience? Share)
If there is a donor, or you have made this membrane yourself, you must place it in the valve correctly and without damage.
If suddenly you forgot the assembly sequence...
All that can be bought for this kind of carburetors is the so-called repair kit. A convenient option is produced by the company IGP (Champion) - in addition to the diaphragm, diaphragm and gaskets, it also contains: a needle, an axle and a rocker arm with a spring. Article: 1700042
That’s all we wanted to tell you about the carburetor of the Chinese lawn mower. We hope that this material will help you troubleshoot and work with pleasure. Good luck with your work!
View a detailed photo report of the disassembly of a Chinese lawn mower
More information about the analysis of damage to the piston group can be read in the article
View a detailed photo report of replacing the piston group on a Chinese lawn mower
Frequent malfunctions and repairs of Chinese trimmers 43-52cm³.
4.4 9 votes
Article rating
When to make adjustments
Carburetor adjustment is necessary in the following cases:
- the new engine was run-in (4-5 liters of fuel mixture was used);
- the composition of the fuel has changed (brand of oil and gasoline);
- the weather changed (it became hot, cold);
- air rarefaction has changed (applies to mountainous areas);
- after long-term storage;
- the load on the engine has increased (after changing tools, etc.);
- due to vibration, the adjustment screws spontaneously unscrewed;
- Fuel consumption has increased, the carburetor is overflowing with fuel;
- carbon deposits quickly appear on the electrodes of the spark plug (even though the fuel mixture is prepared correctly);
- the engine starts and immediately stalls or picks up speed poorly;
- no gasoline enters the cylinder;
- a large amount of exhaust gases.
Signs that adjustment is needed
Some users work with a trimmer for a long time and do not adjust the carburetor, starting to think about this need only when the engine performance deteriorates, for example, when the equipment stalls when pressing the gas. In order not to cause harm to the lawn mower and to set up one of its key components in time, you need to follow a number of recommendations. According to them, the carburetor must be adjusted:
- after running in the engine (consumption up to 5 liters of fuel);
- when using fuel of a different composition;
- when the brand and color of the oil, as well as the type of gasoline, changes;
- when the season changes (typical for chainsaws and other tools that work all year round);
- during prolonged inactivity of the tool, for example, a break during the cold season;
- with increased fuel consumption;
- when dark carbon deposits are detected on the electrodes of the spark plugs;
- if gasoline does not flow, or the engine starts with difficulty;
- if the amount of exhaust gases has increased;
- when the engine operates intermittently, starts poorly or increases speed uncertainly.
So, there are many reasons for making adjustments. Experienced carburetor technicians detect by ear the need to perform a procedure, so if you have any difficulties, you can contact them.
On a note! It will not be superfluous to adjust the carburetor correctly, even if you are not sure that this operation is necessary.
How to make the adjustment correctly
Before you start adjusting the trimmer carburetor, you must do the following:
- flush the engine;
- replace or clean the spark plug;
- replace or clean the air filter (it is recommended to wash it in warm, soapy water, wring it out and let it dry thoroughly).
It is also necessary to install a cord of a suitable diameter in the trimmer reel or install knives - this is done so that during the tuning process the engine has at least some load. After installing the cutting tool and starting the gasoline engine, let it warm up for 10 minutes.
If at idle engine speed you notice that the cutting tool is rotating, then you need to reduce engine speed. This is done using the lower idle speed control, often marked with the letter “T”. The picture below shows the placement of the controls on a Husqvarna trimmer.
But, for example, on a Stihl trimmer this screw may be marked “LA”.
So, turn the idle speed control to the left until the trimmer head comes to a complete stop.
To adjust the carburetor, 3 regulators (screws) are used.
- The right control L adjusts the level of enrichment of the fuel mixture at low speeds. It needs to be adjusted first. Achieve maximum idle speed. This is done using the L control, turning it left and right. After finding the maximum speed point, return the regulator half a turn to the left (counterclockwise).
- The lower adjuster T (LA) is used to adjust the idle speed. By turning it to the left, the engine speed will begin to decrease, and when turning the regulator to the right, the engine speed will increase.
- The left regulator H is responsible for enriching the fuel mixture at high speeds. The enrichment setting completes the carburetor adjustment. Also, using this regulator, you can adjust the maximum speed, fuel consumption and engine power.
Important! If the engine is allowed to operate at full speed for more than 10 seconds, it may fail.
To eliminate this nuisance, adjustment will be required. With the engine running, give full throttle, then turn the “H” control to the right until the speed begins to decrease. After this, the “H” regulator must be slowly turned to the left until you hear uneven engine operation. Then turn the “H” control to the right until you hear the motor running smoothly.
After carrying out the above steps, the carburetor adjustment can be considered completed. After correct adjustment, the engine should confidently pick up speed, quadruple slightly at maximum speed, and when idling, the cutting tool should not turn. This manual is suitable for adjusting carburetors on Huter, Patriot and other lawn mowers.
There are also carburetors without a screw, which is responsible for enriching the combustible mixture at low speeds. That is, they have only 2 adjusting screws: the idle speed regulator and the fuel mixture quality regulator at high speeds. You can learn how to set up a carburetor of this type from this video.
Carburetor for trimmer
The carburetor for the trimmer is one of the most important components of the unit, which is responsible for the fuel mixture. If the equipment is handled incorrectly, the element may be damaged, making it impossible to operate the lawn mower without repair. To repair a garden tool, you need to know about its structure, operating principle and adjustment rules.
Design features and principle of operation of the lawn mower carburetor
The design of carburetors is practically no different from well-known brands and Chinese manufacturers.
The carburetor structure of a brush cutter consists of the following elements:
- Booster pump;
- Atmospheric membrane tuning systems;
- A primer that makes it easier to start the engine;
- Cold running systems;
- Elastic two-valve plate;
- Dosing system with a rotating rotor;
- Throttle valve.
The model functions as follows:
- From the air damper, the air passes into a tube, which increases or decreases its flow;
- In the area with a hole for the fuel mixture, the narrowed zone is a diffuser. In this zone, air moves faster;
- The fuel mixture from the float compartment enters the tube through the nozzle. The amount of fuel is determined by the float;
- The fuel is picked up and atomized by the increased air flow. An air-fuel mixture with sufficient density is created;
- Sucks the mixture with a cylinder through a pipeline.
The concentration of the air flow depends on how slightly the air damper is opened; accordingly, more fuel is supplied to the cylinder. Adjusting the carburetor of a lawn mower involves setting the correct ratio of the flaps to achieve the optimal consistency of the fuel mixture.
Results of work on flushing the carburetor of lawn mowers
The carburetor flushing procedure is not difficult and takes no more than 1-2 hours. However, before you get started, you need to consider the following points:
- During the cleaning process, it may be necessary to replace parts and components, which should be purchased in advance. If the lawn mower is Chinese, it may be difficult to find spare parts.
- You need to be prepared for the fact that the mechanism may not be suitable for further use, so it will need to be replaced. The cost of carburetors depends on the model of the tool.
- After completing the work, you will need to resort to the setup procedure. There will be no difficulties with this, since detailed instructions for adjusting lawn mowers and trimmers are described here.
The most important thing when carrying out work is to remember the correct location of all parts and elements. It is strictly contraindicated to use sealant. Worn and dry gaskets should be replaced.
If you are faced with the need to clean the carburetor of a lawn mower, then you should not put off the procedure. Prepare your tools for the next season in advance so as not to miss the opportunity to tidy up the surrounding area around your house or prepare hay for winter.
When is carburetor adjustment required?
The operator needs to adjust the operation of the working unit in certain cases:
- The new engine was run in using 4-5 liters of fuel;
- Changed the composition of the fuel - the brand of motor oil and gasoline;
- Weather conditions have changed (in winter, summer);
- The level of air rarefaction has changed;
- The load on the power plant has increased;
- After prolonged storage of the unit;
- Formation of persistent carbon deposits on the spark plug;
- The engine immediately stalls after starting or does not develop the required speed;
- When vibrating, the adjustment screws became loose;
- The amount of fuel consumed has increased;
- Gasoline is not pumped into the cylinder;
- There's a lot of exhaust coming out.
In what cases is it necessary to adjust the carburetor?
The stable operation of a lawn mower's carburetor largely depends on its correct settings.
Node adjustment is required in the following cases:
- after running in a new trimmer, when 4–5 full tanks of fuel were consumed during operation;
- when the operator frequently changes the brand of gasoline used for refueling;
- as a result of sudden changes in weather;
- due to prolonged storage of the trimmer;
- as a result of arbitrary unscrewing of the adjusting bolts of the brush cutter caused by strong vibration of its motor;
- due to a sharp increase in the amount of fuel consumed by the trimmer.
It will also be necessary to adjust the mower's carburetor in cases where carbon deposits quickly appear on the tool's spark plug, as well as when there is a sharp increase in the volume of exhaust gases emitted by the trimmer.