All owners of personal plots are faced with the problem of mowing grass, which grows literally before our eyes, and during the season it is necessary to improve their plot several times. The usual hand scythe has long been replaced by gas trimmers and electric trimmers. But the price for them does not decrease and is quite significant for many owners of dachas and private houses. Craftsmen nevertheless found a way out of this situation and learned to make trimmers with their own hands literally from improvised means, using gas and electric tools not intended for these purposes.
From the Bulgarian
Most often, a homemade electric trimmer is made on the basis of an ordinary grinder, which is available to every home craftsman. This tool is almost ideal for converting into a trimmer. It has more power and a higher number of revolutions per minute than store-bought machines. In addition, the standard nut used in the grinder to secure the discs already has holes through which it is easy to insert a fishing line (cord).
So, there are many options for what to make a barbell (holder) from. The simplest one is a wooden holder that is longer than for a shovel. An angle grinder is attached to the end of it at the desired angle using regular tape. The fishing line is inserted into the 2 holes of the nut, after which it is tightened. Thus, in a few minutes you get a trimmer with which you can mow the grass without any problems.
To ensure safe operation of a homemade device, you can improve it by making a protective casing (how to do this will be discussed later).
For advanced craftsmen who have a welding machine, we can recommend a more advanced design for securing the grinder and protective casing. It is made of an aluminum tube (serves as a holder) and a metal square profile. Looking at the figure below, you can understand the principle of making the holder.
The grinder is secured to the holder with bolts inserted into the holes that are intended for attaching the handle to the device.
The following photo shows what this design looks like from below.
Next, the “original” casing of the angle grinder is removed, and instead of the disk, either a fishing line or a metal disk blade is installed.
By the way, you can also screw the holder (bar) to the holes for attaching the handle when you want to make a simple trimmer that is easy to assemble and just as easy to disassemble if you need to use the grinder for its intended purpose.
To make it more convenient to hold the trimmer in your hands while working, and for it not to rotate around the axis of the rod, you can attach a side handle made from a bent pipe to it.
From a vacuum cleaner
A trimmer from a vacuum cleaner engine is made according to the same principle as from an angle grinder. The motor must be mounted on a rod, and either knives or a plastic or metal disk must be attached to the motor shaft, into which the fishing line must be inserted. The top of the cutting tool is covered with a protective casing.
To prevent dust and small particles of mowed grass from getting into the motor removed from the vacuum cleaner, it can also be hidden in a plastic casing made from a sewer pipe, as shown in the following photo.
Since the motor in the vacuum cleaner is high-speed, it needs to be cooled. Therefore, under the washer into which the fishing line is inserted, it is recommended to insert a homemade disk with slotted and curved blades so that it acts as a fan that creates a vacuum. It is required so that air is sucked through the hose from above and cools the engine.
In order to ease the load on the hands of the mower operator, the unit can be installed on a platform with wheels. In this case, you will get something similar to a lawn mower.
To secure the fishing line, you can also use either a pulley with a suitable mounting hole or a plastic wheel from a cart.
Lawn mower made from an electric motor from a vacuum cleaner
My design consists of:
- commutator motor;
- its attachment point on a wooden rod;
- homemade cutting knife;
- support wheel;
- switch buttons;
- protective covers.
Electric motor
The design of the lawnmower is based on a collector motor from an old Soviet-era 300-watt Buran vacuum cleaner. Its intended use had to be abandoned after, as a result of long-term use, various gaskets began to wear out and air movement was disrupted. I was tired of eliminating emerging fistulas that affected pressure and suction, so I bought a replacement.
The appearance of the assembled trimmer from the engine side is shown in the photograph. Since it is no longer in use, it is covered with rust, and the remains of the mown grass have long since dried out and remained stuck to all the parts. I find it much more convenient to work with a factory design.
The engine didn't have to be rebuilt at all. I simply made several fasteners and protective covers using an electric drill, a vice and a hacksaw. In the next photo, a cap cut from a plastic bottle is raised, covering the brush assembly.
The working knife is poorly visible in this picture, but it can be seen above.
For greater clarity, I lifted the protective cover with my finger and showed a close-up of the engine from the brush side. Here, all factory parts remain in working order.
On the opposite side, a factory-mounted capacitor works.
Barbell
All parts of the homemade trimmer are attached to a dried wooden stick without any processing. I drilled mounting holes in it, and screwed some parts, for example, the handle bracket, with a piece of wire.
All these connections are visible in different pictures.
Homemade grass knife
It is noteworthy that when I removed the fan impeller, I saw that the free space on the rotor shaft was ideal for attaching a homemade knife. I didn't even have to select the nut and gaskets.
Bad experience
At first I tried attaching wires of different diameters to the shaft. She started to mow the grass normally, but stopped very quickly. Its structure cannot withstand the mechanical tensile and bending loads developed by high engine speeds and oncoming grass. Therefore, trimmer manufacturers produce different types of fishing line.
Method of making a lawn mower
I made a knife for a homemade trimmer using the following technology:
- took a metal plate made of mild steel;
- cut it into a rectangular shape;
- drilled a hole in the center along the diameter of the shaft;
- sharpened the edges to reduce the stress when mowing.
To show how to attach it through the factory bushing, I unscrewed the nut a little and simply bent the knife itself by hand.
Support wheel
The main disadvantage of this lawn mower design, like all trimmers with a bottom-mounted electric motor, is the need to exert great physical effort to keep the blade in the desired plane when mowing. At the same time, the worker’s muscles tense, and he himself quickly gets tired. Need emphasis on the ground.
Therefore, I attached small wheels from an old children's cart to the motor housing and rod using adapters. They are lightweight, but make the job much easier.
Switch button
It must be placed on the handle directly under the palm.
This way you can quickly turn off the trimmer.
Design selection
I used a special fastening of a button with self-return from one of the used measuring electrical devices. It is simply screwed to a wooden rod with soft copper wire insulation and for better clarity, the photo is shifted from its axis to one side.
The switching capacity of the contacts can withstand the power developed by a 300-watt motor with a reserve.
I draw your attention to the self-return function. I do not recommend using a regular switch. If while working you accidentally fall, lose your balance, or something unexpected happens, and the running trimmer slips out of your hands, you will not be able to stop it instantly. A sharp knife will cut anything that gets in its way.
To prevent accidents in such situations, I even eliminated the constant operation function on the factory trimmer by removing the corresponding switch. I believe that safety and health are more important than such amenities with risks.
Installation method
Accidental access to the electrical contacts of the wires is limited by the insulation of a special insulating tape.
In the next photo I deliberately exposed them. This will give you a better view of the fastening and connection.
By the way, the soldering was done with the same soldering iron Moment, about which I had the largest number of comments. Although there are many other designs, described in a separate article on choosing soldering irons for the home craftsman.
The wires to the button of a homemade lawn mower are simply wrapped around the rod, and on the reverse side they are twisted and soldered into the gap of one supply wire of the cable. The connections are insulated with electrical tape and covered with protective cambrics.
According to safety rules, any switch or control button must switch phase, not zero. But in the design under consideration, determining its position each time does not make much sense, and the homemade trimmer was created for the sake of experiment, and not long-term work. It has proven itself quite satisfactorily when mowing the lawn.
Protective covers
You have already seen their image in all the above photographs. On top of the engine, to protect the collector assembly during operation, I simply inserted a cut neck from a plastic bottle.
We managed to make the lower cover from the body of the same vacuum cleaner, cutting out part of the sector from it. I attached it with screws and nuts.
From a drill
The simplest mower is made in a matter of minutes from a drill or screwdriver . But first you must make a knife from a sharpened metal plate with a hole drilled in the center. A bolt is inserted into this hole and tightened with a nut.
Next, the bolt is clamped in the drill chuck, and the trimmer is ready.
Since a drill with this attachment does not have a protective casing, such a tool is quite dangerous for the user. To protect yourself, you can place the drill, like a grinder (discussed above), on the handle of a shovel or on an aluminum pipe.
Also, to protect the user of the mower from knives, a casing can be attached to the drill (attached to a plastic pipe and placed on the body of the device).
The drill is attached to the rod using clamps.
Lawnmower on wheels made from a cordless grinder
Another option for a grinder mower is a manual, portable trimmer on wheels, which can be used to trim the lawn in the most difficult to reach places.
What materials will be needed for manufacturing:
- a saucepan or small freon bottle;
- steel sheet;
- 4 wheels, bearings and axles;
- a piece of metal pipe with a round cross-section;
- a piece of thick carbon steel for making a knife.
List of required tools:
- grinder with attachments for metal cutting and grinding;
- welding machine;
- drill with a metal crown;
- optional, but desirable - a lathe and a belt sander, a can of paint;
- marker and tape measure.
The process of making a mower with your own hands:
- To make the body, you need to cut off the top or bottom of an empty gas cylinder. Having found the center of the convex bottom, cut it out with a grinder and weld a flat piece of sheet steel.
- The next step is to make a clamp (one or two) to attach the grinder to the body. It can be made from a piece of pipe or thick steel. Make a hole in the center of the body along the diameter of the clamp and weld it.
- Make a pipe for discharging mowed grass: drill a hole in the body and weld an elbow from the pipe so that the grass does not fly towards you during operation.
- Cut and sharpen the knife for the future trimmer. Weld a long nut to the center of the workpiece. To prevent grass from wrapping around the axle, you can weld a piece of pipe over the axle, weld the end and drill a hole for the nut.
- Next, you need to prepare the axles for the wheels: drill them lengthwise, cut threads for the screws and screw the wheels. Weld the finished axles to the metal body; if necessary, make steel shields for secure fastening.
- The final stage is painting and assembling the structure. You can start working.
From a chainsaw
Many different attachments have already been invented for chainsaws that expand the capabilities of this unit, for example, a cultivator, a drill, a boat motor, and also a scythe attachment. You can see what it looks like in this video. If you want to make a trimmer out of a chainsaw, the most you can make is a lawn mower on wheels, since the engine of the unit is quite heavy, and it will not be possible to apply the above-described options for making trimmers (with a bottom drive) to it.
Therefore, the trolley is made first. It can be welded from a 25x25 mm corner. The frame dimensions should be 500x600 mm. The wheels are attached to the corners of the frame.
Next, you need to unscrew the “steering wheel” and tire from the unit. The cart handle can be made from water pipes. The “steering wheel” is screwed to it. It is also necessary to lengthen the fuel hose and throttle cable.
When installing the trolley handle, make sure that it does not block the winder (starter).
The gasoline engine is installed (screwed through the holes to secure the tire) onto the frame so that the gearbox is rotated 90 degrees and the shaft is at the bottom.
Now all that remains is to attach the cutting tool to the shaft of the unit. This is done as follows.
- It is necessary to weld a small piece of pipe, 80 mm long and 50 mm in diameter, to the “star” of the device. It is better to cut the pipe on a lathe so that the ends are perfectly straight.
- Next, find a pipe with a slightly larger diameter - equal to 58 mm. It also needs to be cut to a length of 80 mm. Thus, you will receive a telescopic shaft, which is connected using 2 bolts (m6) located opposite each other. The bolts must have locknuts. Below is a diagram of how the trimmer head is made, which is used to secure the cutting tool.
Several holes need to be made in the telescopic pipes so that the height of the knives above the ground can be adjusted.
It is better to make a knife of such a design as in the following figure.
Due to the fact that movable knives are attached to the disk with rivets, they will simply bounce off when they encounter a stone or a dry branch . This will protect the shaft and gearbox from damage that may occur when the tool jams.
The rivets that hold the knives to the disk must be metal.
The diameter of the disk (made from 4 mm sheet steel) should be 180 mm. The knives are made from strips 30 mm wide and 120 mm long, cut with a grinder from a hacksaw blade for wood.
DIY trimmer knife
If you need to mow plants with thick or tough stems, then ordinary fishing line will not cope with this task. Therefore, you cannot do without a special metal knife. Trimmer knives can be bought at a specialized store, or you can make them yourself, for example, from an old circular saw blade (without soldering). The knife is made as follows.
- First, markings are made on the disk. You can make as many “petals” as you wish, for example, two, three, four or five, as in this description.
- Next, using a grinder, 2 radial cuts are made according to the markings.
- After radial cuts, you need to use the same grinder to connect 2 cuts, making a longitudinal groove of sufficient depth so that you can break off the cut piece of the disk.
- Clamp the almost cut part of the workpiece in a vice and break it off.
- Do this operation with all the “petals” of the future knife. All irregularities can be ground on an abrasive wheel.
- When the workpiece is ready, sharpen one side of each “petal” at an angle of 45°.
How does a trimmer work?
To make a trimmer at home, you should first understand the principle of its operation and design. In general, all manual mowers are classified into gasoline and electric. The first option is more convenient, because the user is not tied to an outlet, but to make a homemade device, electric motors from household appliances or tools are often used .
The design of both types of manual lawn mowers includes:
- engine (electric or gasoline) - suitable for household tools (screwdriver, drill, grinder), washing machine, and chainsaw;
- tank - for a gasoline engine;
- starter - it is best to use a simple button with a return mechanism;
- the rod is made of solid wood or a metal pipe (aluminum pipe is perfect, since it is lighter), you can also make a sectional design that will allow you to adjust the holder to the height of different people;
- a handle for ease of use, on which a button is placed - it should have a comfortable grip and be made of non-slip material;
- knife or fishing line - it is better to use knives, as the fishing line breaks faster;
- protective casing - powerfully weld from thin metal, cut from a large plastic bottle, or use an old frying pan.
Advice! It is better to make a knife from tool steel, an old circular saw blade or a hacksaw. It can be solid or with a replaceable blade. The second option is more convenient, since if damaged, it will be enough to simply change the edge.
However, it is worth understanding that factory designs are more complex than homemade devices. And you won’t be able to get a complete analogue of a store-bought trimmer. Below are recommendations for assembling a functional hand mower from various equipment.
Homemade protective casing
If you are making a homemade mower, then you will definitely need a protective cover. It will protect your eyes, body and legs from injury from small pebbles and knife fragments if they break.
The trimmer housing can be made from a sheet of aluminum or thin sheet metal.
- First, in the corner of a metal square, you need to drill a hole of the required diameter (depending on the type of drive of your unit) using a crown.
- Then you will need to make markings for the fasteners. As a base to which the homemade protection will be screwed, you can use a standard casing from an angle grinder if you are making a trimmer from it.
- Clamp the workpiece with a clamp and, using a tape measure and a pencil, draw the first circle with a radius of about 270 mm. The center of the circle will be the corner of the workpiece. It is impossible to give exact recommendations regarding the radius, since it will depend on the diameter of the cutting tool that you will use with the unit. Therefore, first decide which knives you will use and what line reach will be optimal.
- Next, draw a second arc (this will be a bend), slightly retreating from the first. In this case, 5 centimeters. This way you measured the height of the future shield. In general, it is recommended to make the height of the casing such that when you place it flat on the ground, the cutting tool does not reach it by about 2 cm.
- After marking the second line, you need to cut a workpiece along it using a hacksaw or a jigsaw with a metal file.
- In addition, it is necessary to make radial cuts (up to the first arc) and bend the resulting parts with pliers at an angle of 90°.
- Next, the shield is attached to the protective casing of the angle grinder, the cutting tool is installed, and the unit is ready for work.
In this way, you can make and install a protective cover on a trimmer purchased in a store if the shield has cracked for some reason. The shields in factory devices are made of plastic and often break if you unsuccessfully hit the trimmer head on the ground to lengthen the fishing line.
Making an electric scythe from a washing machine with your own hands
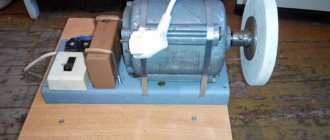
You can also make an electric scythe using the motor from a washing machine. It is asynchronous and is activated via a button. The winder can be made from a return button, for example, from measuring instruments. The fairly compact dimensions of the motor make it possible not to make a large cart, as in the previous version.
On a note! The convenience of using such an engine lies in the fact that it already has a pulley, and replacing the piston pulley with a more convenient one is not necessary. The belt and second pulley are located right there - in the washing machine.
Knives are made by analogy with the descriptions above. But there is one important point - in order to prepare the motor from a washing machine to work as a trimmer, you should not forget to make a protective casing for it. It will protect the drive from the grass. But at the same time, it is necessary to take care of protection from overheating, that is, the casing should be larger in size and have holes for ventilation. An old bucket or large plastic bottle will do for this purpose. Don’t forget to take breaks - such a motor is not designed for long-term operation .
Trimmer belt
For more comfortable work with the trimmer, if you intend to process a large area covered with grass, it is advisable to use a special belt. This device relieves fatigue from the hands and back of the mower operator and greatly facilitates the process when compared with the same work, but without a belt.
There are shoulder straps and backpack straps. The shoulder strap is the simplest device and consists of a loop with two or one latch (carabiner), with which it is attached to the mowing unit. A plastic plate is usually attached to the second carabiner, protecting the operator's side from pressure from the trimmer bar.
The shoulder strap is usually used with lightweight trimmers weighing 3-4 kg. For heavier units it is more convenient to use a backpack belt.
A trimmer belt can be easily ordered online or purchased at a specialized store that sells these devices and their accessories.
The price of backpack belts starts from 250 rubles and above.
If you want to make it yourself, then any housewife, looking at this device, can easily sew it from improvised materials (old belts and belts). You may have to buy buckles and carabiners. But we still recommend buying a ready-made backpack suspension and not wasting time and money on making a device of worse quality than the ready-made one.


