How does a TV get its channel order?
If you connect the TV to the antenna for the first time, it will offer to auto-tune channels. Auto-tuning helps you quickly find and arrange channels in order.
The TV arranges the channels itself, or receives their order from the television company: Tricolor, NTV-PLUS, Telekarta, MTS and others.
How to receive channels, we select during auto-tuning:
If we choose Antenna, Cable or Satellite, the TV will arrange the channels itself.
If we choose NTV-PLUS or other operators, the TV will receive the order of channels from these companies.
Search by alphabet
By default, on Tricolor devices, the channels are organized in order. The earlier a specific television channel was found, the lower the number it is assigned. But remembering digital designations is not always convenient, especially when it comes to three-digit numbers.
Sorting TV channels alphabetically helps solve the problem of quick access to the desired content. You can arrange Tricolor TV channels alphabetically by following these steps:
- Press the “Ok” button and call up the full list of channels.
- Press the green button and call up the alphabet.
- Select the desired letter and click Ok.
The system will display all TV channels whose names begin with the selected letter. You can exit the list using the Exit button.
If you need to change the order
You can change the order only if the TV has arranged the channels itself. If your TV received the channel order from the TV company, you won't be able to move channels.
| What did you choose during auto-tuning? | What to do next |
| Antenna, Cable or Satellite | Proceed to move channels |
| Proceed to move channels | Do autotune again and proceed to move channels |
| Don't remember what you chose during auto-tuning | Do autotune again and proceed to move channels |
Below are instructions for the different episodes (click on the episode name to view), so find out your TV's episode before tuning.
ON THIS TOPIC:
How to do auto-tuning
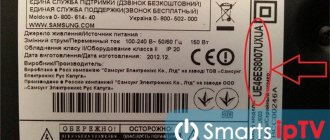
How to find out the series and year of production of a TV
Featured Lists
You can move TV channels or create your own group through the special “Arrange Favorites” menu.
Important! Often, receivers already have lists on certain topics. Because of this, it may not be possible to move additional channels there. Also, editing may not be available after a new firmware update.
To begin moving, follow these steps:
- On the remote control, press the “Menu” button.
- In the window that opens, select “Channels”.
- Next, select the “Organize Favorites” section.
This section provides for creating your own list of channels. However, if you go to “Channel Organization” you will see groups with standard thematic designations. For example, “Music”, “Sports”, etc. You can only change their location.
As a standard, you have 5 lists labeled “FAV” or “New1-5”. You can change their name to your heart's content. For example, “news”, “movies”, etc. To do this you need to do the following:
- Using the “arrows” on the control panel, select the required one and press “F4” (in most cases it is colored blue).
- Use the volume and toggle arrows to enter its name. Each character must be confirmed by pressing the “OK” button. If the input is incorrect, you can delete a letter or number using the red “F1” button.
- Press "F2" to save.
Thus, create the categories you need. To add and configure their order, follow these steps:
- Find the desired list in which you will make settings using the “OK” button. Next, on the left, you will see your group, and on the right, all the channels available for viewing.
- Using the “arrows” on the control panel, find the one you need in the section on the right, then “F2”.
Complete step 2 as many times as necessary. After that, they can be swapped, directly in the list itself, like this:
- Using the “arrows” on the control panel, select the TV channel that needs to be moved up or down. Press "F2". To remove it from the list, use the blue “F4” button.
- Then it can be lowered or raised using the same “arrows”. After which he will quickly jump to the right place.
- To complete the setup, click “Exit”.
How to move channels on an H-series TV
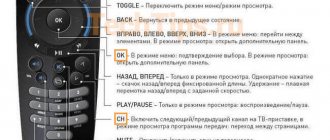
- Enter the TV menu. Depending on the remote control:
press the "Menu" button
or press the Keypad button and select Menu on the TV screen.
- Enter the “Broadcast” item.
- In the “Broadcast” item, select “Edit”. channel numbers" and select "Enable" if the item is active. If inactive (gray), go to the next step.
- Select Change Channel.
- Select one channel you want to move and press the Enter button. A check mark will appear to the left of the channel name.
Channels are analogue and digital. Channels that have a name next to the number are digital. Channels without names are analogue.
If you move digital channels, they change places (we move the fifth channel to the place of the third, the third will move to the place of the fifth, the remaining channels will remain in place).
If you move analog channels, the position of the channels located below the one that was moved changes position (the fifth channel is moved to the place of the third, the third will move to the place of the fourth, the fourth to the place of the fifth, etc.).
Select "Change" numbers" and press the "Enter" button.
Move the channel to a new location using the arrows on the remote control
or enter the number you want to move the channel to.
Press the Enter button to save the channel at the new location.
The channel number has been changed. Repeat steps 5 - 9 to move other channels.
Changing the list yourself
There are two principles by which you can independently organize TV channels:
- Alphabetically . When all channels are in order starting with the first letter of the alphabet.
- Featured Lists . In this method, you add TV channels to a separate list. For example: your favorite channels.
Sort by alphabet
In order for the list of your TV channels to be displayed in alphabetical order, you need to perform the following steps:
- Turn on the TV and click “Ok” on the remote control to bring up the table of available TV channels.
- Click the "F2" button (usually green).
- A window will open, you need to specify the letter by which you want to sort TV channels.
- Next, you need to remember your choice, click the “Ok” button.
- To save the result, click the “Exit” button.
Featured Lists
The user can create an individual group of channels and transfer the TV channels he needs there. Press the “Menu” key, select the “channels” tab and the “arrange favorites” section.
By default, the Tricolor user has 5 lists open. Which are called: “New”, “New 2”, etc. You can change the name to suit you. For example: “Musical”, “Cinema” or any others.
To do this you need to do the following:
- Using the arrows, select the required group and press (key “F4”). Most often it is dark blue.
- Using the keys for switching TV channels and adjusting the volume level, specify the name. After each character entered, confirmation is required by pressing the “OK” button. If you made a mistake while typing letters, you can delete it using the “F1” key (red).
- After entering the name, save the result by holding the “F2” button.
Thanks to these instructions, you can create separate groups; in order to add TV channels and organize them, you need to:
- Open the created list, divide the screen into two halves:
- TV channels that are available by subscription will be on the right;
- the created section is on the left.
- In the general table, mark the desired TV channel and press “F2” to move it to the favorite group.
- Move the remaining ones.
To swap channels between each other, you need:
- Use the arrow on the remote control to select the desired channel (“F2” to move, “F4” to delete).
- Use the arrows to move up or down the selected channel.
- Please enter to confirm your actions.
In some receivers, by default, TV channels are divided into groups with a specific theme; they cannot be changed. Also, after updating the firmware, this function may not be available.
How to move channels on an F-series TV
- Enter the TV menu. Depending on the remote control:
press the "Menu" button
or press the More button and select Menu on the TV screen.
- Enter the “Broadcast” item.
- Select Change Channel.
- Select one channel you want to move and press the Enter button. A check mark will appear to the left of the channel name.
Channels are analogue and digital. Channels that have a name next to the number are digital. Channels without names are analogue.
If you move digital channels, they change places (we move the fifth channel to the place of the third, the third will move to the place of the fifth, the remaining channels will remain in place).
If you move analog channels, the position of the channels located below the one that was moved changes position (the fifth channel is moved to the place of the third, the third will move to the place of the fourth, the fourth to the place of the fifth, etc.).
Select "Change" numbers" and press the "Enter" button.
Move the channel to a new location using the arrows on the remote control
or enter the number you want to move the channel to.
Press the Enter button to save the channel at the new location.
The channel number has been changed. Repeat steps 4 - 7 to move other channels.
Editing lists
All created and preset lists can be modified. To edit them, use the colored buttons on the receiver remote control:
- Blue allows you to rename an existing list.
- Red deletes the previously created list of TV channels.
- Yellow opens the section for creating a new list.
Using the remote control it is quite easy to distribute all channels into the desired categories. Most often, subscribers use thematic sorting. With it, you can create suitable lists (for example, “Cinema”, “Children’s”, etc.), and then place suitable channels in them (for example, “Film screening” can be wisely added to the “Cinema” list). You can change the sorting at any time if you wish.
Sort by alphabet
This method is more suitable when the number of available channels is not large. To start alphabetizing, follow these steps:
- When watching TV, press the “OK” button on the remote control. A list of all available TV channels will be displayed.
- Press the green “F2” button.
- In the field that opens, select the desired letter from which the sorting will begin using the “OK” key.
- On the right you can see the result of the new sort.
- Save your changes by clicking the Exit button.
This is where the options for resolving the issue end.


