The microphone does not work on Android - this problem occurs more often than we would like. You cannot do without voice communication during a conversation, so the breakdown will have to be repaired. An important detail: the device may be completely inactive or not function in some applications. Do not rush into the settings - first study the reasons for the failure.
Why the microphone does not work on Android - the main reasons
A microphone malfunction in Android OS may be due to hardware or software reasons. What to do if you can't hear the other person? We list the most common phenomena:
- mechanical damage;
- clogging;
- moisture inside the telephone case;
- consequences of unsuccessful cleaning;
- software glitch.
It is difficult for an ordinary person to deal with hardware problems in a phone; it is better to contact a service center. Software problems can be resolved by changing or resetting settings, flashing the firmware, or upgrading the operating system. Each situation on Android should be considered autonomously.
How to correctly diagnose the cause
Most often, problems with speaker sound begin due to mechanical impact, for example, water could get inside the smartphone, or it could fall on the floor. Any fall could have a negative impact on the speakers: broken cables, damage to connectors or contacts, etc.
If moisture gets inside, the gadget must be dried quickly to prevent oxidation of the contacts. To do this, blow out the speaker connector with a can of compressed air or a hairdryer. As an alternative, the gadget is placed in a bag of rice (it quickly absorbs moisture). If the speaker stops working after a fall, you will need to take the gadget for repair. If you have the appropriate skills, you can repair the device yourself. In extreme cases, this hearing component will need to be replaced.
drying your phone with rice
If there has been no mechanical damage or contact of the phone with moisture, the reasons for the sudden malfunction of the speaker may be as follows:
- audio parameters are incorrectly configured;
- the user accidentally muted the sound or switched the gadget to “Do Not Disturb” mode;
- the speaker is clogged;
- headphones are connected;
- system failures, etc.
Below is what to do if each of these problems occurs.
How to fix the problem
The easiest way to deal with software problems and blockages. If the microphone partially works during a conversation, you will have to open the case and clean the inside of the gadget. The sound trap is a barely noticeable hole in the housing - this channel must be blown out or cleaned with a sharp object (pin, needle). Do not overdo it - there is a risk of damaging the microphone.
It also happens that the microphone on an Android phone does not work for software reasons. Don't panic - a reset can fix the situation. Rolling back will delete all unsaved information, so make backup copies of important files. Start synchronizing contacts, copy videos and photos to your laptop. After that, start flashing. Please note: the firmware must be custom or official. Otherwise, you will encounter new conflicts and make your situation worse.
How to delete search history in Yandex on a Samsung phone
Situations with sound in a smartphone can be different – sometimes quite exotic. Plan your actions based on your symptoms. Here are some typical examples:
- The sound comes with serious distortion (we discussed this option above).
- The disappearance of sound is episodic.
- Complete lack of audibility.
- Problems only affect a specific application.
If the sound of the microphone periodically disappears, you are faced with a broken electrical contact. The increased humidity probably led to oxidation. Factory defects associated with unreliable connectors and poor soldering are also common. If the microphone does not work during a conversation for this reason, you will have to take the device to a service center.
A microphone that completely fails is a common occurrence. There is only one way to verify that the mechanism is faulty - by ringing the contacts. At the same time, you can check the gadget for blockages and oxidation. As for software problems, the following methods are most often used:
- removing unnecessary files;
- restart;
- reinstalling or updating applications;
- system rollback.
Third-party apps may interfere with the microphone's functionality, so you'll need to use Safe Mode to fully test it. Some programs conflict with the built-in microphone - you will learn what can be done in this case in the next section. Often difficulties arise in instant messengers (WhatsApp, Skype, Viber or Telegram).
If the microphone does not work in Android applications
It happens that when you make a call via messenger, the interlocutor cannot hear the sound of your voice. How to deal with this problem? Let's look at the algorithm using Skype as an example. You have to perform three operations:
- Call an alternative number. A sure sign of a breakdown is similar problems on all lines. Another diagnostic option if the microphone does not work on your Android smartphone is to contact a service center called Echo. Say a few words into the microphone and be patient - the service will redirect the call to your smartphone. If you hear your own voice normally, the gadget is faulty with your interlocutor.
- Research settings. The Echo service and the interlocutors do not perceive you - what to do next? Go to your privacy settings and tap on the microphone icon. Review the list of applications that have access to your microphone. Make sure that Skype is present there; if not, reinstall the program.
- Test with your headset. Using a Bluetooth headset often improves sound quality. This is also a sure sign that the messenger refuses to interact with the built-in microphone.
How to disable forwarding on Samsung
The microphone does not work during a conversation
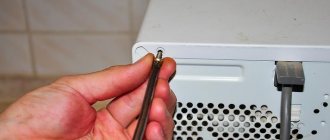
Sometimes users encounter similar things after a custom flashing. Try to install official versions of operating systems, otherwise the hardware will conflict with the system. You will need to navigate to the Recovery menu to install the stock firmware. If the microphone on Android does not work during a call, the algorithm will be as follows:
- Move to recovery.
- Activate the “wipe data/facroty reset” option (this assumes resetting the current settings).
- Clear cache.
- Run “installzipfromsdcard”.
- Mark the route to the archived folder stored on the memory card.
- Agree with the action.
- Wait for the result.
The microphone stopped working during a call
The parameters can be adjusted using the third-party utility Mobileuncle MTK Tools. Install the program and launch the engineering menu. Here you will need to change the factory settings. We recommend copying old information into a notepad, just in case. We list the parameters with which you will have to experiment:
- “Normal Mode”;
- "Audio";
- “Mic.”
Replace the first parameter with “LoudSpeaker Mode”. The display will show seven sensitivity levels - they can be adjusted over a wide range. Level 0 is the level at which you hear nothing. Individual settings are made for each level (the upper limit of values is 255). By increasing this parameter, you shift the sensitivity threshold up. When setting level 6, you will not be able to adjust this parameter using the telephone keys - you should remember this.
The value will change only if you erase the previous information. Pay attention to the line called “Value is 0…255”. If the microphone does not work on Android, and you decide to correct the situation through the engineering menu, there will be no way back. Click “Set” and enjoy the changes. Experienced programmers do not recommend setting maximum values in the settings - this often leads to undesirable effects.
How to enable and configure the microphone in MIUI
Sometimes even an incorrectly selected case can cause the microphone to work normally. Incorrect Xiaomi settings or incorrect operation of applications may be the cause of the malfunction. Problems can be resolved manually.
Noise suppression
If during a conversation the interlocutor cannot hear you or there is an echo, rustling, or crackling sound in the speaker, then the noise reduction function may be disabled in the settings of your phone. To activate it in the settings in the “Sound and Vibration” section, next to the word “Noise Reduction”, move the slider to the “On” mode.
If the function is activated, but the interlocutor hears interference during a conversation, you should try turning it off.
OK Google
Ok Google voice assistant may be causing the microphone to not work properly on your Xiaomi. To disable the service, select the “Google” section in “Settings”, then in the “Search” section, disable the “Voice Identifier” function. After the completed operation, reboot the device.
What to do if the microphone on your Android tablet does not work
The reasons for the malfunction listed above also apply to tablets equipped with the Android operating system. See what a faulty spare part looks like when removed from your gadget.
How to use Samsung Music
The diagnostic methods are similar to those we used on smartphones. The easiest way to do this is to use Skype and its services. Water, damage, software conflicts and incorrect settings can all lead to disaster. You will lose the ability to use voice communication, which is sad.
The design of a tablet is more complex than that of a smartphone, so we do not recommend opening the case yourself and trying to clean or fix something. You are unlikely to achieve success, and you can easily make your situation worse. So go to a specialist if the microphone does not work during a conversation - it’s more reliable. And don't forget about safety precautions. Carry your tablet in a case, do not drop it, and stay away from water. Install licensed software, wipe the device with wet wipes. Update the operating system itself periodically.
The microphone works fine, but I would like to increase its sensitivity
It is better to make this decision with caution and implement it carefully. You can download the Volume+ application, but for more serious changes, use the engineering menu. Note that increasing the sensitivity will not help when the microphone is faulty.
- Open the engineering (service) menu in the phone number dialing section. The combination of numbers depends on the smartphone manufacturer. If you don't find the manufacturer's code for your model in articles and forums, try a combination of other popular developers.
- Select the “Audio” section – “Normal mod” (normal mode, not a loudspeaker, for example) – “Type” (volume) – “Mic” (microphone) – “level” (the level by how much the volume will increase when the sound is increased in games, when talking, etc.).
- Set level 6.
- Value is 0~255 set to 64.
- Save the changes by clicking on “Set”, confirm with “ok”.
- Find the highest acceptable value for the “Max vol” (maximum volume) column of your smartphone model. Please indicate it in this column.
- Exit the engineering menu as you would any other application.
Complex faults
If none of the above helped, then the following serious malfunctions may occur: The microcircuit responsible for sound has failed. It could fail due to water ingress, mechanical damage (impacts to the body) or static (which is unlikely, but cannot be ruled out). Software failure. The lack of a sound recording function on a phone rarely disappears due to a software glitch, but this option should not be ruled out. Usually a software failure shows several faults at once. For example, frequent application errors, spontaneous reboots and severe freezes. Moisture gets on the motherboard. Even a small drop of water can cause such a malfunction. And sometimes it is very difficult to find a water stain or corrosion on SMD parts with the naked eye.
There are detailed repair instructions for all faults, but all this requires additional tools, parts and time.
Post Views: 245
What to do
If the microphone on your device suddenly stops working, then you need to try to understand what exactly the problem is. Let's consider the most likely situations:
- They can't hear you well. This means that everything works, but the sound itself is greatly distorted. Usually the reason lies in obstacles that interfere with the normal passage of sound waves. Most likely, the sound trap (a small hole in the body) is clogged. We clean the sound guide channel and try to communicate with the interlocutor. This may fix the problem.
- The sound disappears periodically. This means there is poor contact in the system. This happens under the influence of moisture or if one of the wires is too oxidized. The reason may be poor-quality soldering after a previous repair. In any case, such a breakdown can only be solved in a workshop.
- Perhaps the part is completely broken and the assembled module will have to be replaced.
- The microphone does not work in a certain program. This can be encountered in applications such as Skype, Whatsapp, Tango, Viber. Most likely, the problem is in the operation of a specific program.
- Operating system problems. The gadget mistakenly believes that a headset is connected and tries to record sound from a non-existent microphone. You can try clearing your device of some apps or even resetting everything to factory settings.
After updating to the beta version of iOS or downloading some software, your phone's microphone suddenly stops working? In this case, there is a solution - the Tenorshare ReiBoot program.
Tenorshare ReiBoot is the best program that allows you to solve the most common problems such as iTunes stuck (Enter Recovery Mode) and get your iOS device back up and running (Exit Recovery Mode). These operations are performed literally in one click, saving personal data and without asking for a password. Tenorshare ReiBoot additionally solves the problem of black (blue, frozen, etc.) screen and stuck on the logo, reset and unlock and more than 150 more crisis cases that even iTunes cannot cope with.
Tip: If you are an Android device user, you can use Tenorshare ReiBoot for Android to solve the problem.
The step-by-step instructions are simple:
- Step 1. Install the latest version of the program on your computer. Launch the program and connect your iPhone to your computer using a USB cable.
- Step 2. After recognizing the device, click the “Start” button.
- Step 3. By default, the program is set to Standard Repair.
- Step 4: After downloading the required files, click on the “Fix Now” button. Wait for the process to complete.
To find out for yourself whether the problem is in the OS or in the hardware, connect the headset.
If audio recording on the headset functions normally, then the problem is with the smartphone.
Turn on speakerphone on your smartphone step by step
Using the speakerphone function on a telephone is convenient in cases where several people are participating in a conversation, the subscriber is uncomfortable holding the handset to his ear, or he consciously does not want to do this.
Through the standard menu
How to turn on the speaker:
- From the list of contacts in the phone book, select the person you are going to call.
- Click on the call button. Once connected, a menu of options will appear on the screen that you can use during the audio call.
- In the lower right corner, tap on the speaker image. If the icon changes color, the speakerphone feature is enabled.
On an incoming call, switching the speaker to loud mode occurs in a similar way. After swiping the handset to the right, a grid of available options will appear on the screen. Click on the speaker image and continue communicating in a comfortable environment.
Setting the speakerphone to turn on automatically
You can have incoming phone calls automatically put on speakerphone. Then you won’t have to turn it on manually every time.
Algorithm of actions:
- Enter the Settings menu.
- Open the "General" section.
- Select "Universal Access". Find the “Audio call source” column. In most cases, the “bird” is opposite the “Auto” mode. Move the checkbox and place it in the “Speaker” section.
- Exit settings mode.
To make sure everything went smoothly and the feature will turn on automatically, ask a relative to call you back.
Using third party programs
If the device is not equipped with speakerphone settings, or for some reason it does not work, the user can use third-party resources. What to do:
- Log in to the Play Market application.
- Enter “Contacts and phone book” in the search bar.
- From the proposed programs, choose the one that has the largest number of positive user reviews. Install it on your phone.
- Launch the program on your device. Activate the speaker by checking the box next to the “At the beginning of every call” section.
When there are incoming calls, the program will start automatically.
Start with a simple test and inspect your iPhone's microphone
The iPhone has several microphones to enhance sound. On modern models they are located at the bottom (near the speaker grille), at the back (near the rear camera) and at the front (inside the speaker grille).
The list below shows the exact number.
- iPhone 8, X and later - 3 microphones
- iPhone 6s, 6s+, 7 and 7 plus – 4 microphones
- iPhone 5, 5c, 5s, 6, 6 plus and SE (1st generation) - 3 microphones
- iPhone 4 and 4s - 2 microphones
- Original iPhone, iPhone 3G, 3GS – 1 microphone
Now let's do some quick microphone tests.
Check the main bottom microphone
Let's say the other party has difficulty hearing you on standard calls and FaceTime. To solve this problem, let us check whether the iPhone's bottom microphone is working or not.
Open the built-in Voice Recorder and press the red record button . Now hold your iPhone horizontally to your mouth and speak from below (near the microphone hole).
After 10-15 seconds, press the same red button to stop recording. Now play the voice note. If you can clearly hear what you recorded, congratulations, your main microphone is working correctly.
Check the front and rear microphones
Open the Camera and swipe to VIDEO. Press the shutter to start recording. Now speak at the top of the iPhone. After a few seconds, stop recording.
Now tap on the tiny camera selector and switch to the iPhone's front camera. Record a new video, usually while talking on the top side of the device.
Then play both videos. If you can hear your audio, it means the front and rear microphones are working correctly.
Has your iPhone passed both of the microphone tests above? If yes, keep reading. Most likely, we will solve the problem. If any test fails, you may need to contact Apple Support and have your device checked (more on this later).
Method 1: Update
Make sure your device has the latest software. Perform a forced search for updates, even if the system usually notifies you about it.
- Open “Settings”, go to the “Software Update” section and tap “Download and Install”.
- If updates are found, download them following the instructions on the screen.
Replacing the microphone
If the fault has not been resolved, then perhaps there is no contact somewhere inside or the part itself is damaged. Before you begin the replacement process, you need to find a working microphone. You can look for it in service centers or at a flea market. It is not recommended to start replacing a part without appropriate experience.
What you need
A very common case is poor soldering of smartphone contacts and even mechanical damage. In any case, it will not be possible to do without disassembling the device. For disassembly you need:
- Phillips screwdriver.
- Flathead screwdriver.
- Soldering iron and everything else for soldering (solder and rosin).
- Stationery knife.
You can begin the replacement process. To do this you need:
- Remove the back cover, remove the battery, flash and SIM cards.
- Using screwdrivers, find the screws and unscrew them.
- Very carefully remove the parts of the case that block our access to the board. After this, you need to find a microphone, it is small and round, resembles a small tablet in appearance and is attached with a thin cable. There is usually a special groove in the housing for it.
- We take out the broken part. We unsolder it as carefully as possible and install a new one in its place. This should fix the problem.
- Now we assemble the gadget very carefully, trying not to lose a single screw.
Method 3: "Safe Mode"
Third-party software often affects the operation of the operating system and standard applications. To check this version, start your phone in Safe Mode.
- We hold down the device’s start key, and when the “Menu” opens, press the “Shutdown” touch button for two seconds and reboot the device.
- When the smartphone boots into BR, a corresponding message will appear in the lower left corner of the screen.