How to set up a projector so that the image is displayed on both the monitor and the projector
During the presentation, it is necessary to make settings so as to periodically control the process on the projector or, conversely, disconnect the screen from the projector in order to continue working on the computer without showing it off. This is quite easy to do, but each operating system has its own characteristics.
Setting up on Windows 7
When connecting on Windows 7, the control panel opens in the general menu and the “hardware and sound” section is selected. Next, a window will appear with four ways to reproduce the image:
- Show the presentation only on a projector.
- The desktop shows the interface before the video is output to the projector and monitor screen.
- Shows only the desktop.
- Shows the desktop on both the screen and the projector.
When you select any parameter, its data begins to work immediately. When changing settings, you must re-enter these sections. Therefore, in order to quickly switch between modes, it is recommended not to close the panels, but only collapse them to the lower toolbar.
Setting up Windows 10
It is possible to connect the projector to a Windows 10 computer using the same methods described above. If the connection is correct, the image is usually automatically displayed immediately on the screen; it may not be clear or floating. You need to adjust the resolution by setting it in your computer settings to match the projector resolution.
Image Settings
If the connection is made correctly, then when you turn on the laptop will precede the projector as an external screen and immediately display the image on the wall. The picture may be distorted, this is especially noticeable on letters that are floating. This problem usually occurs when the screen resolutions of the laptop and the projector do not match.
Check what resolution your projection equipment supports. Usually this is 800x600 or 1024x768, but expensive models can have 1920x1080. In the resolution settings on the laptop you need to set the same value.
- Right-click on the desktop to open the context menu. Go to the "Screen Resolution" section.
- In the “Resolution” line, set the value appropriate for the projector. No more and no less, so that the device does not have to compress or stretch the picture, which is why distortion occurs.
On Windows 10, you won't find a Screen Resolution section in the desktop context menu. Here the resolution is adjusted through the screen settings.
- Open the Start menu and go to Settings.
- Open the "System" section. You will immediately be taken to the Screen tab. Scroll the page and proceed to configure additional settings.
- Set the appropriate resolution and save the configuration.
When the connection is established and you see a normal image on the wall without distortion, you can proceed to selecting the display mode.
How to connect a projector to a laptop
Latest generation laptops support wireless data transfer. But there are also models that can be connected to a projector using a cable.
Common ways to connect a video projector to a laptop computer are:
There are no particular difficulties in connecting a projector, for example Acer P5327W, to a computer. But, if such an action is performed for the first time, incomprehensible moments may arise. Next is how to connect a projector to a laptop using the above methods.
Wired connection
To connect the projector to your computer without problems, you need to determine in advance which cable you will have to use - VGA or HDMI. In the first case, the video will be displayed in the usual television or DVD resolution, in the second - in high definition, HD or Full HD mode.
If you are just planning a purchase, it is worth clarifying how to connect an ACER or another brand projector to a laptop. It is best to use HDMI as it provides the highest picture quality.
Important : If the required port is not available on one of the devices, you will have to resort to using an adapter. This reduces image quality, but when watching movies or presentations, the difference is almost negligible.
Another problem can arise if one of the devices lacks both VGA and HDMI. This means you will need to purchase a VGA to DVI adapter.
When connecting a laptop to a projector, it is important to remember that it is recommended to turn off the power to both devices before installing the cord. Plugging into a power outlet can only be done after the wire plugs are inserted into the ports. The projector is turned on first, then the laptop to ensure the correct display of the content.
Wireless connection
How to connect a projector to a Windows 7 laptop using a wireless network? This is done very simply. The Wi-Fi cable is connected to the USB ports of both devices. If your laptop or video projector has a built-in Wi-Fi card, you can do without an external antenna.
In order for synchronization to be successful, you will first have to install the projector drivers on your laptop. For the latest versions of Windows, starting from the seventh and higher, drivers for many video projector models are already preinstalled. Therefore, you won’t have to download anything from the Internet or read anything from a CD.
PC does not see the device
If the computer does not see the projector, the reason must be looked for, first of all, in the drivers. The problem is solved by installing them and then rebooting the laptop.
How the picture is displayed
After the device (Acer X118H) has been successfully connected, the image is displayed on the projected surface through the menu: “Display resolution” - “Multiple screens” - “Expand these displays”.
Windows 8 makes video output even easier. In the control menu, select “Display Resolution”, then you just need to press the external screen selection button.
Differences in connections to a laptop and a computer
When using Microsoft operating systems, the operating principle of a laptop and a personal computer is very similar. The differences are only in the hardware. If the user does not connect the projector to the laptop, you can use the instructions for connecting this device to the PC.
Important : Many modern laptop models lack not only VGA and DVI inputs, but even HDMI. Instead, there are mini HDMI and USB. This means that you will have to use adapters.
Programs for working with projectors
Very often, when working with a projector, they use the Power Point program. Using it, you can enable the presenter method, where some of the information will be displayed on another device and will be visible only to the presenter.
The notes feature allows you to make additional notes. This allows you to avoid having to learn the entire speech by heart. A pen or laser pointer highlights certain important elements.
Also, using the program, you can view all slides at the same time or, conversely, change the size of one slide.
Sometimes when using small laptops it is necessary to download special applications for the projector, the same as for mobile phones. In order for the monitor to work separately or together with the desktop in these applications, it is configured separately.
Wireless connection via Wi-Fi
Modern Internet connections with fast and high-quality wi-fi allow you to completely eliminate wired connections and take advantage of the World Wide Web. There may be several reasons for this:
- the room does not imply the use of cords;
- a large number of wires get in the way and there is nowhere to hide them;
- There is an urgent need for additional connection of mobile devices at the event;
- road presentation requiring operational organization;
- During training, when all devices are connected, you can control the process of completing tasks.
Using wi-fi can be done in two ways:
- via the Internet connection of the organization where the presentation is being held or
- use projectors that support wi-fi communication, which itself is its source.
To use the projector, you must first be properly charged and mounted on a secure tripod. Next, we adjust the quality and size of the image on the screen. For a laptop, select the hdmi system in the settings, connect to the wi-fi router in the parameters section.
The advantage of this connection is that you can search for video presentations on the Internet using links directly.
Working in PowerPoint
If you're going to show your slides through PowerPoint, there's one more small tweak you may need to make. It's about choosing a display to display. The audience sees the slides through a projector, but something else is displayed on the monitor screen: for example, the text of the report.
Before selecting a screen, you must connect and set up the projector. Once your equipment is ready to go, go to the Slide Show tab in PowerPoint and select your projection equipment in the Show Presentation On box.
Another handy feature is the presenter mode. When activated, notes and additional buttons will appear on the projected image to help you control your presentation.
Wired connection
It is worth noting that a wired connection will be the most effective. In this case, a more stable connection and virtually no technical problems are guaranteed. The projector will definitely not freeze or depend on the Internet.
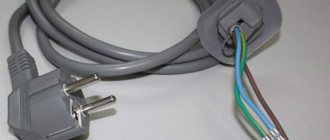
To turn on the projector in this case, you need to compare the wire connectors. They must fit together. As a rule, they are made universal and they very rarely do not match. If they still do not match, then any computer store sells an adapter. Depending on the type of connectors available, the connection is made using:
- VGA;
- HDMI;
- USB.
The connection diagram for each of them is almost identical, with only slight differences in application.
What is a VGA connection
The VGA connector is the most popular and one of the very first to appear. However, today these connections can be seen on older devices. It was started to be used in devices about thirty years ago by IBM. When the projector is connected this way, sound is output using an additional cable.
In appearance, this connection looks like a small connector with three blue lines. Thus, an analog system for progressive video transmission to a monitor was invented. A cable of the same color is connected to it, which is screwed for fixation with special built-in screws.
When connecting, two VGA cables are connected first to the projector, and then each to the monitor and processor respectively. After this, turn on the projector first, then the device being used. Next, install the drivers and set the projector as the image output in the settings.
Connection via HDMI
Connecting a projector to a laptop or computer via HDMI is by far the most reliable connection for displaying images on the screen.
The connection method in this case is similar to the vga connector. A prerequisite for connection is that all equipment is completely turned off. Otherwise, equipment malfunctions and system malfunctions may occur.
An important advantage of this connection is the simultaneous transmission of image and sound, which eliminates the need for additional wires. More technologically advanced, it transmits sound and picture with maximum expansion and has additional protection against piracy. Thanks to this cable, it became possible to output a higher quality image through the projector.
USB connection
Increasingly, users have begun to use USB projector connections. The convenience of this method is that everyone has USB ports and cables in abundance. And if suitable connectors and adapters are not at hand and cannot be purchased, you can always try this method. Or it happens that a multi-channel connection is needed, but all video outputs are already occupied by other devices. This allows you to connect several projectors to the device at once.
Among the disadvantages, it can be noted that the resolution of the video sequence may suffer significantly. This is due to the narrow space of the transmission cable.
To establish a connection, you must first download a special driver on your PC, which transmits the image from the screen to the projector. At the same time, the resolution decreases along the way, which can significantly affect image quality.