Varieties
Before you begin lengthening, you need to familiarize yourself with the main types of hoses.
Jellied
The inlet hose is a device used to connect the washing machine to the water supply system. It is with its help that water is supplied to the internal elements of the system. Such products operate under high pressure conditions and therefore reinforcement technology is used in their manufacture.
The main material from which the filler tubes are made is polyvinyl chloride, the surface of which is covered with nylon.
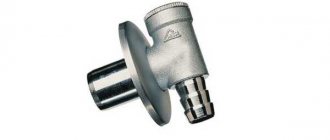
The connecting components of the structure can be made of steel, aluminum or plastic. Budget models use plastic fittings that are unscrewed and screwed on manually, without the use of additional tools. When working with steel or aluminum products, you will have to use a special wrench.
Drain
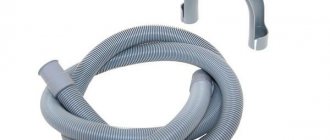
A drain hose is used to drain liquid from washing equipment. The following types of drain tubes are distinguished:
- Standard. Such products are produced in a certain length, the length of which can reach five meters.
- Telescopic. These are corrugated products that can easily be stretched to the desired length. When connecting telescopic tubes, you must be very careful so that they do not bend. The kinks may burst under strong pressure.
- Polypropylene. They are made from durable polypropylene. At each end of the product there are special fittings with which a device for washing clothes is connected.
To start
Remember two main rules that must be followed before any repair work on household appliances.
Shut off the water
Close the water supply shut-off valves. They are usually located behind the washing machine on pipes. Now, even if the hose is damaged during operation, water will not flow.
De-energize
Remove the plug from the socket. To keep the wire out of the way, you can attach it with paper tape or wire to the back wall of the washing machine.
Preparing tools and materials
Before you begin repairing, replacing, or extending the drain hose, make sure you have everything you need on hand:
- pliers;
- screwdrivers;
- fastenings - metal clamp, coupling or adapter;
- sealant, we recommend using silicone;
- water for washing and cleaning;
- brush or cable;
- the spare parts themselves.
Purpose and features of the connection
Before you start extending the drain hose, you need to become familiar with its main purpose and the features of its connection. This design is used to drain water from washing equipment into the sewer system. The efficiency of draining liquid depends not only on the integrity of the structure, but also on the characteristics of its connection to the sewerage system and the washing machine. To connect the tubes, connecting elements - fittings - are used. They are installed on the hose and ensure its secure fastening.
For additional fixation, use a special rubberized or metal coupling. It is installed to the pipe responsible for removing liquid.
Materials used
To extend the drain system, you will need the following materials:
- Extension tube.
- Clamps.
- Screwdriver Set.
- Connecting elements.
The extension tube can be purchased at a hardware store. There it will not be difficult to find both types of drain hoses described earlier.
Connecting elements for joining old and new tubes. This part is a plastic pipe, to the ends of which it is necessary to attach elements of the drain system.
Using clamps, the edges of the drain system are attached to the connecting element. It is worth noting that one drain tube may have ends of different diameters. Most often, the thin end is attached to the machine, and the thick end to the extension component. This must be taken into account when purchasing clamps.
Methods for organizing drainage
Draining water can be done in several ways. The thoughtful design of the drainage system largely depends on this. Let's look at the most popular options:
Drain into a sink or bathtub
For this method, it is enough to insert the water drain hose into the holder and direct it to the bathroom or sink. This method is used if it is impossible to connect to a sewer or if the machine is temporarily used in this place.
Important! This option has its drawbacks: the inability to use the bathtub/sink when doing laundry, contamination due to waste water, and the unpleasant appearance of the device.
Connection to the sewerage system using a siphon. The best option for many cases. Ensures sufficient sealing and ease of use.
Important! The disadvantage of such a system is that it takes up a certain space.
Installation directly into the sewer through a cuff
In this method, it is necessary to ensure that there is a reserve length of the drain hose of the washing machine. Do not allow the hose to be tight, as vibrations can damage the connection, leading to leakage.
Siphon with check valve
This connection method is rarely used nowadays, since most apartments do not have a special place for devices such as a washing machine or dishwasher.
Important! A mechanism of this type is significantly superior to the previous ones, since it has a system of protection against unpleasant odors and the return of water into the equipment.
Important! Do not overload the washing machine to prevent expensive mechanisms from breaking down. Follow the link and learn how to calculate the weight of bedding for washing.
Through siphon
The siphon, or elbow, is endowed with an important function - by closing standing wastewater, it isolates the kitchen or bathroom from odors from the sewer. Modern siphons are already equipped with a side pipe to which the drains of washing machines and dishwashers are connected.
If you got an old or cheap siphon that does not have a side pipe, replace it with the one you need. A sink that has a small cabinet or a decorative ceramic support may not allow connecting the SMA through a siphon - it does not have free space for connecting the washing machine drain. A small washbasin will also not allow you to install additional pipes - there will not be enough free space under it. The disadvantage of the SMA siphon drain is the gurgling of waste water when the machine is operating.
To connect the drain through the siphon, the plug is removed from the latter. A layer of sealant or silicone glue is applied to the pipe at the connection point. The drain hose (or corrugation) is put on. A “worm” type clamp is placed and tightened at the connection point.
Connect directly
Direct connection is made using a tee or insert. One (straight) outlet of the tee is occupied by a sink, toilet, bathtub or shower, the second (corner) is occupied by the drain channel of the washing machine. The side outlet to which the MMA drain is connected is not located at a right angle, but is raised upward - in case the seal is not at hand.
The insertion is made directly into a pipe for which it is impossible to fit a tee (for example, it is asbestos or cast iron). If we are talking about an apartment building, and even on one of the lower floors of the building, it is recommended to shut off the water supply on this line in your entrance. Insertion, as well as removal from the riser, is carried out only during the overhaul of the apartment.
To connect the drain hose or pipe to the tee, use a rubber cuff or a homemade rubber gasket cut from old car inner tubes.
The fact is that drain hoses and tees at the point of their connection vary significantly in diameter. Without a gasket or cuff, wastewater will flow out - the SMA drain pump creates considerable pressure.
Through plumbing
Connecting the SMA drain through the plumbing means ensuring that laundry waste (wastewater) is discharged directly into the bathtub, sink or toilet, and not bypassing it, as with other methods. This requires frequent washing after a number of washes. Decaying waste that covers the surface of a bathtub or sink with a film emits an unpleasant odor and spoils the appearance of the plumbing fixtures.
To ensure that the drain hose is securely fixed to the bathtub or sink, use a hanger attached to the faucet or other butt joints on which it is hung. For example, on a sink, the hose is suspended from the base of the faucet.
A connection that is not completely strong can break off when the SMA removes the spent detergent solution before rinsing. The pump pumping out wastewater works unevenly, the hose will twitch and may come off. If this happened, and more than one bucket of water spilled out, then insufficient waterproofing of interfloor ceilings and not quite high-quality tiling (or tiles) will lead to leaks in the neighbors below, even in the bathroom, which is considered the safest room in terms of leaks.
A small sink may overflow with waste water. The fact is that washing technology is developing, operating time is decreasing. Water should be added - and pumped out after washing - as quickly as possible. Overflow is the fate of sinks and shower trays, in which the siphon is clogged with fatty deposits. Water does not flow into them - it seeps through.
When washing, you will not be able to fully wash yourself or go to the toilet. The water pumped out and flowing out of the tap (or tank) may ultimately exceed the capacity of the general drain.
Horizontal bend
This is a long section of drain hose located horizontally, often lying on the floor near the wall. This will ensure that there is an unpleasant smell from the sewer in the washing machine. To prevent this smell from spoiling the laundry that you did not remove in time after washing, the hose is raised and hung on the wall using any fastener (except through) at least 15-20 cm. You can place an elbow in any place - an S-shaped bend, in which standing water insulates the SMA from sewer odor.
It’s even better when a riser or “podium” is equipped for the SMA at the same height - the pump will work without extra effort, and the bend can be located next to the machine. The hose is positioned so that its space up to the bend is not filled with waste water. The length of the drain hose or pipe can be almost any.
In some cases, a separate water seal is installed near the main sewer pipe - instead of an S-shaped bend. The dimensions of the pipes at the joints are adjusted to each other using rubber, silicone or sealant for the purpose of sealing.
Connection - washing machine and dishwasher.
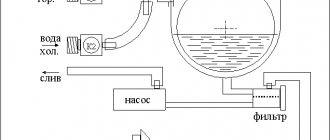
Connecting a washing machine and dishwasher. November 23, 2006 Nowadays, a dishwasher and washing machine can be seen in almost any kitchen or utility room. They are made in standard sizes to suit the decor of the room and fit neatly under tables, in cabinets, etc. They are connected using flexible pipes - hoses - to a special or general kitchen sewer pipe or sink drain in the room where they are installed. Automatic machines must be provided with a constant supply and drainage of water. Dishwashers require only cold water, but washing machines can have both cold and hot water. Hot water washing machines are faster and may also be more economical depending on how you heat the water. Water pressure The instructions for the machine must indicate the operating water pressure. Hinge without mortise. If the machine is installed on an upper floor, it is necessary to check whether the height difference with the storage tank will provide the required pressure. On the lower level, pressure problems are rare, especially if cold water is supplied from the sink supply pipe. However, consult a specialist when installing two or more machines. Rice. 1 Washing machine connection: Inlet pipe 15 mm (half inch) Machine valve PVC inlet hoses Water inlet Drain hose Water intake pipe Siphon Drain pipe 40 mm (one and a half inch) to the sewer Water inlet Washing machines and dishwashers are supplied with PVC hoses that connect the inlet water at the back of the car with special small-sized valves (valves) connected to the water supply system of the house. Draining water from the washing machine. After connecting the washing machine to the water supply, we proceed to connecting the drain hose to the sewer. The washing machine is equipped with a drain hose, which, as the name suggests, drains the used water from the machine into the sewer. The drain hose at the end has a plastic tube onto which you need to put a reduction, the outer diameter of which corresponds to the diameter of the sewer socket. A reduction can be said to be a rubber coupling with which you can connect pipes of different diameters, and in our case it is a thin tube at the end of the drain hose and a thick socket of the sewer pipe. The reduction will protect you from the leakage of used water from an overflowing sewer pipe, and of course from the odors emanating from the same pipes. When connecting the drain hose, you can also use the pipe socket used. As in the case of the intake hose, you can put a tee on the socket used, which will allow you to connect the drain hose to the sewer. The drain hose can also be extended using a coupling and an additional hose. The final touch in connecting an automatic washing machine will be connecting it to the power supply. There is nothing complicated here since the machine is equipped with a wire and a plug that just needs to be plugged into a socket. But the main requirement for the outlet will be the presence of a grounding contact, that is, the washing machine must be grounded. Well, that’s all, after all the above, we can say your washing machine is ready for use, but you really still need to level it. The level of noise emitted by this miracle piece of equipment and its level of vibration will depend on how level your washing machine is installed. You can level the machine using its four legs, which are made in the form of bolts, with a plastic sole at the junction with the floor. By turning these bolts, you can achieve the desired position of the washing machine. Bathroom without toilet photo. Legs - the bolts can be fixed in the position you need with locknuts, which should be on the legs.
Well, that’s all, you’ve done it and now you can calmly wish you a pleasant wash.
[custom_ads_shortcode2]
Checking the washer for leaks
There are five things that must be checked after installing the washing machine:
- If the water drain pipe is connected under the sink in the kitchen, you should make sure that it is not connected to the washing machine in a straight line, without a bend. The hose, which is inserted into the U-shaped bend of the sink, must first rise to a height of 15 cm before lowering down to the machine. Otherwise, water will flow directly into the washer.
- You need to make sure that there is no leakage anywhere. If you need to specifically connect the inlet or drain hose, you need to carefully monitor the areas where they are connected to drainage and water supply.
- Fill and empty the washing machine several times to see how it works. Even if everything went without leaks, you need to check these areas again after a certain time. Perhaps a slow and almost imperceptible leak has formed here, which in the future can cause significant damage (when it is necessary to pay for the restoration of the premises in the apartment below, which was flooded).
You also need:
- Make sure the inlet hose is not too tight. Over-tightening causes the silicone seal between the faucet or water valve and the hose connection to become severely compressed and deformed. Tighten it by hand, and then just tighten it a little more. Don't overdo it.
- Make sure there are no kinks anywhere. If the equipment is already connected, you may not notice that the filling or draining tubes are bent. Inlet hoses are the most prone to fractures, especially when there is a connection with hot water supply.
The final check of the quality of the drain connection can be done without laundry.
Set some washing mode. Then, when the washing machine is filled with water and begins to wash things, you need to press the cancel key and carefully check whether the water is pouring out correctly.
So, following the tips and instructions that are described in the passport for the purchased washing machine, you can connect the equipment to the drain yourself. After the measures taken, you should definitely check how the washing machine functions in idle mode and ensure that all joints are tight.
Hose Extension Instructions
The junction point has its own characteristics. Before you start building up the drain tube, it is advisable to familiarize yourself with its geometry. The automatic washing machine comes with a standard drain hose. If necessary, it can be increased independently.
The main task is to take the correct actions to avoid leaks. The operating instructions for the device indicate that it is prohibited to place the drain pipe higher than 1 m. This is due to the low power of the pump. Its lifting height should be 0.6 m higher than the bottom edge of the device.
With connector
This option is the most common. To extend the hose using a coupling adapter, you will need to purchase a connecting element and two clamps in advance. They provide sealing at the joint.
The lengthening process takes place in several stages:
- You need to carefully insert the tubes of the wide and narrow ends into the coupling. Their fit to the connector should be tight.
- To ensure sealing, metal clamps should be secured. For this action you will need a screwdriver.
- The wide end of the elongated pipe is connected to the washing machine. Narrow - for drainage. The joint points are also fixed with metal clamps and coated with sealant.
- To check the system and detect possible leaks, run a test wash.
If no problems are found, the washing machine can be used.
Without adapter connector
It is not always possible to purchase a coupling. To extend a drainage hose without an adapter coupling, you will need a plastic or rubber tube. You need a thickness that allows you to fit on 2 connected pipes. A size that is too large or small will not seal properly. To secure it you will need 2 clamps.
- Part of the hose is put on the joint. It should fit snugly.
- Secure with clamps.
If a 3.5-meter length is not enough, then the washing machine is installed closer to the water drain or a drain is made nearby.
Troubleshooting drainage system problems
It is impossible to use the washing unit for its intended purpose when problems arise in the drainage system. You can handle some of them yourself.
Table. Malfunctions and ways to eliminate them.
- Symptoms of a problem
- Cause of failure
- How to fix the problem
| Failure in the program, a strong hum when the machine is operating, a decrease in the drain speed, the machine turns off when switching to draining water | Drain hose clogged | Cleaning the hose |
| Unpleasant smell from clothes, poor drainage, pump malfunctions | Filter dirty | Cleaning the filter |
| Water is pumped out, but flows out slowly, the pump motor hums, but the water does not drain, the pumping system does not function | Pump malfunction | Pump repair or replacement |
How to clean a drain hose
The drain tube may become clogged due to foreign objects getting into it. Most often, threads from clothes, fluff, lint and hair accumulate there, which form a blockage that prevents water from draining. There are two ways to clear a clog in the drain hose.
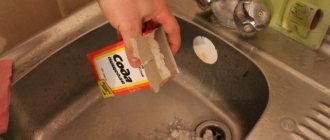
Using chemicals (in tablet, powder and liquid form), as well as baking soda or soda ash.
You can take a glass of soda and put the powder in the drum. After this, select the washing mode at a temperature of 90 degrees on the control panel. Water mixed with soda and heated to this temperature perfectly removes dirt adhering to the inner surface of the hose. This cleaning method is good because you don’t have to remove the hose.
Mechanical cleaning. In this case, the removed hose is cleaned with a narrow brush attached to a wire. Cleaning should be done from both ends of the drain tube. After such treatment, the remaining dirt is washed off with running water. To be more sure of the result, you can soak the hose for a couple of hours in citric acid diluted in warm water.
After installing the hose in place, it is recommended to carry out a test wash without clothes at maximum temperature. In this case, you should add citric acid to the detergent reservoir, which will perfectly remove scale from the parts of the washing machine.
Cleaning the filter
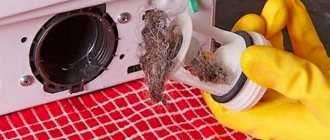
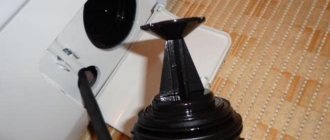
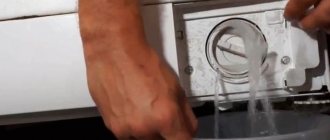
Removing contamination from the drain filter is not that difficult. It's easy to find. In all models it is located at the bottom of the washing machine body, on the right or left. Usually the compartment where the filter is located is closed with a decorative cover that has the same color as the unit itself.
How can I clean the filter?
- You need to open the plastic cover.
- It is better to place a cloth that absorbs water well on the floor where the filter is located. This is due to the fact that some water (dirty) will flow out of the hole.
- For the same purpose, you need to place a water container under the compartment.
- The lid is unscrewed.
- The filter is removed.
- It is necessary to manually remove large contaminants and then rinse the filter under running water.
- By sticking your hand into the hole, you can check for foreign objects on the impeller. They can be removed with your fingers.
- The filter returns to its place. It is important to ensure that it is installed straight along the thread. The part is screwed tightly to prevent water leakage. But over-tightening can strip the threads.
In addition to the listed types of blockages, malfunctions in the washing machine can occur due to a plug of dirt formed in the sewer. To fix the problem, you will have to clean the pipe or (more often) the connection point of the drain hose.
We connect the washing machine and dishwasher to the water supply system
We connect the washing machine and dishwasher to the water supply system. Well-made water supply and drainage are not only important elements necessary for the proper operation of the washing machine or dishwasher, but also a guarantee of their safe operation. Water and sewer connections can be made behind the washing (dishwasher) machine or next to it. This should be done in such a way that they are easily accessible, allowing all necessary operations to be carried out during operation and maintenance of the equipment. The aesthetic appearance of the connections also plays an important role. What kind of water? Washing machines and dishwashers usually only supply cold water, although some models can also supply warm water (the temperature of which does not exceed 60°C). Equipment supplied with warm water will use less electricity during the cycle (it will heat the water faster), but be aware that you will have to pay more for the warm water used (customers who pay for warm water off the meter , it may be cheaper). Attention! Some experts do not recommend using warm water. They claim that washing and washing dishes in equipment supplied with warm water is less effective (proteins coagulate quickly in warm water). The supplied water must meet the requirements for drinking water (especially the content of iron and manganese salts, as well as hardness salts). Therefore, the water must be prepared and, if necessary, filters must be installed that match the type of contamination in the loop without insertion. Filters that soften water are also available for sale. Their installation in front of the washing machine increases washing efficiency, reduces detergent consumption and protects equipment from scale. But before installing such a filter, you must consult with the equipment manufacturer or employees of an authorized service point. The water flow in the system should be approximately 10-15 liters per minute. Before connecting the equipment, you need to check whether the pressure in the home system is compatible with the required pressure indicated in the documentation for the equipment. It can range from 1 to 10 bar (0.1-1.0 MPa). 1 The free end of the hose, through which water is supplied to the washing machine, is put on the fitting and crimped with a clamp. 2. or using a union nut, it is connected to the thread of a special tap for connecting washing (dishwashers) machines. 3 The external siphon for washing machines is mounted on the wall and connected to the sewer system. 4 Hidden siphons can be combined into one with a water connection unit. 5. and even with a splash-proof electrical outlet Water supply To the place where the washing machine should be located, it is necessary to lay a water supply pipe, and at its end install a shut-off valve with a hose fitting or a special tap for connecting washing machines and dishwashers. Ball valves or valves with ceramic heads are convenient and reliable to use. A hose (included with the washing machine or dishwasher) is connected to the tap, through which water is supplied to it. To protect equipment from mechanical impurities in the water supply, you need to install a filter - a plastic gasket with a metal or plastic mesh, which is inserted into the union nut of the hose. In some washing machine models, the filter is installed by the manufacturer, while in others it is included as equipment. The water supply hose must be laid without kinks or kinks, away from sharp edges and high-temperature elements, so that it cannot be damaged during operation of the washing machine (dishwasher). You should not shorten it yourself, much less lengthen it. If it is the wrong length, it is better to replace it with door hinges without mortise installation. Modern washing (dishwashers) machines are usually equipped with a check valve or a special system - Waterstop, which prevents water from returning to the water supply system through the intake hose. Attention! If the device manufacturer recommends installing a check valve on the water supply system, you should listen to the recommendations. Draining used water The drain hose of a washing machine or dishwasher is connected to sewer lines located next to sanitary fixtures or directly connected to the sewer system. The diameter of the sewer pipe to which the water drain is connected should not be less than 40 mm. If a connection of this diameter is longer than 3 m, it must be provided with additional ventilation, for example by installing an aeration valve. The water drain from the washing machine should be high enough from the floor. In the operating instructions for each equipment model, this height is determined individually. Most often it is in the range of 55-90 cm. Attention! The end of the drain hose should always be above the maximum water level in the washing machine. Otherwise, water will always flow into the sewer through the switched off pump and drain hose, and the washing machine will continue to collect and heat it up. In such a situation, the water may not even reach the set temperature, and electricity is wasted. Water can be drained by inserting the end of the drain hose directly into the sewer pipe with a rubber collar that is smaller than the outer diameter of the hose. The limit switch should not reach the level of the drains in the sewer. To connect a washing machine or dishwasher, the most suitable solution would be to install a special siphon on the sewer system: • external; • hidden, integrated with a water connection fitting and a separate tap; • hidden, integrated with the water connection fitting, having a built-in tap; • hidden, integrated with a splash-proof electrical outlet and water connection fitting, with a built-in tap. Connection to the water supply and sewer system and operation of devices must always comply with the manufacturer’s recommendations, which are contained in the instructions attached to them. CAUTION WITH ELECTRICITY! Electrical sockets for connecting a washing machine or dishwasher can be installed: • in the kitchen - at a distance of at least 60 cm from the water point; for aesthetic reasons, you can place them under the kitchen countertop; • in the bathroom: at a distance of at least 60 cm from the water point. Sockets must be splash-proof (protected from water splashes by a lift-up cover). In addition, they must have a protective earth contact and be connected via a residual current switch. The distance from electrical cables to sewer or water pipes must be at least 50 mm. Without scratching the walls and redoing the system Water supply If you need to connect water to the washing machine in the bathroom or kitchen and at the same time avoid the need to break the tiles and redo the system, you can connect the faucet via extension cords: one with a tap and a tap to which the hose is connected, supplying water to the equipment, the second is a simple pipe. To do this, you need to dismantle the mixer, install extension cords, and then install the mixer again. Unfortunately, the water supply made in this way will be noticeable. 1 An extension cord with a branch and a tap for connecting a washing machine (dishwasher) must be installed on the cold water supply pipe. 2. extension pipe (without tap) - to the hot water pipe. 3 The location of the drain hose on the edge of the toilet is dangerous. Hot water, with a temperature of up to 95°C, pouring into the toilet during washing can lead to serious burns to the person using the toilet, as well as cracking of the toilet itself. 4 Siphons of a sink, washbasin or bathtub can be equipped with a fitting for connecting the drain hose of a washing machine. Draining the water The simplest, but most dangerous, is a refrigerator with a glass door. The easiest way to remove dirty water from your washing machine or dishwasher is to place the drain hose directly into the sink, bathtub, sink, or under a closed toilet lid. The end of the hose is hung on the edge of the sanitary fixture using a profiled elbow. This edge must be higher than the water level in the equipment. A bent drain hose falling off the edge of a sanitary appliance during the washing process is the most common cause of flooding in a room. Through a siphon - for example, a washbasin or sink. Draining the water is possible after installing a special siphon with a fitting for connecting a hose from a washing machine or dishwasher. The disadvantage of this solution is the possibility of foam penetrating through the drain grate into the washbasin or sink bowl, as well as the occurrence of unpleasant squelching sounds in the siphon. The advantage is the systematic cleaning of the siphon with a stream of hot water flowing under pressure from a washing machine or dishwasher. If the diameter of the drain channel is small (for example, 32 instead of 50 mm) and the length is large, difficulties may arise with the correct drainage of water from the equipment, and noisy suction of water may occur from the siphons of individual sanitary appliances that have a common sewer connection to the riser.
https://saw-wood.com/articles/slivnoj-shlang-stiralki-bez-rezinovoj-mufty-na/Washer drain hose without a rubber coupling at the end, how to connect
2014-12-24T13:22:04+03:00
adminArticlesdishwasher, drain hose, washing dishwasher, washing dishwasher Contents Connection - washing machine and dishwasher. The drain hose of the washing machine without a rubber coupling at the end, how to connect the washing machine to the sewer pipe. Connecting the washing machine and dishwasher to the water supply system. Connecting the washing machine and dishwasher. Connecting a washing machine and dishwasher. November 23, 2006 Nowadays, a dishwasher and washing machine can be seen in almost ...
SubscriberConstruction Blog
The drain hose is an integral part of the washing machine, the design of which is far from the same in different machine models. Therefore, it is worth considering this subject in more detail.
It is believed that the most common cause of washing machine malfunction is a broken drain hose . The name itself explains its functionality - to remove water from the unit.
[custom_ads_shortcode1]
When to extend the hose
In older houses, the size of bathrooms and kitchens is modest and does not always allow convenient placement of a large washing machine next to communications. In addition, the devices are usually equipped with drain systems of a standard size and their length does not exceed 1.5 m. Therefore, there is often a need to lengthen them.
Before starting this operation, it is important to take into account some technical features of the device. For high-quality pumping of waste water, the drain hose should be located at a height of up to 1 m above the floor level. Otherwise, the power of the drain pump will not be enough to completely remove the soap solution from the tank, and the liquid will stagnate inside.
When connecting the device, the drains are positioned so that they are not in a tense state. In this case, the top point of the hose should be located 60 cm above the bottom. This value may differ for different models and manufacturers. All these features are described in detail in the manual for the device.
Notes
Note that you should not get carried away with lengthening without unnecessary need. If your machine breaks down, and the technician who comes on call sees the extension cord, then you will most likely be denied warranty repairs.
In addition, if you have greatly extended the drain hose for the washing machine, and when draining it makes some strange grunting and simply straining sounds, then you will have to shorten the drain. However, not everything is so bad: sometimes the pump power is not enough due to the fact that the diameter of the nozzle is too small.
In addition, in no case should there be any kinks in the extension section, due to which the load on the sump pump increases sharply.
[custom_ads_shortcode3]
How to extend the drain hose
If, after purchasing a washing machine or moving it to a new location, it turns out that the length of the drain hose to connect the drain to the sewer is not enough, you can solve the problem by extending the hose to the required size. This is exactly the method that car owners most often resort to without the help of specialists.
Having determined the distance to the connection point with the sewerage system by which it is necessary to increase the hose, you need to purchase a segment of the required length and diameter.
The next stage is connecting the two parts together using an extension cord. Reliable connection is ensured by adapter couplings. The ideal option would be if the diameters of the connecting parts of the hose match. In this case, a coupling is used, both ends of which have a diameter of ½ or ¾ inches (19 or 22 mm, respectively). If tubes of different sections need to buy a ½ by ¾ reducing coupling (or 19 by 22 mm, respectively). When installing a connection, you need to take care of its reliability. For this purpose, both ends of the drainage tube are crimped using metal clamps, which must be placed on it in advance, on both sides of the adapter. Having securely fixed the clamps and installed the drain pipe to the required height, you should check the connections for leaks while the unit is operating.
How to replace the water supply hose
Also, if necessary, you can completely replace the water supply hose attached to the washing machine. To do this, you need to purchase a ready-made pipe of the required length. Unlike the situation with a complete replacement of the drain hose, there is no need to disassemble the washing machine, since the lock nut with a rubberized seal or external thread (the mounting option depends on the specific model) for the water inlet is located on the rear of the equipment.
Helpful advice! In order to avoid such unpleasant situations in the future and turn the purchase of new household appliances into a holiday, you need to decide on the location for its future location in advance, making all the necessary calculations and measurements. It is highly advisable to draw up a detailed plan for the placement of other important interior elements - furniture and plumbing equipment.
If the room where your future automatic washing machine will be located (for example, a kitchen, bathroom, pantry) is still under renovation, then the necessary communications (water supply, sewerage) should be laid here in advance. At the same time, all water outlets, in particular the height level of the inlet and outlet, must comply with current building codes and regulations, otherwise blockages will regularly occur in the pipes.
After reading this article, you were able to make sure that there is nothing complicated in extending the drain or supply hose of an automatic washing machine and you can completely cope with this task yourself.
Replacing the drain hose in a washing machine with your own hands
Replacing the washing machine drain hose may be necessary in several cases. Let's say you bought a washing machine and the drain hose turned out to be short, you can lengthen the drain hose, or you can buy a longer drain hose and replace it. Another reason for replacing the drain hose may be that it is worn out or broken. Perhaps you accidentally placed something heavy on it and a hole appeared in the hose. Also, over time, the drain hose itself becomes overgrown with dirt and scale inside, and an unpleasant odor may come from it. In this case, it is also better to replace it. If it is not possible to install the drain hose at the required height or the height is too low for the “siphon effect” to disappear, it is necessary to install an anti-siphon - a check valve for the washing machine.
Changing the drain hose in a washing machine with your own hands is not very easy. If the inlet hose is enough, just unscrew it and put a new one in its place. Then the drain hose is attached to the pump and passes through the body of the washing machine, which entails a small disassembly of the washing machine itself. But don’t worry, everything is not that scary, we will describe step by step the entire sequence of changing the drain hose with accompanying photographs and videos.
Before you begin replacing the drain hose, you must first drain the remaining water from the washing machine. To do this, remove the small cover located at the bottom of the washing machine and unscrew the drain filter. This operation must be done for all models of washing machines.
LG, Samsung, Beko, Indesit, Ariston, Ardo, Whirpool, Candy
The drain hose of these washing machine models is much easier to change than other brands. With machines of these brands, access to the drain hose is very easy; you do not need to remove covers or walls, because the drain can be accessed through the bottom of the machine.
Tilt the washing machine on its side for easy access to the drain pump. It is most convenient to place the washing machine on its side. Next you need to disconnect the end of the hose from the pump; to do this, take pliers and use them to loosen the clamp.
Then pull out the hose. Now the hose remains attached only to the body.
Remember how the hose is attached to the body and only then completely disconnect it.
Now that the old hose is disconnected, you need to install the new one. To do this, first insert the hose in the same way as the old one into the washing machine (But do not attach it to the body). Then connect one end of it to the pump using a clamp. If the pump has been removed, it must be reinstalled. And only after the hose is attached to the pump and it is in place, attach the hose to the body.
Electrolux and Zanussi
To change the drain of these washing machines, we will need a little more effort, because we will no longer have access to the hose through the bottom, and therefore we will have to remove the back wall.
First, let's remove the top cover, to do this, unscrew the two screws that are located on the back and push the cover back, after which it can be easily removed. Now unscrew the bolts holding the back cover. But we won’t be able to remove it right away, because it’s held in place by the filler valve. In order for us to remove the cover to the side, we need to unscrew the bolts securing this valve. For convenience, it is best to remove the inlet hose.
After this, the back wall of the machine can be safely removed. Now disconnect the drain hose from the pump by loosening the clamp (similar to the above washing machine models). Next, we remember how the drain is attached to the walls of the washing machine, or better yet, take photographs. Now we detach it from the walls and put it aside.
Now is the time to get a new drain hose. First of all, we throw it through, as we did earlier, lay the old hose (we do not fasten it) and attach its end to the pump and fix it with a clamp. Next, attach the hose to the body of the washing machine. We install the back cover, the fill valve on it and the top cover in place. We connect the machine to the water supply and sewerage and carry out a test wash. There should be no leaks at the connection points.
Bosch, Siemens, AEG
In these washing machines, replacing the drain hose requires even more effort than in all of the above models. In order to do this, we will need to remove the front wall of the machine, which entails the removal of some elements.
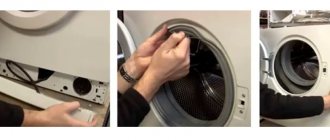
The first step is to remove the powder dispenser. Next, remove the bottom panel and drain the remaining water if you have not already done so. Now we need to disconnect the cuff from the front wall; to do this, remove the clamp that holds it on the cuff using a slotted screwdriver. Remove the cuff from the front wall so that it is not in the way of removing it.
Next, unscrew the bolts that secure the front wall to the body of the washing machine; they are located from top to bottom. After this, the front wall hangs on special hooks, but it cannot be removed because it is connected by wires leading to the loading hatch lock. There are two options: first, simply unscrew the bolts securing the door lock; and second, carefully move the front wall to a distance so that your hand can fit between it and the washing machine body and pull out the wire that fits this lock.
To remove the front wall, you need to lift it up a little and pull it towards you. It will be removed from the place with the hatch. Once you have removed it, set it aside and let's start changing the drain hose.
Here we do everything by analogy with other washing machines. Disconnect the drain from the pump by loosening the clamp. Next, we remember how the hose is routed along the body of the washing machine and disconnect it. We throw a new one on the same principle, but do not fasten it. Now we put the end of the drain hose on the pump and tighten it with a clamp. Next, the hose needs to be secured to the body of the washing machine, similar to the old one.
Before putting the washing machine back together, check the tightness and correct connections. Now we put on the front wall, insert the lock, put on the cuff and screw it into place. In a word, we put the machine back to its original state in reverse order.
Replacing the drain hose on a top-loading machine
In vertical washing machines, changing the drain hose is no more difficult than in horizontal-loading machines. The only difference is that the side wall of such a machine needs to be removed. To do this, unscrew the bolts that hold it, you can find them on the adjacent sides of the washing machine (back and front). After you unscrew the wall, remove it and put it aside. Inside the washing machine you will see a drain pump with a hose connected to it.
Next, before removing the drain hose from the washing machine, remember its location and attachment to the walls of the washing machine. After this, loosen the clamp and disconnect the hose from the drain pump. After this, unfasten the hose from the body and move it to the side. Then, by analogy, lay a new drain hose and connect it to the pump, securing it with a clamp. After this, attach the drain hose to the body of the washing machine.
Next, you need to put the side wall of the machine back on and do a test wash. If you notice a leak from the bottom of the washing machine, then most likely you have not secured the hose properly.
In the video below you can see replacing the drain pump in a washing machine. In our case, you can see how the drain hose is removed.
Features of some washing machine models
Not all SMAs have the ability to easily and quickly remove the drain tube or filler system part. For most models from manufacturers such as Ariston, Ardo, Indesit, LG or Samsung, the drain is located at the bottom of the device. Therefore, you have to tilt the washer strongly or even lay it on its side to get to the desired part. To do this, remove the bottom cover along with the drain filter. Then unscrew the connecting clamp and remove the tube. A new part is installed in the vacant space and the device is assembled in the reverse order.
Zanussi CMA models, like Electrolux products, are assembled in such a way that the drain parts can be accessed after removing the back cover of the device. To do this, first remove the top cover and only then remove the back wall, having first unscrewed the two bolts holding it in place. Then loosen the clamps and replace the required drain part.
Devices from AEG, Siemens or Bosch have an even more complex design. In such washing machines it is very difficult to get to the drain system. Their parts are located under the front panel. To remove it, first remove the detergent drawer. Then loosen the clamp holding the cuff and pull it out. After this, unscrew the bolts holding the front panel in place. Move the part up and towards you and remove it. Only after this can you start replacing the required part.
For a top-loading SMA, unscrew the bolts of the side cover and remove it. After this, loosen the clamps and replace the parts of the drainage system.
Additional Tips
If you had to expand or change parts, do not forget to check whether your machine has enough cord to connect to the mains. If the cord is too short, or, on the contrary, the outlet is far away, then you need to pay attention to this point. It is better not to use extension cords to connect the washing machine to the network. This is fraught with serious damage: such extension filters often cause a fire.
Now you know how to extend the drain and intake hose of a washing machine. And no matter where your washing machine is, you will always find a way to successfully connect it to all communications.
How to extend an inlet hose
If the length of the filler tube is not enough, it is easier not to increase it, but to connect a new part. You can purchase it in the same department as the components of the drainage system. To replace the tube, you do not need to disassemble the device itself. The procedure in this case will be as follows:
- If the automatic machine is already connected to the water supply system, turn it off and disconnect the tubes.
- Unscrew the fasteners without using tools. So, the plastic parts will remain intact.
- Install the new tube and tighten the fasteners also by hand without using tools.
- Open the water supply and check how tight the connections are.
- Run a wash to test the new filler tube.
Important! If you cannot find a filler tube of the required length on sale. Its size can be increased. To do this, you will need a similar water supply hose and an adapter. A 3x4 inch brass nipple is used for this. The tubes are simply screwed onto it from both sides.
After expanding or replacing parts, you need to make sure that the cable is long enough to connect the device to the power supply. It is best not to use extension cords or filters with multiple outlets for your washing machine. Such a connection is unreliable and is quite capable of causing a fire.
Some exceptions
There are situations when the drain hose for a washing machine, even three meters long, does not reach the toilet, sink or shower stall. We have to increase it to the maximum values. What “relaxations” are allowed here?
Experts say that Zanussi washing machines have a pump with enough power to pump dirty water over a distance of up to eight meters without any problems. In general, most of the brands common on our market can handle lengths of up to 4.5 meters without much difficulty. So, connecting the drain hose of the washing machine can be done without any fear.
[custom_ads_shortcode2]
In what cases is extension necessary?
As a rule, a standard washing machine, for example, a Samsung model, is usually equipped with a drain hose, the length of which does not exceed one and a half meters, and in most cases it is quite sufficient for proper installation. But if the bathroom area is larger, or the location of the sewer pipe does not meet the standards, the length must be increased. To solve the problem, specialists usually simply lengthen the tube using some methods.
Extension can be done by purchasing a new hose to replace the previous one and replacing it completely. During this procedure, it is necessary to disconnect the parts of the device; their purpose depends on the specific model of the washing machine. Removing the drain hose can be difficult: if the machine is not a standard type, you have to remove the front panel.
Hose complete with connector
How to prevent clogging of the drain system
The easiest way to fix a problem is to prevent it from happening. Therefore, before loading the laundry, do a detailed inspection of all items. Remove small parts from pockets, you can shake the item out. Fasten all zippers and tie laces.
Some of the reasons for clogging:
- the machine turns off when switching to “spin”;
- does not rinse completely.
- the program crashed;
- Water drainage has decreased in speed.
The appearance of a clog in a washing machine often becomes an unexpected occurrence for users.
The prevention method is to equip it with a filter. It can be attached to the hose before installing the structure. Be sure to take the time once a month to inspect the condition of the drain.
The advantages of rubber hoses are their low cost and wide consumer availability.
Why is an extension cord prohibited?
In modern apartments there are practically no problems with connecting washing machines to the electrical network. Developers carefully consider the layout of bathrooms, providing several waterproof outlets for convenient and safe installation of household appliances. But in “old” houses, communications are not so well established: access to power is standard or even located far away, in the corridor or room. If there is no way to rebuild the room, there is only one option left - throw in an extension cord.
The scheme is simple: go to the nearest hardware store, buy the first extension cord you come across and turn on the washing machine through it. There is only one problem - doing this is strictly prohibited. This item is specified in each factory manual.
Connecting through an extension cord is considered dangerous for several reasons:
- Often an extension cord that is not suitable for power is purchased, or rather, it is too “weak” for the equipment;
- a energized “carrying device” lies on the threshold, next to the washing machine or in the corridor and, if exposed to water or touched, can give an electric shock;
- the cord connected to the socket under the door often frays, gets crushed and bent, the insulation is damaged, the wires are exposed and pose a threat to the life and health of the residents;
- Unknowingly, other devices are connected to the extension cord at the same time, which overstresses the network and results in an emergency power outage;
- Constant use of plugs of different types, especially pins that do not match in size, loosens the extension cord and does not provide a full current supply.
You can't joke with electricity. The human heart “works” from electrical impulses, and even a small surge in voltage from the outside will lead to malfunctions of the cardiovascular system. We must not forget about the fire hazard - damaged insulation and exposed wires can lead to a fire in equipment with further consequences.
Manufacturers of washing machines warn users and provide instructions for connecting the equipment to the electrical network. These include the supply of direct current of a certain power with grounding and protection from moisture. In most cases, the extension cord does not have such characteristics.
Carrying out the procedure
First of all, you should make sure in advance that you have all the necessary parts in stock. This list includes:
- extension hose;
- special connector;
- clamps for fastening;
- screwdriver and other necessary tools.
First you need to put clamps on the ends of both hoses, then insert the end of the one that is connected to the washing machine into the connector on one side. The new hose is secured on the other side, now carefully tighten the clamp with a screwdriver. Fixing is not difficult, you just need to make sure that it does not slip off the connector.
After the process is completed, the machine can be connected to the sewer, and then the operation can be tested during washing. When the machine drains the water, see if the connection area leaks. This problem usually occurs if the ends are poorly secured and water seeps through the holes, but it is quite possible to prevent it at the work stage.
We suggest you familiarize yourself with How to measure a mosquito net for a plastic window
If you don’t want to waste time and lengthen the drain hose by removing the old one, this method will be the most convenient option and is suitable even for those who have never performed such a procedure. Proper organization of water drainage is the key to your peace of mind. This will help avoid water leaks from under the machine and unpleasant odors caused by stagnation or drawing in liquid from the sewer system.
How to do it?
Having talked about some of the nuances of the process, it would be ridiculous not to talk about how all this is done. First of all, you will need an extension hose, the diameter of which must completely match that attached to the machine itself.
The new drain hose for the washing machine is connected to the old one using a special adapter. For reliability, it is tightened with clamps. All this can be purchased at home appliance stores, or you can select pieces of water pipe of a suitable diameter and buy clamps in the garage.
Please note that the extension hose of the washing machine should not rise to a height of more than a meter, as otherwise the load on the pump may be too large.
Features of organizing water drainage from a washing machine
Before you begin to disassemble the issue of connecting the washing machine drain, you need to know that water is pumped out of the machine using a pump, and a short drain hose reduces the load during its operation.
When organizing the drainage of water, a rather important point should be taken into account: the edge of the hose should not reach the water, as this creates an obstruction to the flow of water. If you do not take into account the considered features, then a problem with the operation of the washing machine may occur. For example, the display may display an error and the operation cycle may be interrupted.
Drain connection methods
You can connect the washing machine drain using one of several options:
- Using a special clamp - fixing the hose on the side of the bathroom or on the edge of the sink;
- Install the drainage hose and connect it to the siphon;
- Lay an additional drainage pipe elbow.
Any of the above methods is quite simple and does not require special knowledge and skills in handling plumbing. You can easily organize any method of drainage yourself.
