Regular rye bread recipe
Prepare the necessary ingredients:
- 1 packet of dry instant yeast, preferably SAF-MOMENT.
- 300 g wheat flour.
- 260 g rye flour.
- 1.5 teaspoons salt.
- 1.5 tablespoons of sugar.
- 400 ml milk.
Once everything you need is at hand, we begin preparing the rye bread.
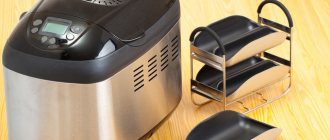
To do this, you will need a spatula, which is designed specifically for kneading dough for rye bread.
- Pour the yeast into the bottom of the mold.
- Pour rye flour behind them. It is important not to swap places with wheat. Rye flour absorbs moisture faster, so it goes first.
- It's time for wheat flour.
- Now add the last bulk ingredients: salt and sugar.
- Pour out the milk.
- We are launching the “Rye Bread” program. She goes at number 7.
- We are waiting for the result and enjoying the fragrant rye bread.
Useful tips or “why bread cracks when baked in a bread machine”
My advice may seem simple, but this is what I personally encountered and how I subsequently managed to cope. In the photo below you can see that the top of the bread is cracked, this sometimes happens to me, although I have been baking for a long time.
The main reason why the crust cracks after baking bread is that our bread sat in the bread maker while it was rising, sometimes I add a tablespoon of sugar for rich bread, and I forget that I need to reduce the time before baking - I may repeat “sugar promotes rapid rise.”
What to do:
- This is your first time baking - check it often, especially after two hours of rising
- if you looked at it, the simplest thing is to increase the baking time and do not close the lid of the bread machine for the first ten minutes, that is, if the main time is 1 hour 10 minutes + 10 minutes for the open lid, a total of 1 hour 20 minutes
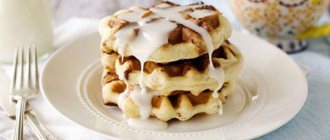
Recipe for Easter cake with raisins
The basic recipes for bread for a bread machine are in the instructions for the product, but not only the bread turns out tasty and aromatic in the miracle oven, but also the baked goods. Recipes with photos literally invite us to get involved in cooking and give free rein to our imagination.
To prepare Easter cake with raisins we will need:
- 4 eggs.
- 1 teaspoon vanillin.
- 120 g butter.
- 4 teaspoons granulated sugar.
- 450 g wheat flour.
- 2.5 tablespoons of fast-acting dry yeast.
- 50 ml lemon juice.
- Complete raisin dispensary.
After preparing the necessary products, we begin to prepare the cake.
- Pour in the dry yeast first.
- Wheat flour is poured on top.
- Add the remaining bulk products: salt, sugar, vanillin.
- Add butter.
- Break 4 eggs.
- Lastly, pour lemon juice into the mold.
- Place the raisins in the dispensary (you can add nuts or candied fruits if desired).
- The cake is baked in the “Diet Bread with Raisins” program, set to “L” size.
- We are waiting for the result.
- When the cake baking process comes to an end, we begin to prepare the glaze. For it you need to beat together egg white, powdered sugar and lemon juice. After the cake has cooled, cover it with the resulting protein mixture and sprinkle with colorful sprinkles.
50 ml of lemon juice is approximately 2 medium fruits. In this case, the juice is first squeezed into a glass and weighed so as not to overdo it. If it is more than 50 ml, the taste of the cake may take on a specific shade.
Recipes according to instructions
The instructions that accompany the Panasonic 2501 bread machine are very simple. Bread recipes are described in a very accessible way. In addition, the rules for using all accessories that come in addition to the stove are clearly stated there.
Before you start baking this or that bread, you should carefully study the page with a description of the ingredients. There are many nuances that are important to consider to achieve the best result.
Fundamental dough recipes for the Panasonic bread machine are also described in the instructions. As a rule, they are enough to prepare main dishes, such as dumplings, dumplings, pizza, croissants, buns, noodles and even brushwood.
Therefore, before looking for answers on forums and on the Internet, it is advisable to study the instructions for the bread maker.
Model Panasonic 2500
The main difference between this model and the previous one is that there is no special spatula for kneading dough for rye bread and there is no dispenser for additional ingredients, for example, raisins, nuts, candied fruits. In this case, you need to add them yourself after a special signal, which is important not to miss.
In addition to baking rye bread, in the automatic program you can use recipes for the Panasonic 2500 bread machine that are offered for the 2501 model.
Baking rye bread
Let's start baking bread. To do this we take:
- The tea leaves that have been prepared.
- Water – 135 ml.
- Vegetable oil - 0.25 tablespoons.
- Salt – 0.5 teaspoons.
- Sugar – 2 tablespoons.
- Molasses (honey or jam) – 1 tablespoon.
- Rye flour - 325 g.
- Wheat flour – 75 g.
- Gluten – 1 tablespoon.
- Dry sourdough – 1.5 tablespoons.
- Dry instant yeast - 1 teaspoon.
- Coriander for sprinkling.
After preparing all the necessary products, we begin preparing rye bread.
- Pour dry yeast into the mold.
- Add dry sourdough and gluten.
- Add rye flour.
- Then add wheat flour.
- Add sugar and salt.
- Stir molasses in water. Pour into the mold.
- Add vegetable oil.
- Pour out the tea leaves last...
- Set the bread machine to the “Yeast Dough” program. During cooking, you can help the stove a little with a plastic spatula to knead the dough. The dough should not be liquid.
- After kneading the dough, you need to level it with a spatula or hands previously soaked in water.
- Sprinkle with coriander.
- Leave for 3 hours.
- After three hours of fermentation, set the “Baking” program, set the time to 1 hour 10 minutes, select the medium crust.
How to bake rye bread in a bread machine, prepare the dough
Dough is the same leaven, only in a larger volume! We will prepare the dough according to the same principle as the sourdough, only we increase the amount of flour and water.
- 50 grams of rye sourdough (water, rye flour)
- 185 grams rye flour
- 185 grams of water
We take a dish of suitable volume (saucepan, cup), put it on an electronic scale - it’s very convenient with one click of a button you can reset the weight of the selected dish to zero, lay out 50 grams of rye sourdough, then add water, stir a little (I use a regular fork, beat a little), then flour and knead again.
Leave the saucepan for 10 - 12 hours at room temperature. It is very convenient to prepare the dough after 9 pm and put it in the bread machine to knead in the morning.
If I need the dough to rise faster, I put it near a radiator and cover it (this is in winter), and in the warm season in the oven with the lighting on, the temperature is about 30 degrees. Cooking time is reduced by two or more - 4.5 hours.
Getting ready to knead dough in a Panasonic bread machine
Pour 1 tbsp. spoon of vegetable oil onto the bottom of the bread maker pan. We spread 375 grams of dough, add 485 grams of whole grain wheat flour to it. We dilute 10 grams of salt in 200 ml of water, thereby it is evenly distributed and will not appear in lumps in one place, pour it into the mold, where there is already dough and flour. Table salt is a necessary ingredient when preparing dough. It reduces the swelling and solubility of flour proteins, making the dough more plastic, which is especially important for rye dough.
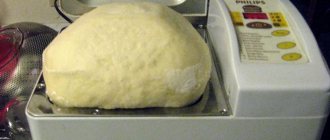
We select the kneading in the Panasonic SD-2501 bread machine, the “Rye No. 17” program is a process of kneading and rising (without baking), at the end of the program, open the lid,
cover the mold with a towel (to retain heat), close and wait. In your case (if the model is different), you can choose to prepare dough for “Pizza”; for clarification, it is better to look at the instructions for the bread maker. The result of kneading the dough is shown in the photographs below.
We leave our bun to stand (lid closed) for 3 hours 30 minutes. The rising time depends on the type of flour (whole grain wheat, premium wheat, a mixture of rye and wheat flour, if you add sugar - for lovers of rich bread) and can last, depending on the room temperature, from 2 to 4 hours. The dough will be ready for baking when it has doubled in volume or more.
Bakery
In our bread machine, the mode is called “Baking”, you can choose the cooking time - I set it to 1 hour 10 minutes.
Then all that remains is to be patient and wait, the smell of bread cooking cannot be described in words! Now it's time to take out our bread, be sure to put it on the wire rack, cover it with a towel on top and wait for it to cool. Bon appetit!!!
Bread recipe with rye bran added
- Vegetable oil one tablespoon
- Dough 375 grams on rye sourdough
- Wheat flour 285 grams
- Rye flour 200 grams
- Rye bran 60 grams
- Water 230 ml
- Salt 10 grams
Bread recipe with premium wheat flour
- Vegetable oil one tablespoon
- Dough 375 grams on rye sourdough
- Premium wheat flour 485 grams
- Water 200 ml.
- Salt 10 grams
Darnitsa bread recipe
To prepare Darnitsa bread, there are various recipes for a Panasonic bread machine. Let's consider one of the most affordable options.
For this we need:
- Water – 350 g (it’s better to heat it a little, but just make sure it’s not hot – this will destroy the yeast).
- Softened margarine - 4 teaspoons.
- Wheat flour – 750 g.
- Rye flour – 250 g.
- Powdered milk – 2 tablespoons.
- Granulated sugar - 2 tablespoons.
- Salt – 2 teaspoons.
- Dry instant yeast - 2.5 teaspoons.
- Pre-sieve the flour.
- Mix sugar, margarine and water.
- Place yeast in the mold.
- Add flour, first rye, then wheat.
- Pour in the dry milk.
- Add salt.
- Pour out the solution prepared from margarine, sugar and water.
- We set it to the “Rye bread” mode.
- We expect the result in three and a half hours.
Cooking cupcake
In addition to bread, bread machines produce excellent baked goods. Recipes with photos can be found on thematic forums, although each model has detailed instructions that provide detailed cooking recommendations.
Using the following recipe, you can prepare an amazing cupcake without much effort. To do this we will need to take the following products:
- Wheat flour – 150 g.
- Eggs – 2 pcs.
- Condensed milk – 1 standard jar.
- Baking soda – 0.5 teaspoon.
After all the ingredients are prepared, we start preparing the cake.
- First of all, beat the eggs.
- Add slaked soda to the eggs (can be quenched with lemon juice).
- Pour in flour and knead into a homogeneous dough.
- Before putting the dough into the bread machine bucket, you can line it with baking paper.
- Set it to the “Baking” program and set the time to 70 minutes.
- When the cake is ready, you need to give it time to cool down and come out of the bucket without any problems if it was not covered with baking paper. This requires approximately 10 minutes.
The recipe for a cupcake in a Panasonic bread machine is very simple and accessible, and the product itself always turns out fragrant and very tasty. The best part is that you don’t have to worry about the product burning. Also, this will never happen when you offer guests a delicious treat for tea, but it is not baked. Here you can be sure that the cake is ready without having to pierce it with a match.
Examples of work - baking example Panasonic SD-ZB2512
Wheat - white bread
It's time to finish discussing the appearance and characteristics, let's get down to business and look at the result of the bread maker.
As an example, let's look at white bread prepared according to program 01 (basic).
All ingredients were added exactly according to recipe 01; to maintain the proportions, kitchen scales were used, which you may also need for more successful and correct results. In addition to scales, it is advisable to have a sieve for sifting flour; this will help make it looser and significantly reduce the chance of getting any defective baked goods. The crust color was set to dark. This setting is initially set to medium crust, but can easily be changed to one of the three available. Some recipes do not allow you to change crust color.
Let's cut the bread and see what it looks like inside.
The crust turned out to be very crispy, that even when cut, it burst, let me remind you that the dark color of the crust was chosen.
The crumb turned out soft, airy, with holes.
I won’t talk much about the taste, since everyone has their own feelings and ideas about the ideal, I will only add that this is truly the most natural product.
It can be stored for quite a long time, sometimes more than a week, if you help it. It does not lose its taste over time, but only dries out and turns into crackers if stored without a bag, for example, in a bread box or wrapped in a towel.
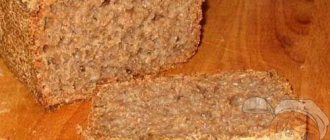
Rye bread – black
Now let's look at rye bread and, if possible, evaluate it.
The crust color was also changed from medium to dark. There are small remains of flour that apparently got from the edges of the mold; it was necessary to shake them off before putting the mold in place. But it’s okay in this case they didn’t stick and easily shook off the bread.
Due to the dark version of the crust, the sides and bottom were slightly burnt. Perhaps it was not worth setting the most powerful mode for this recipe, proportions. If you take everything into account next time, the result will be as it should be. Even with the current flaw, everything turned out very well.
The crust is ruddy, uniform in color, without sharp changes, pits or cracks.
Let's cut it open and see how things are inside.
The crumb came out soft and airy. The overall consistency is slightly denser than that of wheat, white bread. It is also slightly lower than wheat flour, since rye flour reacts worse with yeast.
Dough
The dough kneading program was tested, number 15 (basic).
The dough turned out to be about 1 kilogram. It is a homogeneous, well-mixed mass, perhaps slightly viscous. The taste is balanced and not too salty or sweet. Overall just as top notch as the bread.
Bread maker Panasonic 2502
This improved model differs from the Panasonic 2501 mainly in that it has an additional yeast dispenser. Otherwise, the recipes for the Panasonic 2502 bread machine are similar to the recipes for previous models.
A separate dispenser for yeast is necessary so that it does not come into contact with other ingredients and is added to the dough at the most appropriate moment. This gives great guarantees for a successful outcome in the preparation of yeast products.
Manufacturers also took care of a more convenient control panel. In the new model, the display is larger and located at an angle that is more convenient for using a home mini-bakery.
All basic recipes for the Panasonic 2502 bread machine can be found in the instruction book that comes with the model. It describes how to prepare various types of bread, belyashi, fish pie, pancakes, buns, rum babkas, pizza dough, dough for dumplings, dumplings and many more interesting recipes that will appeal to lovers of home baking.
When you have tried all the recipes offered by the manufacturers, you can seek advice on thematic forums. Practice shows that people who become owners of a mini-bakery cannot stop there and constantly invent new recipes.
Panasonic bread maker SD – 255
Model SD – 255 is made in a white plastic case with a large liquid crystal display. Externally, the bread maker seems very voluminous and heavy, but this is a deceptive impression - the weight of the device is small.
The weight of baked loaves ranges from 600 g to 1.25 kg.
The bread maker has the following advantages:
- The presence of an accelerated bread baking mode allows you to get the finished product in just 2 hours.
- Three options for choosing the color of the crust give the consumer the opportunity to experiment a little.
- The control panel is intuitive and makes it very easy to install all programs.
- The timer time is set in increments of 10 minutes, which is very convenient for accurate recording.
- A capacious dispenser for automatically adding raisins and nuts to baked goods allows you to expand the recipe of finished products.
At the top of the main form there is a handle for removing bread. The instructions supplied with the SD-255 draw attention to the fact that after finishing work this pen is very hot and you must use a thick mitten. After finishing the work process, the bread should not remain inside, otherwise it will sag and become deformed.
When adding ingredients to the main container, the correct sequence must be observed. The main thing is to add the yeast first, then liquid will not get on it. Accurate dosage is also important, so it is advisable to additionally purchase a kitchen scale. During the baking process, the bread maker operates very quietly, but when kneading the dough, the vibrations are quite strong.
Bread maker Panasonic SD – 255