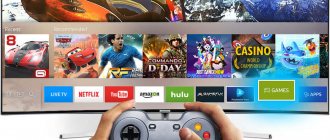
Televisions at one time became a real discovery for people. They made it possible to watch films and programs without visiting cinemas. However, much later, when the Internet became firmly established in a person’s life, their popularity decreased significantly. After all, everything you needed could be viewed on the screen of your laptop, tablet or smartphone. But technology does not stand still, and manufacturers, for example, Dexp or LG, have created TVs with Internet access. It was then that they began to experience their next wave of popularity.
When the Internet came into people's lives, the use of televisions faded into the background
Setting up SMART TV on a Samsung TV via Wi-Fi
The first thing you need to do after purchasing a TV is to install it in a permanent place. After this, you need to choose how you will connect to the Internet. There are the following ways to connect to the network:
- connection using a cable via a router;
- wireless connection via Wi-Fi using the adapter built into the Samsung TV;
- using a Wi-Fi router that connects to the TV via a USB port.
To set up the Internet on a Samsung Smart TV via WiFi, you do not need to perform any additional actions.
Connection via built-in WiFi
If the TV receiver is equipped with a WiFi protocol, the user can set up an Internet connection on it via a WiFi router. The advantage of this method is the absence of cables that spoil the interior of the room.
Advice! A WiFi connection is recommended only in cases where the incoming signal speed is high and stable. Otherwise, online video will work with regular freezes and interruptions.
To connect to WiFi, you need to start the TV receiver and go to the settings section. Next, you need to select “Network”, then “Wireless Connection”. When the TV receiver shows a list of detected networks, you will need to find the home one, click on it and enter the password. After a few seconds the connection will be established. If this does not happen, you should debug the DHCP server.
What you need to know before connecting
Before the connection procedure, it is recommended to consider the following aspects:
- Does the TV have a built-in Wi-Fi adapter? Samsung has models that do not have a built-in adapter, so you have to use a USB port to connect to Wi-Fi. You need to choose an adapter to connect your Samsung TV to the Internet according to your specific model.
- Wi-Fi parameters for device operation: provider tariff plan, signal quality, router functions. If you need to view content that has been pre-loaded onto your computer, it will be enough to use WiFi-D technology. That is, synchronization of the two devices will be enabled, and the content will be duplicated from the computer monitor to the TV screen.
Wi-Fi Connection Steps
The TV automatically connects to the Internet the first time it is turned on to the network after purchase. If the device is not connected to a cable connection, the system will search for available Wi-Fi on its own. You need to reconnect Samsung as follows:
- By clicking on the “Network” button, you go to the parameters, where you need to select the “Network Settings” button. All actions are performed using the remote control by pressing “Settings”.
- The screen will turn dark, indicating that the device is ready for operation. The start button is pressed.
- The TV will offer two options for connecting to the Internet: cable and wireless. A Wi-Fi connection is selected and setup continues.
- The device will search for available Wi-Fi networks for 15 seconds, then the word “SSID” will appear on the screen, which will identify the router found.
- If you have several wireless networks, you need to find yours and connect it to the TV by entering the password in the window that opens. If there is no password, the device will connect to the Internet automatically.
After the TV is connected to Wi-Fi, you need to make additional settings, namely, through the menu, find the “Support” option and press the “Smart Hub” key. This will give you access to ready-to-watch content.
How to connect an old TV without a built-in Wi-Fi adapter to the Internet via a router via Wi-Fi
Not all TVs are equipped with a built-in Wi-Fi adapter. But this does not mean that you cannot connect them to a stationary router. To understand how to make Wi-Fi on a TV if there is none, you need to carefully study several working methods.
Wi-Fi adapter
If the TV does not have a built-in adapter for signal transmission, and the use of wires is not suitable for some reason (a wired connection is not very convenient because it requires laying a wire), you can use external adapters for Wi-Fi. They are not too expensive and are sold everywhere in specialized stores. Many well-known manufacturers produce such devices.
An important requirement when connecting is the ability of your home router to distribute a wireless Internet connection. However, most modern routers have this function.
Important! When talking about whether it is possible to connect a Wi-Fi adapter to a TV without a Smart TV, experts clearly give a negative answer. This is due to the fact that in such models there is no need to connect to the network at all. They don't have apps that let you watch videos or access websites.
MiraScreen adapter
The MiraScreen adapter is often found on store shelves. It allows you to increase the functionality of not only your TV, but also monitors or projectors. However, more often it is used specifically for TV. Adapters of this type allow you to broadcast images to a large screen from mobile devices, as well as media content. These devices support several technologies for transmitting video, images and audio. Modern devices usually have built-in support.
The MiraScreen adapter can solve several problems:
- Add support for necessary functions to TVs that do not have Smart TVs, monitors or projectors. An important requirement is the presence of an HDMI input.
- Display images from iOS devices.
The MiraScreen adapter is widely available and can be found on store shelves very easily.
Android set-top box
The only and easiest way to connect an old TV without a built-in Wi-Fi module to the Internet is to install a set-top box on the Android platform. The software basis of such set-top boxes is no different from that installed on smartphones or tablets. Therefore, it is ideal for devices without Smart and Wi-Fi support. The Android operating system provides the ability to install any application.
A special advantage of the Android set-top box is the ability to connect in 3 convenient ways:
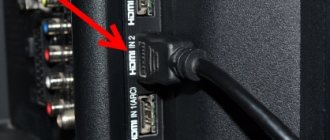
- HDMI cable;
- AV cable;
- HDMI adapter adapter.
The choice of connection method also determines the image quality. When using an HDMI cable, the picture quality will be better than with tulips. They are suitable for older TV models.
Setting up the console is very simple. It must be connected to both the TV and the router. This can be done either using a cable or via a Wi-Fi connection. In the first case, you just need to insert the cable into the desired socket of the router. In the second, you must enter the installed security key. Then you can proceed with the settings (install applications, change the language, etc.).
Important! There are a lot of consoles running on the Android platform on the modern market. In order to choose the most suitable option, you should carefully study reviews of popular models. Some providers also provide set-top boxes with such capabilities along with their services.
MHL cable for phone or tablet
You can also connect a smartphone or tablet to the TV. This may be needed in order to broadcast photos or videos on a large screen, but the output device does not support Wi-Fi or does not have it for some reason. A cable connection is also suitable in cases where the Internet signal is very weak and does not allow you to display a high-quality image on the screen.
In order to connect a tablet or phone to a TV via a cable, you need to use gadgets that are compatible with this. For general setup you need:
- phone or other MHL-enabled device;
- HDMI cable and power;
- MHL adapter;
- TV with an HDMI connector.
Important! The connection process is very simple. And thanks to the charging port, your mobile device will not be discharged while watching.
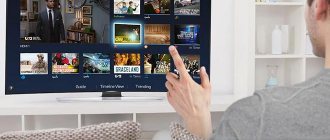
Connecting TV to PC or laptop
Connecting a TV to a personal computer or laptop is also very simple. This method allows you to broadcast everything that happens on your computer monitor onto the TV screen. You can not only watch movies and TV series, but also use the large computer screen as a desktop.
In order to connect in this way, you will also need an HDMI cable and a suitable connector for it on the TV. No additional settings are required on it, only on the computer. You just need to connect 2 devices to each other, select the desired input in the settings and enjoy watching.
Connecting your laptop or PC to your TV is very easy. All you need is an HDMI cable
Checking the connection
If all the settings are made correctly, the TV will start working remotely via Wi-Fi. The device accesses the Internet through a browser built into the TV with the Smart TV function. To make sure that the connection is made correctly, you can test the device.
Testing is carried out as follows:
- The TV is connected to the power supply and all channels are turned on one by one. If as a result there are channels with poor quality picture or sound reproduction, changes are made immediately. Modern devices have built-in programs that allow you to make precise settings.
- The next step is to connect the TV browser to the Internet.
- After this, all installed applications are tested.
If no problems were found during testing, then the settings were made correctly and you can start watching television programs.
What to do if the TV does not connect to the Wi-Fi router
If all the steps have been completed and the password that ensures the security of the connection has been entered correctly, but there is no connection to the network, then you need to repeat all the connection steps and make changes.
The reason may also be a failure of the DHCP server that provides access to the home Internet. In this case, you can reconfigure your Samsung Smart TV for wi-fi using the panel on the router. In this case, the DHCP server is disabled, and all necessary data is entered manually.
Required Internet connection parameters
In order for the connection to the Network to ensure uninterrupted operation of the SMART TV receiver, the user should take into account a number of important parameters: Internet speed (according to the service provider’s tariff plan), the quality of the WiFi signal produced by the router, as well as the speed of the router in the radio channel . The quality of online video content with high image resolution will depend on this data.
So that the video broadcast does not freeze and works stably (without interruptions), a connection speed of at least 20 Mbit/s is required. In this case, 3D movies in high definition will be played back on the TV without interruption. And for a simple HD signal, 2 Mbit/s is enough.
Important! When choosing a provider, you need to take into account proportionality - the higher the Internet speed, the better the quality of the resulting image. However, the latter depends not only on the speed of the connection, but also on the technical capabilities of the TV and the quality of the video from the source.
Connecting to Wi-Fi without DHCP
Manual setup of the Samsung Smart TV WiFi is carried out by entering data corresponding to the router's gateway address, for example, 192.168.1.1. During settings, enter the following:
- IP address.
- Subnet number.
- Gateway address.
- DNS server details.
After such manipulations, a connection to the Internet is established and the TV can quickly connect to its provider’s network.
After this, you should fix problems with the DHCP session; it is necessary for the quality functioning of other gadgets that are in the house and connected to the Internet. To do this, specify the IP address of each device, including the TV in the adapter, by MAC address.
Thanks to such actions, there will be no conflict in the operation of gadgets and all devices will work flawlessly from the same router.
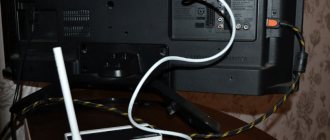
Connection via cable
The first connection option is cable. The TV can be connected either directly to the Ethernet cable entering the apartment or house, or through an additional device, for example, a switch or router.
Important! With a cable connection, the Internet speed is faster than with a wireless connection. In addition, the signal itself is more stable, since it is not affected by obstacles, operating equipment and other interference.
The disadvantage of this solution is the need to stretch the cable. This is especially inconvenient if the wire will pass through several rooms. In addition, there is a possibility of physical damage.
Directly to the SMART TV receiver
To access the Internet via a network cable directly (without the mediation of another device), you need to find a LAN port on the TV receiver and insert the Ethernet plug into it until it clicks. Further actions depend on the type of IP address - dynamic or static.
- If the provider provides services with dynamic IP, then there will be no difficulties setting up the connection. Just go to the “Network” section in the TV receiver settings and select “Wired connection”. All parameters will be assigned automatically.
- If, after connecting the cable, the system notifies that it was not possible to configure access to the Network, this means that the IP address is static. Then you need to open the connection parameters and enter the IP address and DNS yourself. You can find out this information in three ways: the first - from the service provider, the second - in the contract received when connecting to the provider's Network, the third - through a PC or laptop with a configured connection. After these manipulations, access to the Internet will be obtained.
Through the mediation of a switch
If you plan to connect other equipment to the Internet with a cable, it is recommended to use a switch . This is a device for organizing a local network by combining several devices. Other names for the device are switch or commutator. This technique is inexpensive - this is its advantage.
Advice! It is important to use a switch when there is no need for parallel operation of a SMART TV with a laptop or PC. If you need one-time access to the Internet from each device connected to a local network, it is better to use a router.
The connection to the Internet is done like this: a network cable from the provider is connected to the switch, and from it another Ethernet wire is pulled to the TV and inserted into the LAN port. Further steps for setting up the connection are identical to those described in the previous section.
Through a router
Using a router is important when there is a need for several devices to work on the Internet at the same time, and/or if the user wants to further configure a WiFi network for a phone or tablet. For this purpose, there are a number of Ethernet connectors on the back of the router, from which you can run a cable to a TV, PC and/or laptop, thus organizing a wired and wireless connection to the Internet.
You should know that when connecting through a router, you need to debug the DHCP server. This is a protocol that allows all devices connected to the Network to automatically obtain an IP address and other parameters. Otherwise, automatic Internet connection setup on the TV will not be available, and the necessary data will need to be entered manually.
Possible problems and their solutions
In the process of establishing a connection to the Internet, some difficulties and problems may arise, most of which can be easily resolved on your own.
- If the video is unclear and constantly freezes after connecting to the Internet, this indicates a low data transfer speed. With a wireless connection, you can solve the problem by connecting the TV receiver to the Network via a cable. If Internet access is installed via wire, you need to change the tariff to another one (with higher speed) or change the provider. The problem could also be a weak router. Buying a new router will correct this situation.
- If web pages take a long time to load, despite a high connection speed and a powerful router, then there is too much distance and many obstacles between the TV receiver and the router. The solution is to move the router closer to the TV.
- If the TV cannot connect to the Internet, you need to reset the settings to factory settings and reset the device settings. You also need to check the firmware version and update it to the latest one. If after these procedures the connection is not restored, in the same way you need to reset the router parameters to the initial ones or flash it.
- If the connection cannot be established either by automatically configuring the parameters or after manually entering the IP address and other data, you can solve the problem by connecting to the Network via WPS, but only if such a function is available on both the router and the TV. To do this, you need to select this option in the TV menu, and then press this button on the router and hold it for a short time. Depending on the settings in the router’s network interface, you may be required to enter a password that appears on the TV panel screen, or the connection will be established without specifying a code.
- If you cannot connect to the Network automatically, this indicates incorrect DHCP protocol settings. To fix the problem, you need to set the automatic assignment of IP addresses to connected devices in the router settings. After this, all you need to do is plug a network cable into the Ethernet jack on your TV or connect to WiFi to access the Internet without entering any data.
Let's summarize - connecting a SMART TV receiver to the Internet is quite easy if you know how to perform this operation. The connection process is performed the same way on almost all TVs, the only difference will be in the names of the sections and in the interfaces of the operating systems used. If you need a more detailed analysis of these procedures, you can find it in the user manual.
Connection options
There are several ways to connect your TV to Wi-fi:
- Using a wired connection.
- Via Wi-Fi.
- Via laptop.
Let's look at each of them in detail.
Using WI-FI wirelessly
This is the easiest and most convenient way to connect your TV to the Internet: you will need a working router, Smart TV or regular TV and a special WI-fi module, which can be purchased separately in the store.
Instructions:
- We go to the TV settings through the remote control by pressing the Menu button.
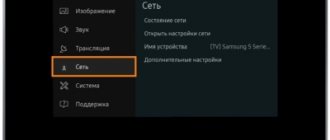
- Select the "Network" section.
- Go to "Network Settings".
- Click on "Wireless Connection Type".
- Select your network from the drop-down list and enter a password if you have one.
- Save your changes and exit Settings.
That's it, now you can use the Internet via Wi-Fi on your TV, watching videos or movies online.
Reference! If your TV does not have a built-in Wi-Fi module, you can purchase it separately. Visually, the device resembles a flash drive and is connected via a USB port.
Wired connection
To implement this method, you will need a TV with an Ethernet port, a router with a Lan port, and a UTP cable. You can purchase a regular Cat 5 patch cord.
After all the wires have been purchased and the router is turned on, we proceed to the setup:
- Insert one end of the patch cord into the Lan port on the router, the other into the corresponding connector on the TV until it clicks. If the connection is successful, the green LED on the cable will light up.
- If you haven't already done so, set up your router to connect to the Internet. To do this, use the instructions provided by the router manufacturer.
- Next you need to configure the TV. Go to menu - Network - Network settings. There we select the connection method: wired connection or via Lan cable, depending on the TV model.
- The automatic setup process will begin. Since the connection is wired, you do not need to enter a password. After the connection is established, close the settings menu and check the Internet for functionality.
This method has several disadvantages:
- firstly, the wires have to be pulled throughout the apartment, and this is not very convenient;
- secondly, not every TV model has an Ethernet connector;
- and thirdly, on some router models, when connecting directly, Internet distribution is suspended.
Using a laptop
You can also use a laptop as a router that distributes Wi-Fi. This option is available in modern devices, although it is inconvenient: it is better to buy an inexpensive router and distribute the Internet to all devices at once. If this is not possible, use a laptop. We'll figure out how to make everything work below.
There are several ways to distribute the Internet from a laptop:
- Via the command line.
- Through third party programs.
- Using the Mobile Hotspot function.
If you want to distribute the Internet from a personal computer, you will need to purchase an external or internal Wi-Fi adapter that connects over the network. Laptops have such an adapter built inside.
Regardless of the type of device, before setting up wireless Internet distribution, do not forget to connect your laptop to the network (via a cable, modem or mobile USB router), and also install the necessary drivers for Wi-fi.
Via command line
This method is suitable for Windows 7, 8 and 10.
- Run the command prompt as administrator (you can find it through the Start menu, in the search).
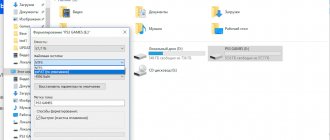
- We execute (enter it and press Enter) the command, where in the ssid= line we write the name of the network, and in the key line - the password for the network. This command will set the name and password for the network: Netsh wlan set hostednetwork mode=allow ssid=My_virtual_WiFi key=1234 keyUsage=persistent.
- To activate the access point, run the command. As a result, you should see “The hosted network has started”: netsh wlan start hostednetwork.
- Last step: share your network. Go to network connections, select the network through which you are connected to the Internet, right-click on it and go to properties. On the access tab, check the box “Allow other network users to use this computer’s Internet connection,” and below select the network whose name you specified in the command above.
- Now turn off the network with the command: netsh wlan stop hostednetwork.
- And turn it back on: netsh wlan start hostednetwork.
As you can see, distributing the Internet from a laptop without a router is possible, and setup will not take much time. However, after each reboot of the laptop, the distribution will have to be configured again .
If devices cannot connect to the created network, or connect to it but there is no Internet access, disable the antivirus and firewall.
Through third party programs
Distributing the Internet through special utilities is somewhat more complicated, it all depends on the program itself. If you decide to use this method, use utilities such as:
- Switch Virtual Router;
- Virtual Router Plus;
- Maryfi.
You need to install network drivers and follow the instructions for each program separately.
Mobile Hotspot feature (Windows 10 only)
This function is built into Windows 10 and is analogous to the above setup via the command line:
- Go to Settings, from there to the Network and Internet section.
- Select the function you are interested in in the menu on the left. Its settings will open on the screen - if desired, change the network name and password, save the changes.
- Switch the switch at the top to the on position, below select the network that you will use on multiple devices.
- That's it, if you have any problems, turn off Windows Defender and Firewall.
Regardless of the chosen method of distributing the Internet through a laptop, connect to the Internet from the TV following the instructions above. In the list of available networks, select the one whose name you specified during the setup process.
other methods
There are several more little-known ways to make your TV accept WIFI. They are not suitable for all models; it is recommended to check the availability of such functions before purchasing. Let's look at different ways to make your TV accept WIFI.
- WPS;
- One Foot Connection;
- Plug and Access;
- Mobile hotspot.
- To connect using WPS , go to the TV settings and find the corresponding function there, while simultaneously holding down the WPS button on the router for 15-20 seconds. The TV connection and setup will happen automatically.
- For One Foot Connection you will need a Samsung TV and the same router. To connect to the network, find this function in the TV settings and turn it on. That's it, you don't need to do anything else.
- To connect using the Plug and Access function , you will need a formatted flash drive. We insert it into the router, if the indicator lights up, then everything is correct. We remove the drive and connect it to the TV. The connection will be configured automatically.
- To distribute the Internet from your phone , use a mobile hotspot.
Go to settings - mobile networks - access point. Turn it on, set the network name and password and save the changes. Now connect from the TV to your network. When distributing the Internet from your phone, monitor the traffic: perhaps its uncontrolled consumption and debiting of funds from the account.
Connection via PC or laptop
You can connect a SMART TV receiver to the Internet via a PC or laptop, using them as an access point. This solution would be appropriate if the user does not have a router or switch, which means it will not be possible to set up WiFi or run a cable to the television panel without disconnecting the computer from the Internet. This method is also optimal if a USB modem from MTS, Beeline or another service provider is used to access the Network from a computer.
To connect to the Network via a PC running Windows 10, click on the network connections icon in the tray and enable “Mobile hotspot” in the menu that opens. Once the button turns blue, the access point is activated. Next, you need to right-click on it and select “Options”. The window that opens will indicate the network name and password to access it. Further steps are the same as when connecting to a WiFi router. For other OS versions, the procedure may differ, depending on the names and location of the partitions.
On a note! You can also connect a TV to a computer to access the Internet via HDMI, but in this case the TV receiver will be used as a large monitor, and work on the Internet will be done through a laptop or PC.
Manually setting up a Smart TV connection
If your TV cannot connect to the Internet automatically, you must enter the network settings manually. You can check them with your service provider or on your computer if it is connected to the Internet. To do this on Windows 10, click on the network connections icon in the tray, select “Active” and click “Properties”. The window that appears needs to be scrolled down, there will be the necessary information - IP address, subnet mask, etc. On other versions of Windows, this data may be accessed slightly differently.
Next, you should start the TV receiver, go to “Settings”, and then to the “Network” tab. Here you need to re-select the wired connection and, if the connection is still not established, turn off “automatic data entry”, and then manually enter the necessary information. On TVs of different brands, this process may differ due to different section names and interface features.
On a note! A detailed description of the process can be found in the operating instructions. Most well-known brands such as Samsung. Sony Bravia, Philips, LG and others, the manual is very detailed and “built into” the TV, so you can find it in the menu of the TV receiver.
How to find out if your TV supports Wi-Fi technology
Not all TVs are equipped with a Wi-Fi module. The technical manual for the product will help you make sure it is available. Find the characteristics section and look for the word Wi-Fi. We also recommend that you find your model on the Internet (for example, in some online store). As a rule, on the product page they write about all the important characteristics in a user-friendly form.
Connection via external WiFi module
If your TV does not have an internal WiFi receiver, you can purchase and use an external WiFi adapter for it. It is recommended to purchase the module and TV from the same manufacturer to ensure compatibility between the devices. If this is not possible, before purchasing you need to carefully study the adapter packaging, which lists all compatible brands and models of TV receivers .
To connect to the Network in this way, you need to insert the adapter into the USB connector of the TV and make sure that the indicator on it lights up. The TV receiver will detect new equipment and install it, after which, in addition to the wired connection, wireless will also be available in the menu. Further actions are similar to those described above for the built-in WiFi protocol.
You need to understand that if the TV does not have a Smart TV, installing an external WiFi module will not expand its capabilities, and you will not be able to access the Internet from it. In this case, it is recommended to additionally purchase a SMART set-top box, Smart stick or other device with the option of Internet access.